
Source: Roblox Creator Hub · CC BY 4.0 · View source · Code samples: MIT Imported 2026-10-03. Formatting adapted for this site.
Export character model
Note
It's important to test your assets multiple times at every point of the asset creation process, whether it is within Blender or after importing into Studio. See Test characters for more information.
Whether you are exporting your character for testing, or are performing a final export out of Blender, you must apply the appropriate export settings to ensure that Blender exports the proper character data.
To export your character:
In the topbar, navigate to File > Export > FBX (.fbx). The Blender file browser window displays.
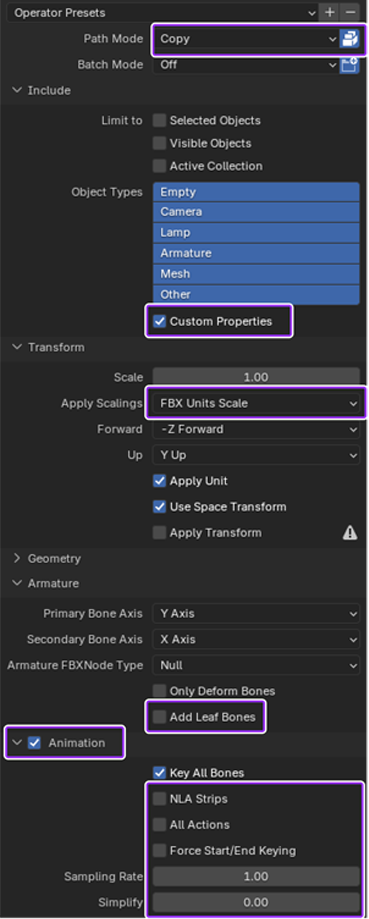
Set Path Mode to Copy and enable the Embed Textures icon.
In the Include section, enable Custom Properties.
Expand the Armature section and disable Add Leaf Bones.
Enable Bake Animation, expand the section, then:
- Disable NLA Strips, All Actions, and Force Start/End Keyframes.
- Set Simplify to 0.0.
Click the Export FBX button and save the
.fbxto the directory of your choice.
Note
After exporting your .fbx file, see Test character bodies for steps on importing your character model into a test place and verifying your avatar and related components.
Note
After importing the Model character to Studio, you can now perform the following with this asset:
- Upload the character to the Marketplace.
- Use the humanoid character on an existing game by applying a HumanoidDescriptionto the
Modelobject. - Save the asset to your Toolbox to share or use within any of your games.