
Source: Roblox Creator Hub · CC BY 4.0 · View source · Code samples: MIT Imported 2026-10-03. Formatting adapted for this site.
Models
Models are containers for physical objects that you can use to organize your workspace and group your assets, such as parts, welds, or joints. While models often contain connected parts known as an assembly, they can also contain any number of individual parts or objects, such as scripts, attachments, or other models.
To demonstrate, avatar characters are a single Model containing the appropriate humanoid parts, joints, and scripts necessary for runtime behavior:
<img src="https://prod.docsiteassets.roblox.com/assets/modeling/model-objects/Model-Example-3D.jpg" width="80%" alt="An example character model of a humanoid monster girl in a dark purple dress." />A model named Octavia
<img src="https://prod.docsiteassets.roblox.com/assets/modeling/model-objects/Model-Example-Hierarchy.png" width="68%" alt="The groupings which comprise the Octavia model in Studio's Explorer window." />The groupings that comprise the model
Create models
Note
You can create models using any open use or restricted asset, but any restricted assets that you don't have explicit permission to use are not visible or audible at runtime unless the game itself has permission to use those assets.
There are two ways to create models:
- Group objects together to automatically form a
Modelobject. - Insert an empty
Modelobject into the Workspace, then manually add child objects to the model.
To create a model using the grouping method:
In the Explorer window or 3D viewport, select every object that you want to group into a model.
Right-click on one of the objects and select Group, or press CtrlG on Windows or ⌘G on Mac. A new
Modelobject displays with all of the objects that make up the model nested underneath.
Note
To completely ungroup a model back to its original objects, right-click it and select Ungroup, or press CtrlU on Windows or ⌘U on Mac.
Set a primary part
If you have a model with parts that are joined together through physical joints like WeldConstraints or Motor6Ds, you should specify a BasePart within the model to become a PrimaryPart. A model's PrimaryPart is the physical reference that specifies which BasePart the pivot point and bounding box should move with when the model changes position or orientation.
To set a primary part:
- In the Explorer window, select a model.
- In the Properties window, select the PrimaryPart property. Your cursor changes.
- Back in the Explorer window, select the part that you want to become your primary part.
Select models
As you hover over models in the viewport, they are outlined to indicate their potential selection. You can select an outlined model by clicking it, or you can select multiple models by holding Shift, Ctrl, or ⌘ as you hover over and click them.
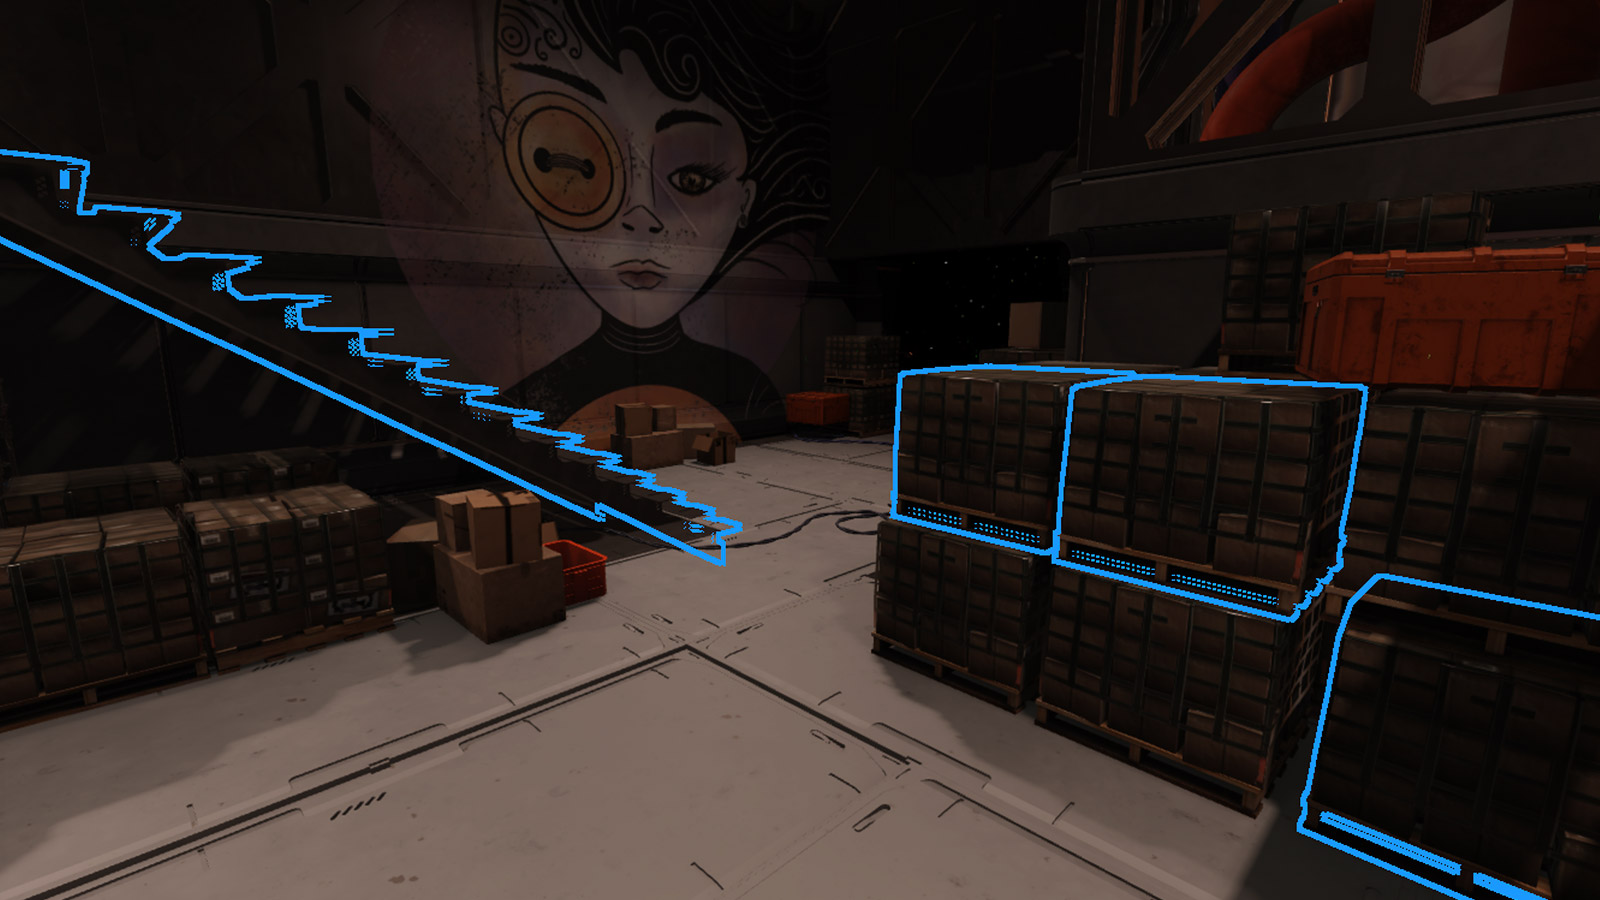
As models typically contain multiple child parts or meshes, some children may be hidden from view. To select a specific child without moving the camera around or locating the child in the Explorer hierarchy, click while holding Alt on Windows or ⌥ on Mac to perform selection cycling.
Selection cycling
Transform models
You can move, scale, or rotate a model using the Studio transform tools. Unless you've set a primary part, a model transforms based on the center of its bounding box.
Additionally, within a Script or LocalScript, you can move or rotate a model through the following methods:
| Method | Description |
|---|---|
| [`MoveTo()`](/docs/model#model-moveto) | Moves the model's [`PrimaryPart`](/docs/model#model-primarypart) to the given position. If a primary part has not been specified, the root part of the model will be used. |
| [`PivotTo()`](/docs/pvinstance#pvinstance-pivotto) | Transforms the model along with all of its descendant [`PVInstances`](/docs/pvinstance) such that the pivot is located at the specified [`CFrame`](/docs/cframe). |
| [`TranslateBy()`](/docs/model#model-translateby) | Shifts a model by the given [`Vector3`](/docs/vector3) offset, preserving the model's orientation. |
Model behaviors
While models act similarly to Folder objects for most purposes in your game, they also exhibit some unique behaviors.
Character models
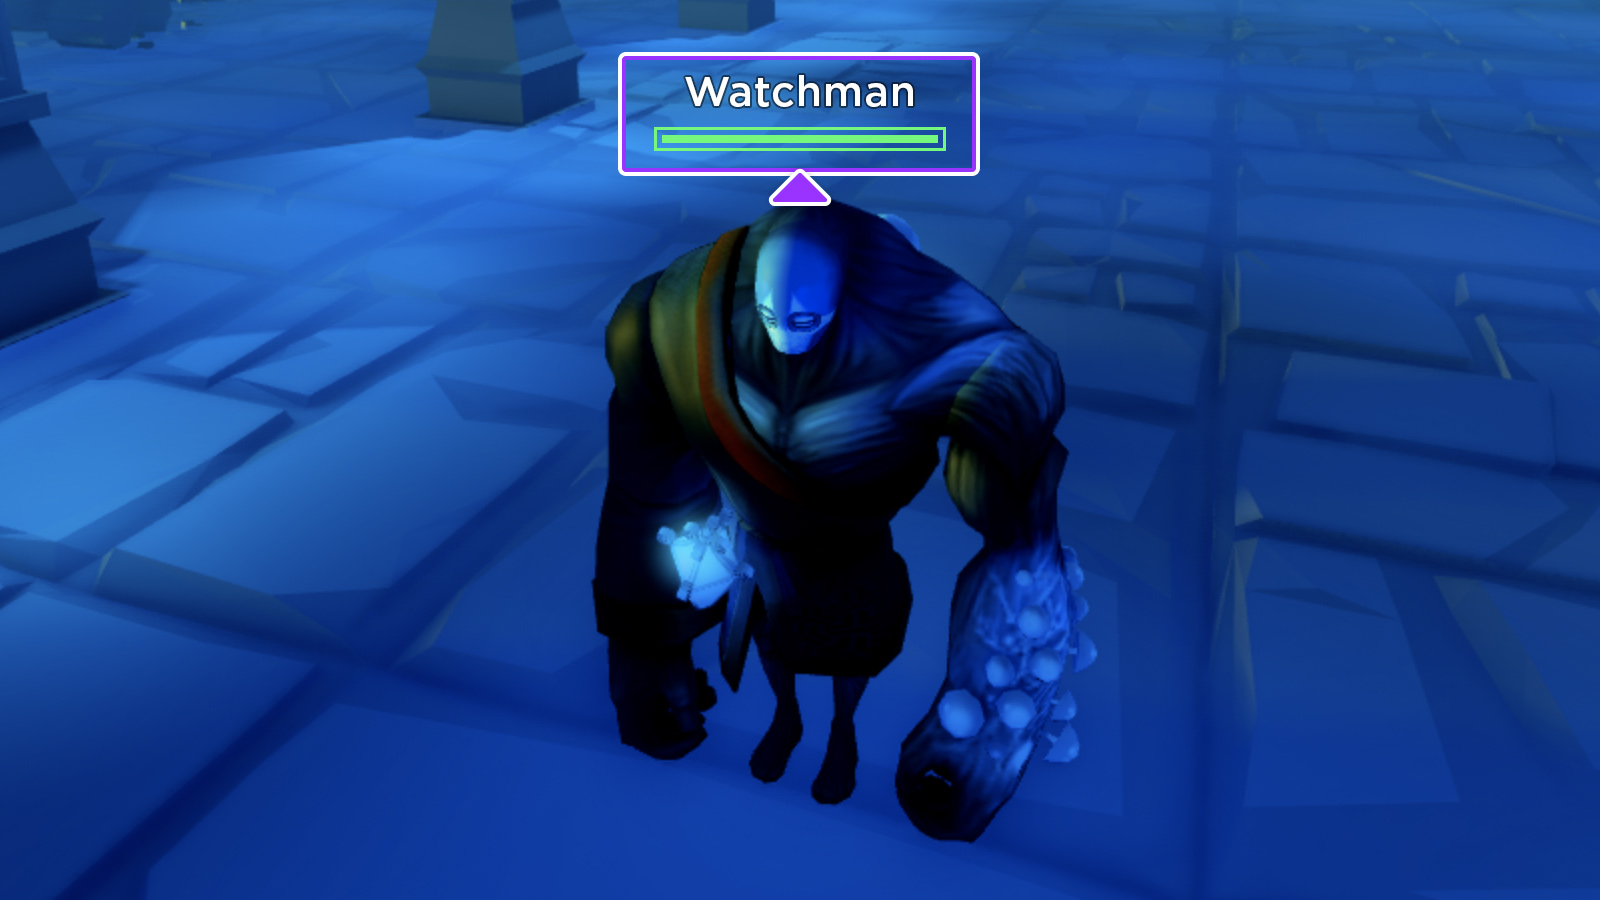
When a Humanoid is present inside a model that contains a Part named Head, Roblox displays a name and/or health bar above that part. For more information, see Character Name/Health Display.
Destroy height
To prevent parts that have fallen off of a game's map from continuing to fall forever, Studio automatically destroys parts that fall below the Workspace.FallenPartsDestroyHeight value. If a part destroyed due to this behavior is the last part in a model, then that model will also be destroyed.
Model streaming
Instance streaming dynamically loads and unloads Models on a player's device as their character explores the 3D world. With streaming enabled, you can specify the way each model should be treated under streaming behavior. For example, a model set to Persistent will never stream out, or a model set to Atomic will stream in and out as a single unit with all of its descendants. For more information, see per-model streaming controls.
Because the 3D content that exists on the client changes dynamically in a streaming-enabled game, models might suddenly disappear, which can be visually jarring for the player. To avoid this situation, you can set specific models to render as optimized "SLIM" meshes or as lower resolution "imposter" meshes when streamed out. See model level of detail.
Upload models
When you upload or import a .gltf, .fbx and .obj model file to the cloud using the Importer, Roblox represents it as a cloud-based asset with a unique corresponding ID. This cloud-based asset system allows you to store models through Roblox and reuse them across the platform in various contexts without maintaining local copies as part of each saved Studio game.
To upload a model you made in Studio:
In the Explorer window, right-click your model. A contextual menu displays.
Select Save to Roblox. The Asset Configuration window displays.
In the Asset Configuration window,
Set Content Type to Development Item.
Set Asset Category to Model.
Complete the following fields:
- Title - The name of your model.
- Description - A short description of your model.
- Creator - Use the dropdown to select if you'd like to publish this asset as an individual or as part of an associated group.
- Genre - The genre of your model.
Click the Save button. After a moment, the Asset Configuration window displays your model's asset ID that you can use in your projects or share with other creators, groups, or games. For more information on granting permission to collaborators and games so that they can use your models, see Asset privacy
Distribute and sell models
You can publicly distribute and sell your own models on the Creator Store for United States Dollars (USD), as long as the models have less than 15,000 dependencies. Each of these dependencies must be an:
- Open use asset or a restricted asset that you created, excluding audio and video.
- Audio or video asset that you acquired from the Creator Store.
This monetization method lets you earn 100% of net proceeds on transactions, bypassing platform fees and DevEx rates. For more information on asset and seller requirements, including how to set up a seller account to set prices and receive payouts, see Creator Store - Distribute and sell assets.
Note
If you want to distribute a model with a child audio asset that you created, you must distribute the audio asset on the Creator Store before making it a child of the model in order for the audio to be audible at runtime.
When creating models for the Creator Store, ensure:
- The model and its dependencies adhere to the Community Rules, Terms of Use, Intellectual Property guidelines, and Creator Store requirements.
- The model is set to a reasonable scale and orientation so that it's usable out of the box when inserted from the Creator Store.
- All of the model's dependencies import into Studio without any warnings.
- Each mesh dependency contains no more than 20,000 triangles.
- Each texture dependency meets Roblox's texture specifications.