
Source: Roblox Creator Hub · CC BY 4.0 · View source · Code samples: MIT Imported 2026-10-03. Formatting adapted for this site.
Accessory Fitting Tool
The Accessory Fitting Tool (AFT) is a built-in Studio tool that allows you to test your custom models on multiple combinations of character bodies, animations, and accessories before generating the final Accessory object. When testing your accessories, you can make minor fit and positional changes to ensure that you get the best result possible.
The AFT automatically handles the conversion of the custom Model or MeshPart based on your menu selections, allowing you to create layered accessories or rigid accessories. After generating an accessory, the AFT creates the correct Accessory object hierarchy with any updated fit edits, sets the appropriate AccessoryType property, and generates any required body attachment points.
<img src="https://prod.docsiteassets.roblox.com/assets/accessories/accessory-fitting-tool/Rigid-Example.png" />Test and edit the orientation and placement of your rigid accessories.
<img src="https://prod.docsiteassets.roblox.com/assets/accessories/accessory-fitting-tool/Layered-Example.png" />Test and edit the cages of your layered accessories.
Note
If you are intending to sell an accessory on the Marketplace, make sure your accessory model design adheres to Marketplace policies.
Set up accessories
The first stage of the fitting workflow allows you to configure the type of accessory to correctly populate the correct fitting tools and generate the appropriate accessory object. When selecting the type of accessory, the following options are available:
- Clothing: Layered accessories that use an inner and outer cage to stretch and wrap around a character body and existing clothing items.
- Accessory: Rigid accessories that attach to a specific attachment point of a character body and remain static in that position and orientation.
Before using the AFT, ensure that you have the MeshPart or Model you intend to create into an accessory selectable in your project. As a reference, you can test the AFT using a reference layered accessory or rigid accessory custom model.
To setup your accessories:
In the toolbar's Avatar tab, click Accessory to open the AFT. The Accessory Fitting Tool panel displays.
In the panel:
- Select the Part field, then in the Explorer window, select your accessory's respective
MeshPartorModelobject. The text field populates with the name of the object. - Back in the panel, click the Next button. The Asset Type page displays.

- Select the Part field, then in the Explorer window, select your accessory's respective
In the Asset Type page:
Select the correct asset type for your accessory:
- If your asset is a layered accessory, select Clothing.
- If your asset is a rigid accessory, select Accessory.
Use the dropdown menu to choose the
AssetTypeof your accessory.Set body type to the body scale you determined while sculpting and sizing of the asset during the creation process.
- Classic: Sets the scaling of the accessory to classic proportions.
- Proportions Slender: Sets the
AvatarPartScaleTypevalue toProportionsSlender. - Proportions Normal: Sets the
AvatarPartScaleTypevalue toProportionsNormal.
Note
This setting does not affect layered accessories, and it only affects rigid accessories if the specific body part has a different `AvatarPartScaleType` [`StringValue`](/docs/stringvalue) object. For more information, see [Rigid Accessories - AvatarPartScaleType](/docs/roblox-avatar-rigid-accessories-specifications#avatarpartscaletype).- Click the Next button. A preview panel displays with a default character wearing your accessory.


Test accessories
After you provide the initial accessory details, the AFT displays a preview panel. With the preview panel, you can test how your accessory looks on different combinations of character bodies, rigid accessories, layered accessories, animations, and custom assets in your game. If you notice any fitting issues with your accessory, you can use the edit tools to make minor adjustments to your accessory.
Note
At any point of the testing process, you can initiate a playtest to launch an instance of your game where your avatar is replaced with the currently selected character body and accessories from the AFT.
With different bodies
You can select different character bodies to test the fit and wear of your accessories. The AFT supplies several default character body models you can use to ensure your accessories fit as expected.
<img src="https://prod.docsiteassets.roblox.com/assets/accessories/accessory-fitting-tool/Body-Example-1.png" />Bazooka Bones character preview
<img src="https://prod.docsiteassets.roblox.com/assets/accessories/accessory-fitting-tool/Body-Example-2.png" />Magma Fiend character preview
To test your accessory with a different character body:
- In the tool's catalog, navigate to Avatars > Default.
- Click one of the character model tiles. The preview loads with the selected character model.
- If two character tiles are selected, click a selected tile to deselect it.
- In the character preview, click and drag to rotate and right-click to pan to inspect your character.
With other layered accessories
You can select multiple layered accessories to test the fit and layering of your caged accessories. The AFT supplies several default character models you can use to ensure your accessories fit as expected.

To test your accessory with a different layered accessory:
- In the tool's catalog, navigate to Clothing > Default.
- Click one or more of the available catalog items. The character preview loads with the selected clothing accessory.
- In the catalog, click an active tile to deselect the asset.
- In the character preview, drag and drop the accessory boxes to change the layer order.
- In the character preview, click and drag to rotate and right-click to pan to inspect your character.
With animations
You can select different animations to test the movement of your accessories. The AFT supplies several default animation assets you can use to ensure your accessories fit as expected when a model is performing various movements.
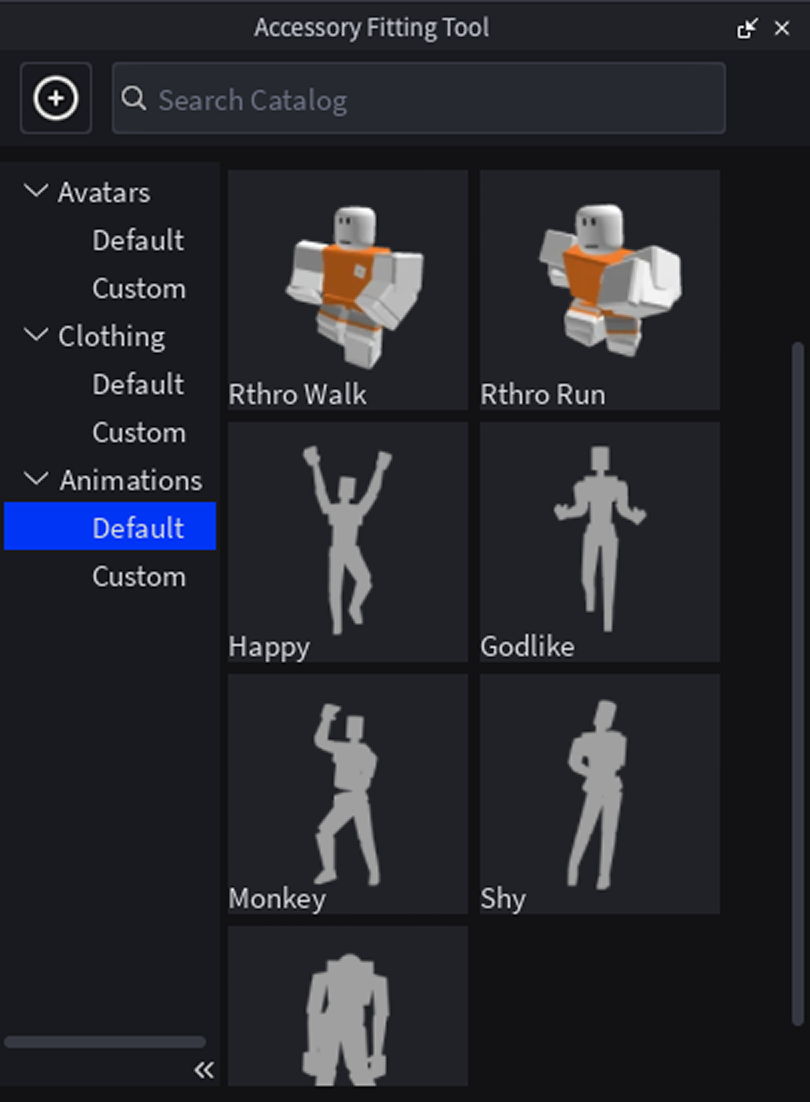
To test your accessory with different animations:
- In the tool's catalog, navigate to Animations > Default.
- Click one of the animation asset tiles.
- In the catalog, press the play and pause icon to control the playback.
- In the character preview, click and drag to rotate and right-click to pan to inspect your character.
With custom assets
You can add custom character body models, layered accessories, and animations that are part of your workspace to the AFT preview catalog. Use this functionality to verify that your accessory works with any other custom models or accessories they may interact with in your game.
To add custom assets:
Click the ⊕ icon next to the catalog search. A prompt appears, allowing you to choose a supported object.

Select any
Accessory,Model,MeshPart,AnimationorFolderwithin the 3D viewport or Explorer window. The asset displays in the corresponding Custom category.
Edit accessory fit
The AFT populates different fitting tools depending on the type of accessory you're creating.
Layered accessories
When editing layered accessories, the following tools populate in the viewport:
| Icon | Description |
|---|---|
 | Toggles the [Cage Editing](#cage-editing) interface in the viewport for making minor inner or outer cage changes to your clothing. |
 | Toggles [auto-skinning](/docs/roblox-avatar-automatic-skinning-transfer#enable-automatic-skinning-transfer) between `EnabledPreserved` and `EnabledOverride`. Depending on the asset and skinning quality, auto-skinning may provide better results.
|
 | Displays a button to **Bring Mannequin in View** which centers mannequin in front of the camera. |
 | Centers the camera on the mannequin. |
Cage editing
When the Cage Editing interface is enabled, additional tools display in the viewport along with the vertices of the selected cage over the mannequin. This allows you to make positional edits to the cage and change how a layered accessory fits on a character body.
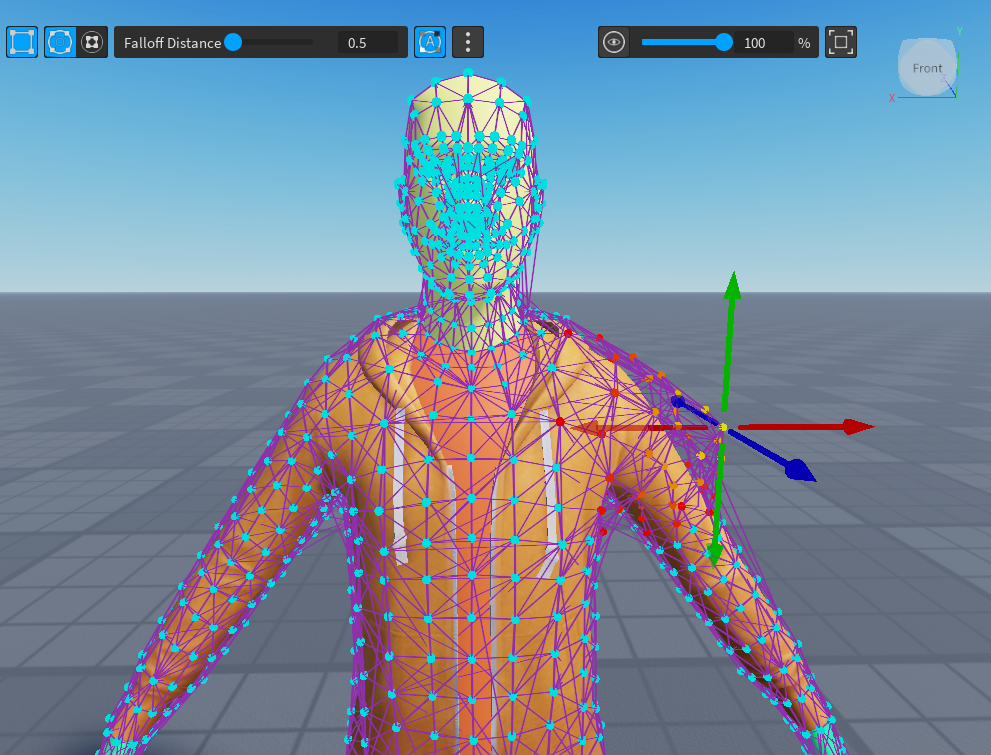
Note
You can use these cage editing tools for minor to moderate cage edits, but if your asset requires major fit or sculpting changes, it's recommended to edit the cage meshes directly in a third-party modeling software, then reimport the updated model into Studio.
Use the following cage editing tools to help visualize and edit any cage vertices:
| Icon | Description |
|---|---|
| Toggles the selection for the inner and outer cage vertices. When selected, the vertices of that specific cage are available to edit. |
| Sets the radius of influence when editing vertices of the cage mesh. When editing a cage vertex, nearby vertices follow the changes for efficient cage editing. A higher Falloff Distance applies influence to vertices further away from the origin. |
| Displays additional buttons:
|
| Sets the opacity of the mesh or the cage vertices, allowing you to better see and access certain vertices and angles of your layered accessory. |
To make changes to the vertices of the currently selected cage:
- In the toolbar, disable Move snapping. This enables you to make detailed changes to a vertex's position.
- Select a vertex and use the Move tool to reposition. Changes to the cage apply immediately and display in the preview panel.
- Use the opacity sliders to better visualize the changes to your cage.
- Set the Falloff Distance depending on the number of vertices being adjusted at once.

Rigid accessories
When fitting rigid accessories, a bounding box appears around the mannequin indicating the possible placement of that specific type of accessory. You can position, rotate, and scale objects within this bounding box to ensure your accessory fits on different character models.
<img src="https://prod.docsiteassets.roblox.com/assets/accessories/accessory-fitting-tool/Bounding-Box-Example-1.png" />Adjust your rigid accessory fit within the bounding box.
<img src="https://prod.docsiteassets.roblox.com/assets/accessories/accessory-fitting-tool/Bounding-Box-Example-2.png" />If the accessory is outside the appropriate space, the bounding box turns red.
Create accessory
AFT applies any fit changes and generates the appropriate Accessory instance in the workspace depending on the type of accessory selected and any configurations applied.
When you are ready to generate your accessory, select Generate MeshPart Accessory.
<img src="https://prod.docsiteassets.roblox.com/assets/accessories/accessory-fitting-tool/LC-Hierarchy.png" />Hierarchy generated for layered accessories.
<img src="https://prod.docsiteassets.roblox.com/assets/accessories/accessory-fitting-tool/Rigid-Hierarchy.png" />Hierarchy generated for rigid accessories.
With an accessory successfully created, you can now try the following:
- Begin the process of uploading and publishing the accessory to the Marketplace.
- Use the accessory in your current game by equipping it to character models with HumanoidDescription, or by dragging and dropping the accessory under the appropriate character
Modelobject. - Save the accessory to your Toolbox or make it public on the Creator Store to use within any of your games or share with other creators.