
Source: Roblox Creator Hub · CC BY 4.0 · View source · Code samples: MIT Imported 2026-10-03. Formatting adapted for this site.
Character bodies
Character bodies for avatars are models with technical components that work together to create a character that can interact with objects in the 3D space and wear cosmetics, clothing, and accessories. There are four main layers of the avatar body that structure how the character looks and moves on the platform:
- Body parts & textures that make up the character's visual appearance.
- Rigging armature that determines how the character moves.
- Facial animation data in the character's head that expresses the character's personality and emotions.
- Cage meshes & attachments that determine how the character attaches accessories and wears clothing.
While you can create each of these layers manually in third-party modeling tools like Blender or Maya, some have strict configuration requirements to meet Roblox's technical character specifications that guarantee your avatar behaves consistently from game to game. Before you create your first custom character body, it's recommended to:
- Understand the essential components of an avatar's character body and how they work together on the platform.
- Review all resources that Roblox provides to standardize and expedite the creation process, such as Blender and Maya project files, Studio tooling, and step-by-step guides.
- Follow the basic character creation tutorial that uses Roblox templates in collaboration with common Blender modeling and texturing tools.
Once you have a custom character body model, you can import it into Studio and use the Avatar Setup tool to process your creation into an avatar asset that's ready to be sold on the Marketplace.
Character body components
All character bodies for avatars are made up of several fundamental components that provide users the functionality and flexibility to interact with their world. Many of these components are never made visible to the user, but they enable powerful avatar features that enhance social and environmental interactions. When creating avatar characters, all of these components are typically created first in your modeling software and then converted to their appropriate Roblox Studio instance on import.
Each avatar character is made up of the following rendered and non-rendered components:
Rendered
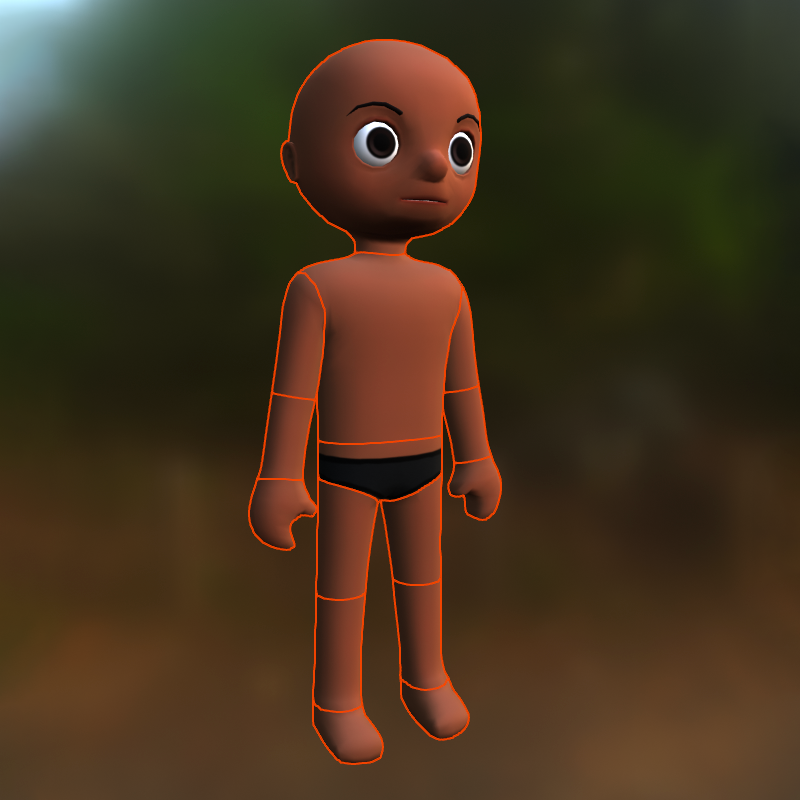 15 separate body part meshes make up the shape and contours of the character.
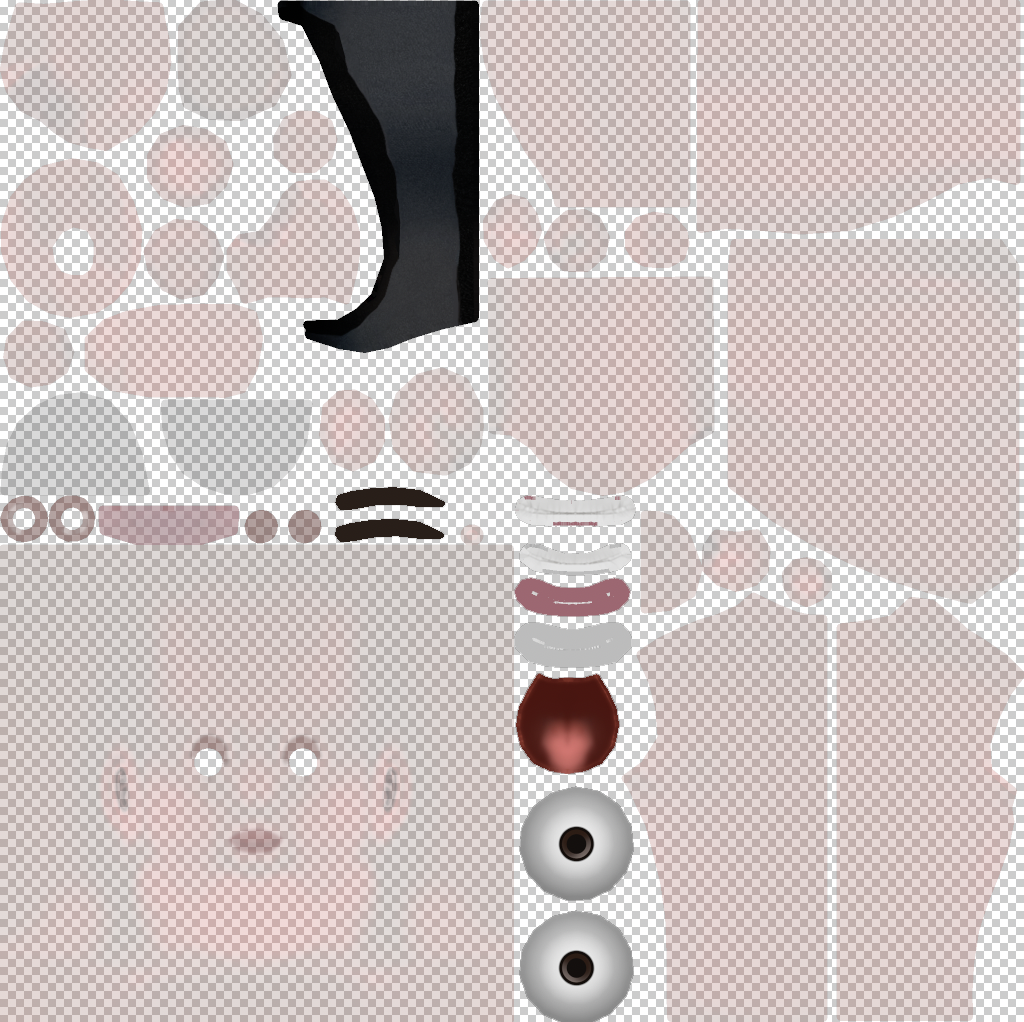 Texture image maps apply a surface color and appearance to the character's skin.
Non-Rendered
 A rigging armature allows the body parts to properly connect with each other, driving movement, expressions, and animations.
 Facial animation data allows avatars to express virtually all types of facial expressions for chatting and socializing.
 Cage meshes define the surface where layered accessories can wrap and stretch over.
 Attachment points define where rigid accessories attach to a character.
Body parts
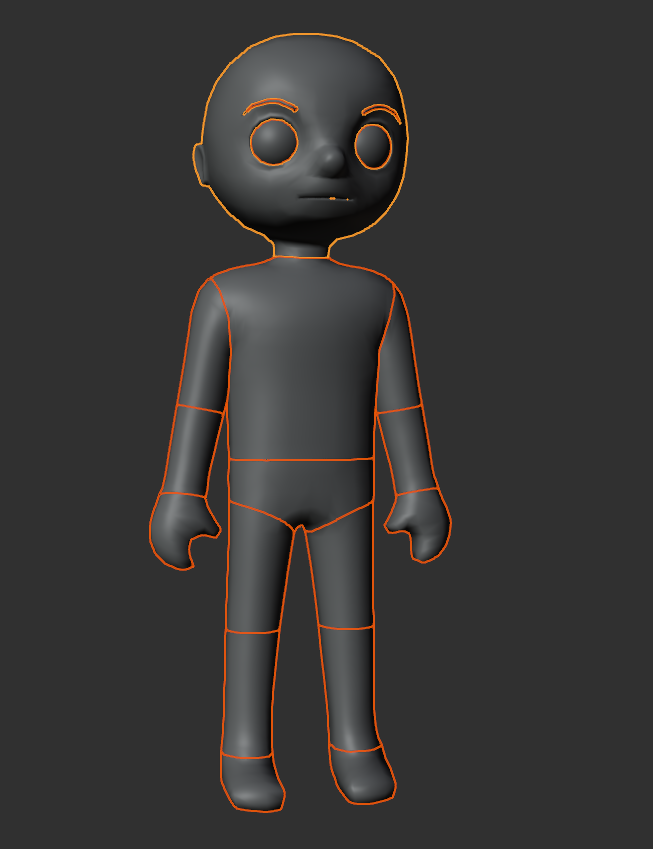 Each avatar character is made up of 15 separate mesh objects
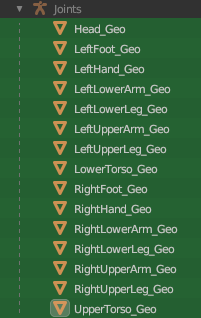 These meshes must follow a standard naming convention
An avatar's physical body geometry is made up of 15 separate mesh body parts that define the shape and contours of the character:
- Head
- Upper and lower torso
- Left upper arm, lower arm, and hand
- Right upper arm, lower arm, and hand
- Left upper leg, lower leg, and foot
- Right upper leg, lower leg, and foot
In Studio, these geometries are represented as MeshPart objects and are nested under a single Model.
Textures
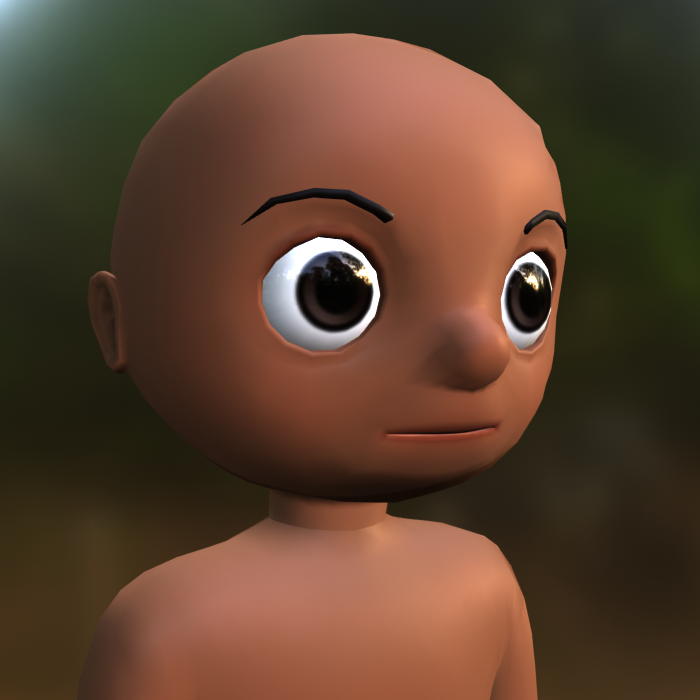 Textures apply color and surface details to your character model.
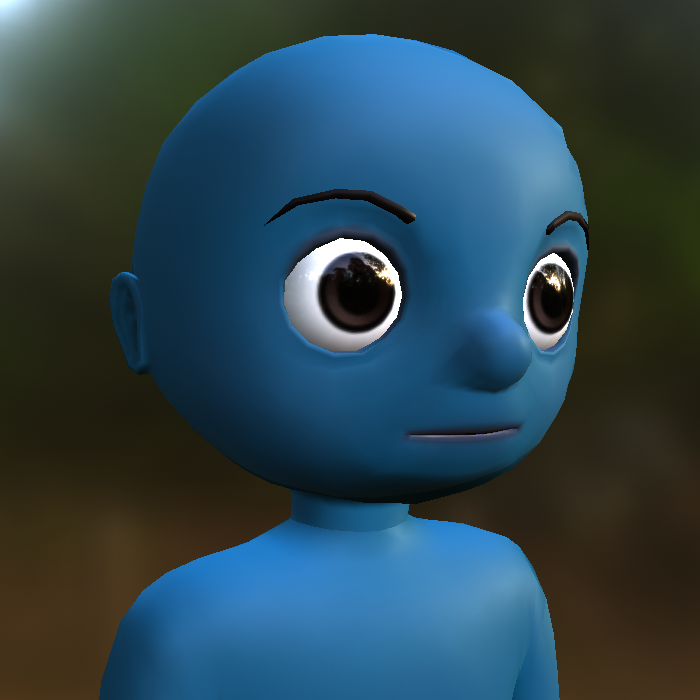 A texture image map's opacity can combine with the [`MeshPart.Color`](/docs/meshpart) to apply custom skin tones to characters.
Textures are image files that define the surface appearance of your character. You can create textures using a texture painting program or 3D modeling software. In Studio, you must import textures as image files and set them to MeshPart objects by a child SurfaceAppearance object or the mesh's TextureID property.
Note
When texturing parts of your character model's body, ensure that your character model includes a modesty layer over sensitive regions. See Community Standards for more information on Roblox's policies.
Rigging armature
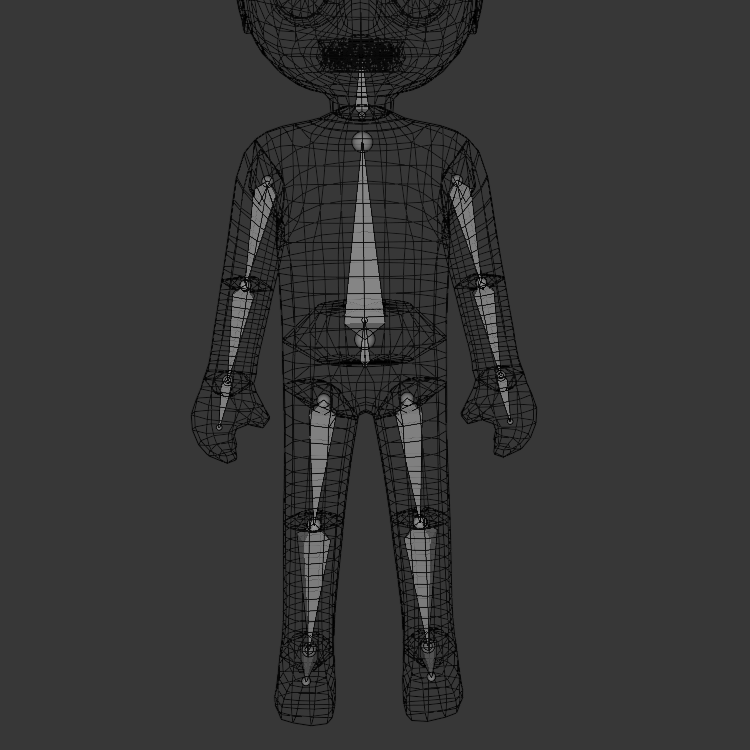 The rigging armature includes at least 16 bones, 1 for each body part and a root bone. Higher-fidelity rigs can include up to 37 additional bones.
 Bones must follow a specific hierarchy and naming convention
Inside of the avatar's physical body is a non-rendered rigging armature that allows the character to articulate its limbs. Often referred to as joints or bones, a rigging armature includes skinning data that allows connections between limbs to bend organically, such as the character's knees and elbows.
Standard avatar rigs (R15) require 15 poseable joints to articulate the character's 15 body parts. However, if you want to create higher-fidelity characters with a greater level of realism, there are up to 37 additional optional joints for advanced R15 rigs that you can create for articulated hands, shoulders, and spine movements.
In Studio, each joint of the rigging armature is represented by Bone objects that connect the character's body part MeshPart objects together. Bone objects must follow a specific hierarchy and naming convention for the avatar to function properly in Studio and on the Marketplace. For more information, see Rigging.
Face animation data
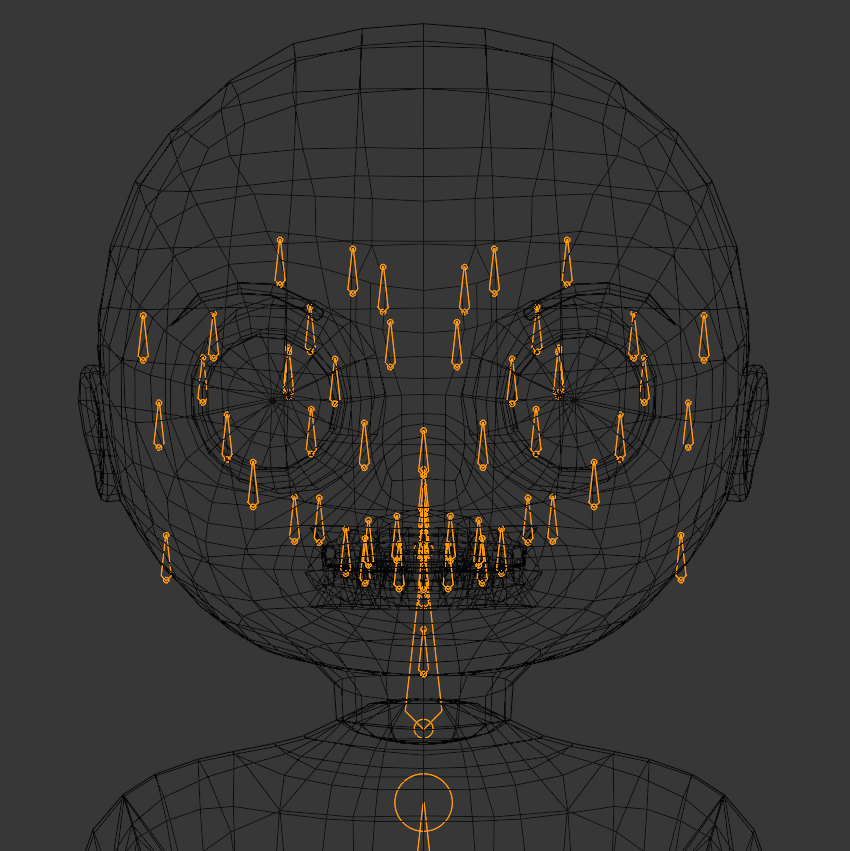 Each avatar character face is rigged and skinned to create various expressions
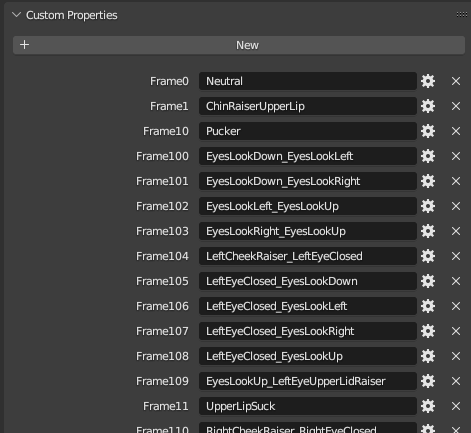 Each pose is mapped to a pose name within the Custom Properties (Extra Attributes in Maya) of the Head_Geo object
 Each required face pose is saved as a keyframe in the animation timeline.
Facial animation data from either the character's rigging armature or facial joints allow avatars to express emotions with their eyes, mouth, and teeth. Each character includes facial joints, skinning data, animation timeline data, and mapped pose data that allows these expressions. In Studio, these facial animation elements are represented by a FaceControls instance.
Cage meshes
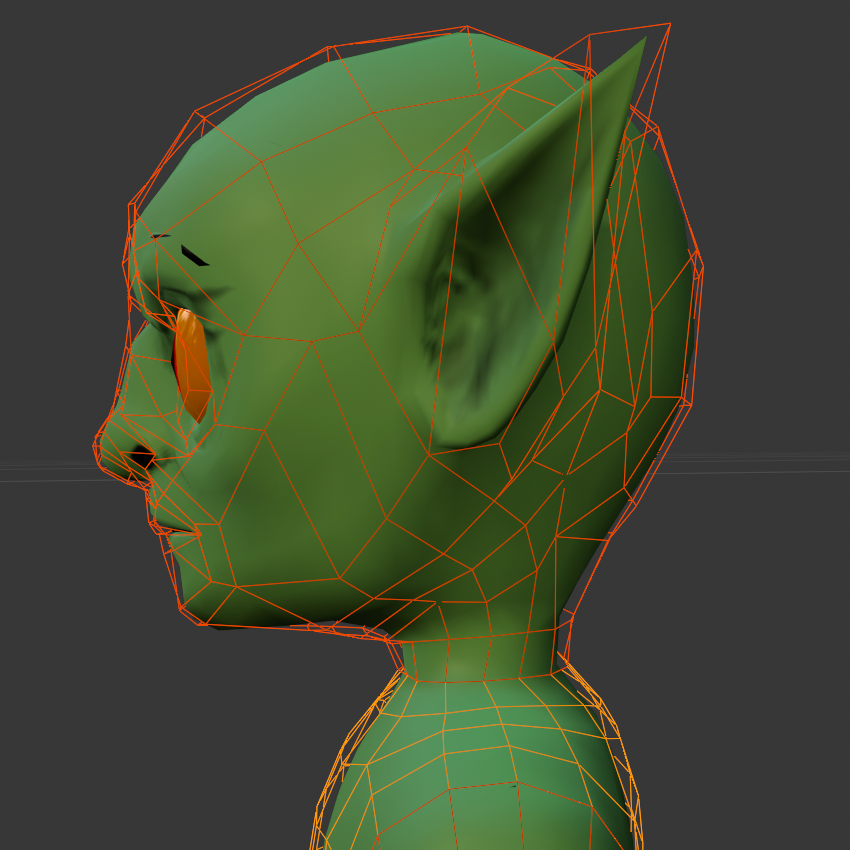 Head and Upper Torso cage mesh objects (wireframe)
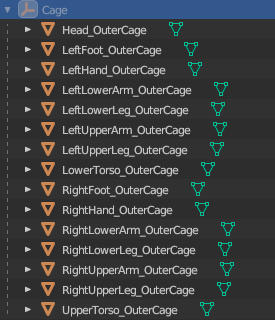 Cage objects must exist for each of the 15 body parts
Cage meshes set the invisible outer boundary for layered accessories to stretch and fit over body parts, allowing clothes to fit over models of different shapes and sizes without you having to remodel the clothing item each time. In Studio, outer cage mesh objects are represented by a WrapTarget instance.
If you are caging your own non-template character model, it's important to use one of Roblox's body cage project files to ensure you are using a Roblox standard cage mesh. Removing or adding vertices from this standard mesh can cause issues with clothing fit and import.
Attachments
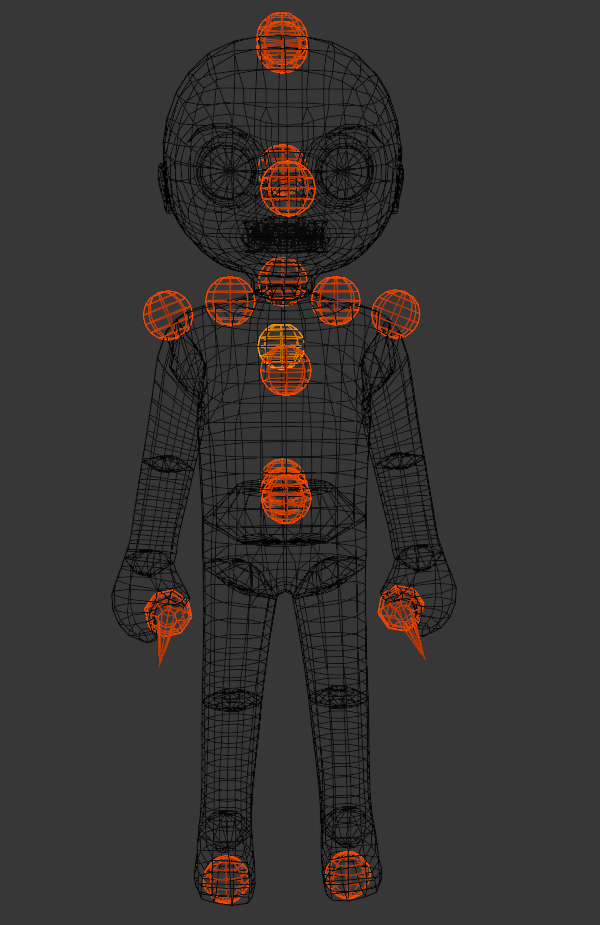 Each character has common attachment points for equipping rigid cosmetics
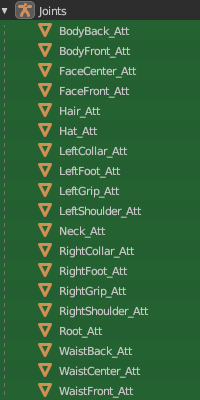 Each avatar character must include their associated 19 attachment points
Attachment points set the specific points where rigid accessories and in-game equippable objects attach to the character's body. These are not rendered on the platform, but they are represented visually as spheres in 3D modeling software when you use Roblox's R15 Rig and Attachments project file.
When you import a rig with these visual representations, the spheres are created as Attachment objects using standardized names.
Note
When users wear a layered accessory, the layered accessory isn't attached directly to the attachment, but it does reference the associated attachment point during ragdoll and dismemberment animations.
Creation process
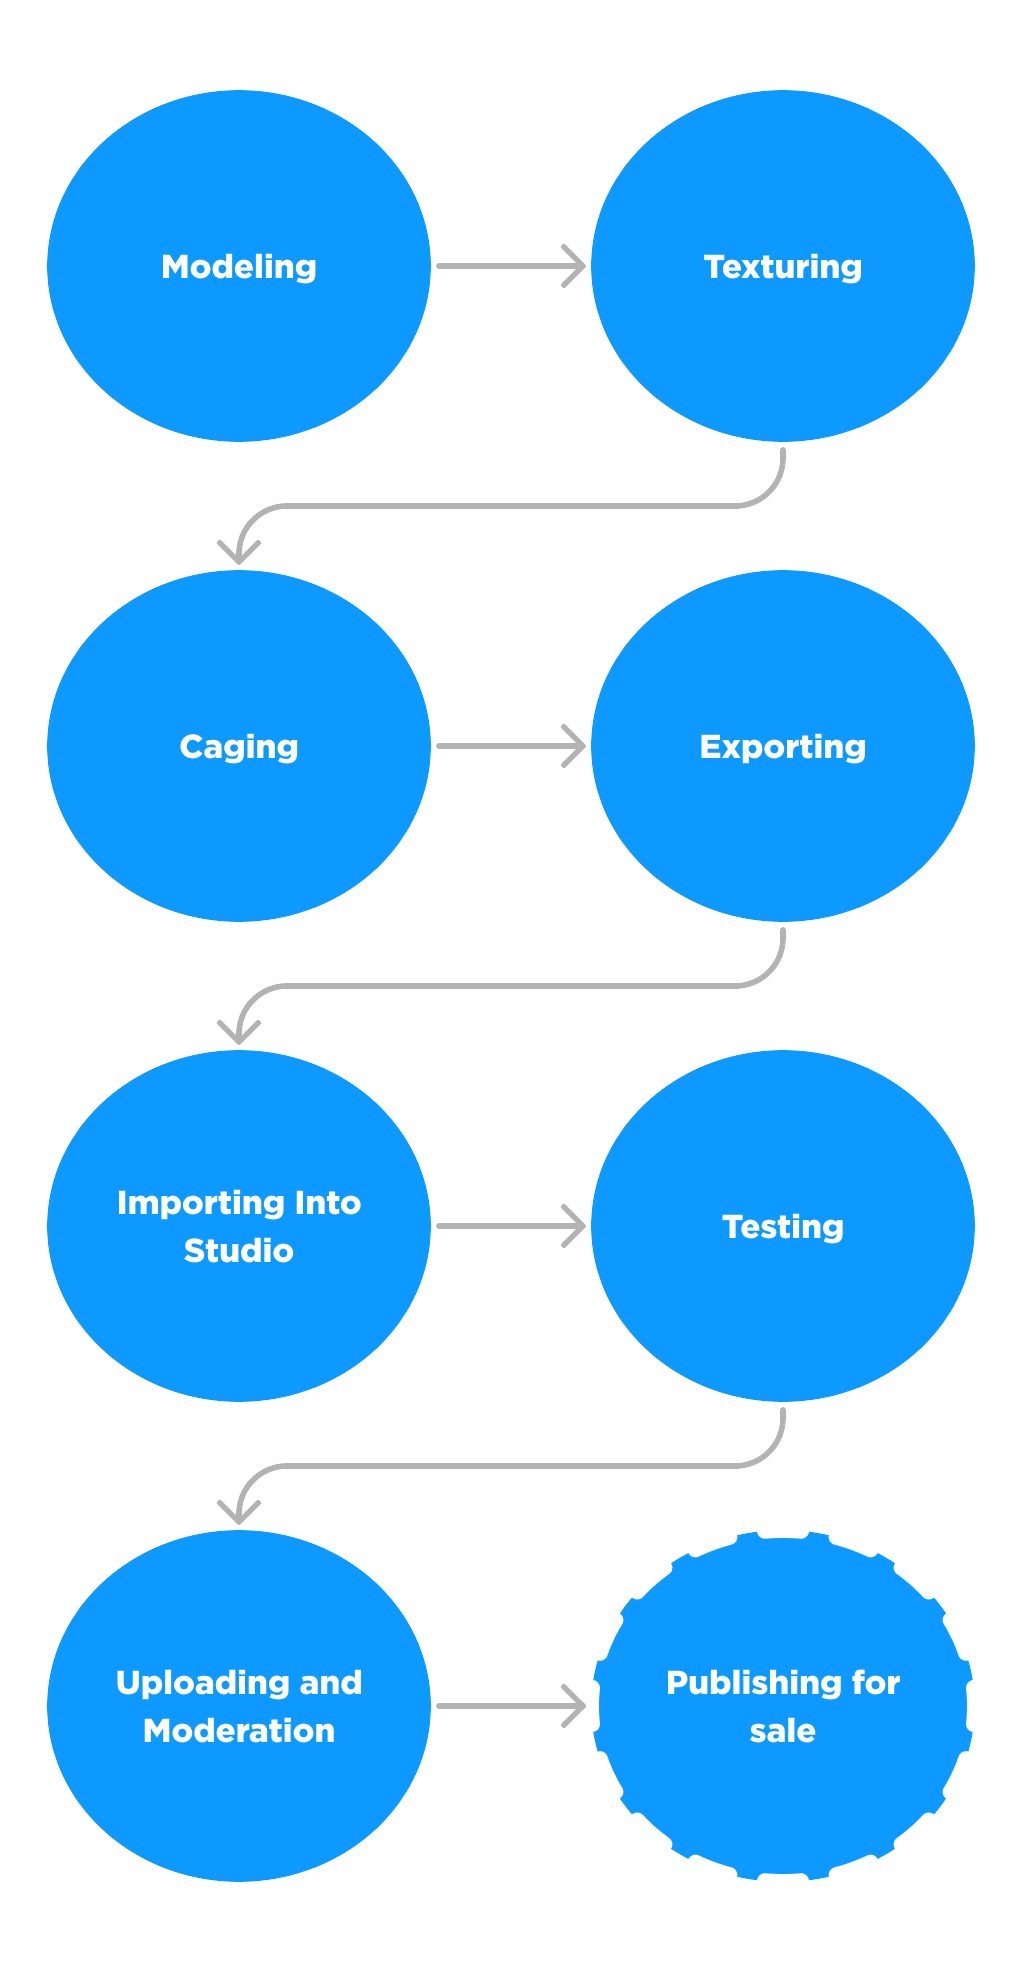
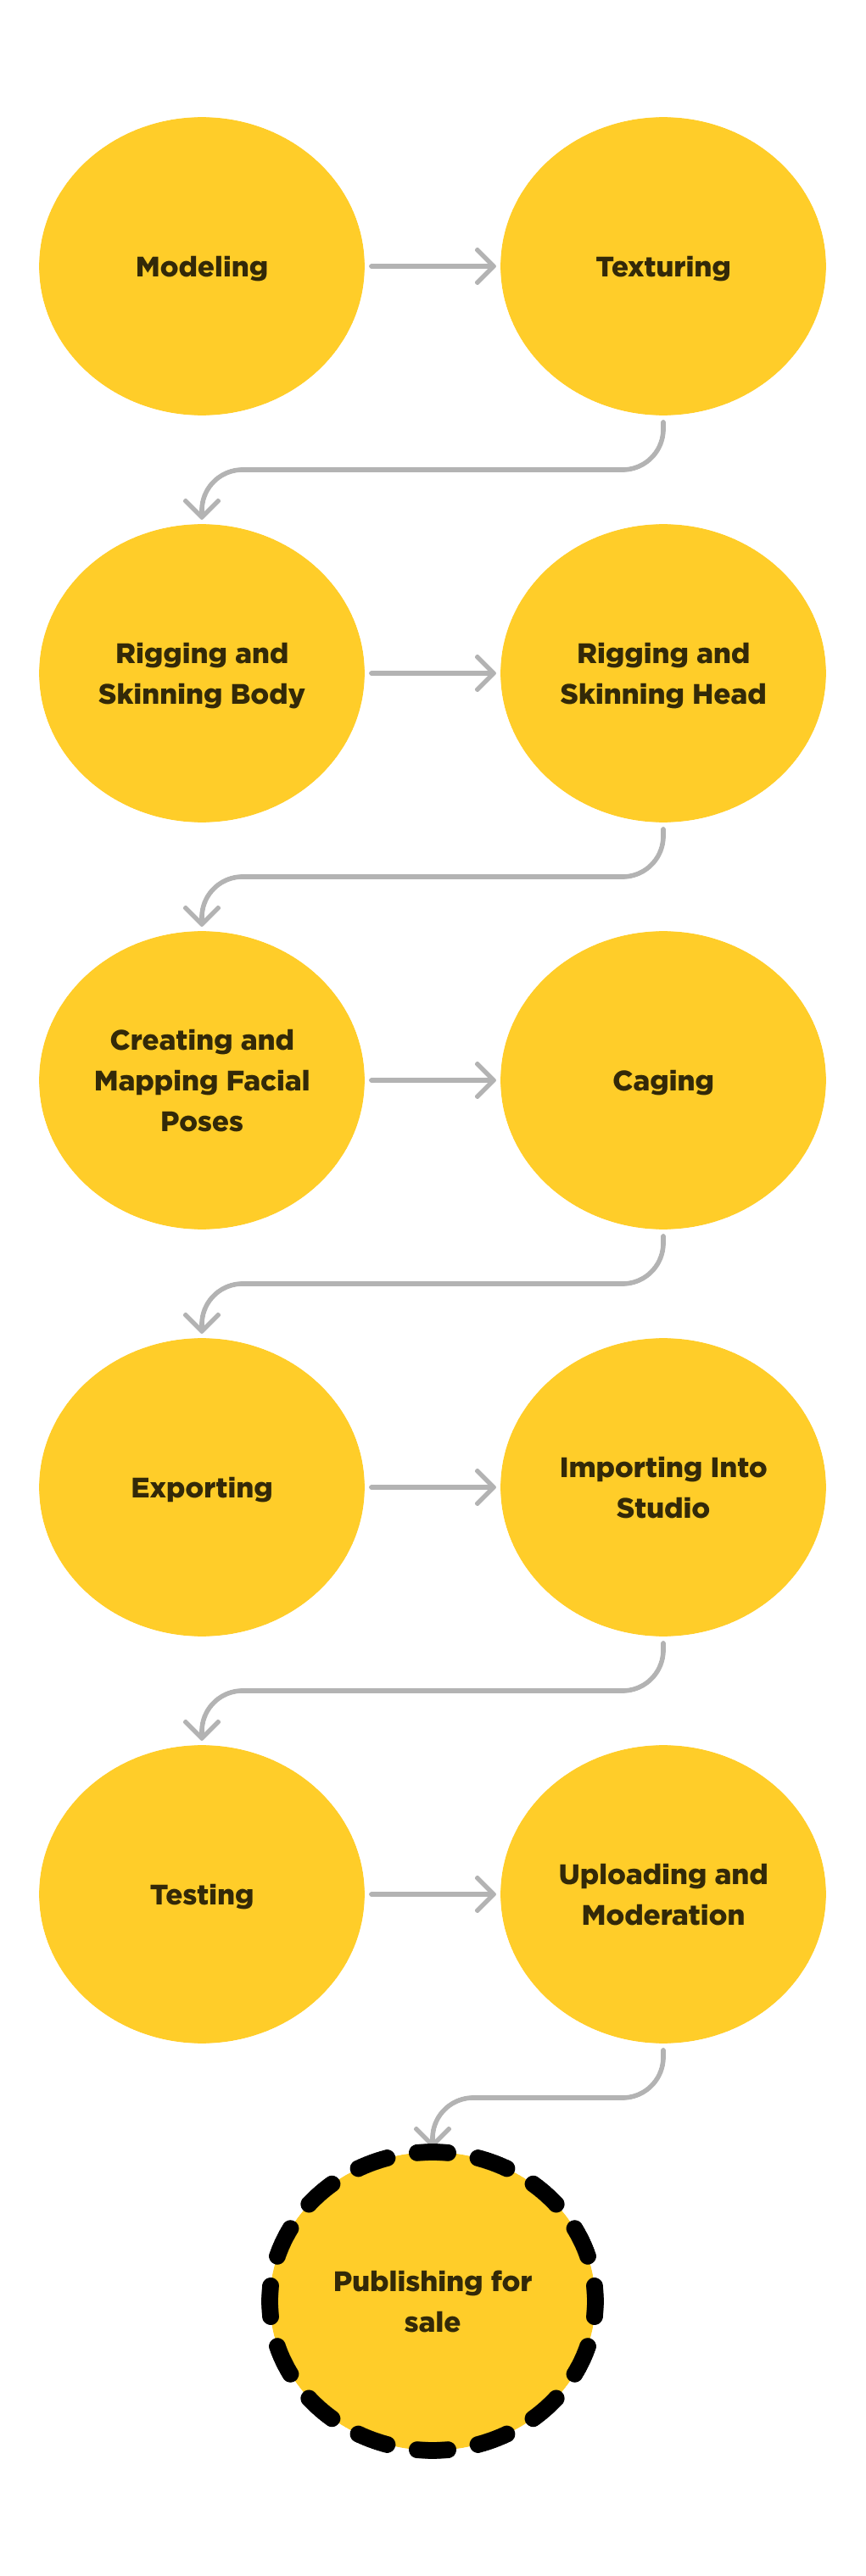
When designing a character body in Blender or Maya, you must export all of the avatar components in a single .fbx or .gltf for import into Studio. Since 3D creation isn't a linear process and always requires reiteration and testing, the process of creating an avatar character model can differ between individuals and various creation workflows.
In general, the creation process follows these typical workflows:
Customize a [character body template](/docs/roblox-art-characters-creating) that already includes all the necessary components.
Create characters from scratch, allowing full customization of the avatar character's components.
Note
Ensure that all assets you create follow Roblox's Community Standards and any applicable Marketplace policies.
Resources
There are a variety of resources available for creators of all backgrounds to get started with character creation. Review the following table for specific topics and resources:
| Topic | Resources |
|---|---|
| Tutorials | [Basic character creation tutorial](/docs/roblox-art-characters-creating) |
| Reference files | [Avatar references and project files](/docs/roblox-avatar-character-bodies-project-files) [Example mesh/model objects](/docs/roblox-art-modeling-project-files) |
| Technical specs | [.FBX export settings](/docs/roblox-avatar-character-bodies-export) [Avatar specifications](/docs/roblox-avatar-character-bodies-specifications) [General mesh specifications](/docs/roblox-art-modeling-specifications) [Accessory specifications](/docs/roblox-avatar-rigid-accessories-specifications) [Marketplace policy](/docs/roblox-marketplace-marketplace-policy) |
| Cosmetic creation | [Accessories overview](/docs/roblox-avatar-rigid-accessories) [Creating face accessories](/docs/roblox-art-characters-facial-animation-create-face-accessories) [Accessory Fitting Tool](/docs/roblox-avatar-accessory-fitting-tool) [Accessory specifications](/docs/roblox-avatar-rigid-accessories-specifications) [Marketplace requirements](/docs/roblox-marketplace-marketplace-policy) |
| Texturing | [Texturing requirements](/docs/roblox-art-modeling-texture-specifications) [PBR textures](/docs/roblox-art-modeling-surface-appearance) |
| Rigging and skinning | [Rigging and skinning overview](/docs/roblox-art-modeling-rigging) [Humanoid rig requirements](/docs/roblox-avatar-character-bodies-specifications#rigging) [Rigging facial bones](/docs/roblox-art-characters-facial-animation-create-basic-heads#rig-and-skin-the-head) [Automatic Skinning Transfer](/docs/roblox-avatar-automatic-skinning-transfer) [Skinning facial bones](/docs/roblox-art-characters-facial-animation-create-basic-heads#skin-joints) |
| Facial animation and live heads | [Basic head creation](/docs/roblox-art-characters-facial-animation-create-basic-heads) [Face accessory creation](/docs/roblox-art-characters-facial-animation-create-face-accessories) [FACS pose references](/docs/roblox-avatar-dynamic-heads-facs-poses-reference) |
| Testing and validation | [Calisthenics Tool](/docs/roblox-art-modeling-calisthenics-tool) [Clothing Validation Tool](/docs/roblox-art-accessories-validation-tool) |
| Publishing and Marketplace | [Uploading to Marketplace](/docs/roblox-marketplace-publish-to-marketplace) [Marketplace policy](/docs/roblox-marketplace-marketplace-policy) [Fees and commissions](/docs/roblox-marketplace-marketplace-fees-and-commissions) |