
Source: Roblox Creator Hub · CC BY 4.0 · View source · Code samples: MIT Imported 2026-10-03. Formatting adapted for this site.
Develop polished assets
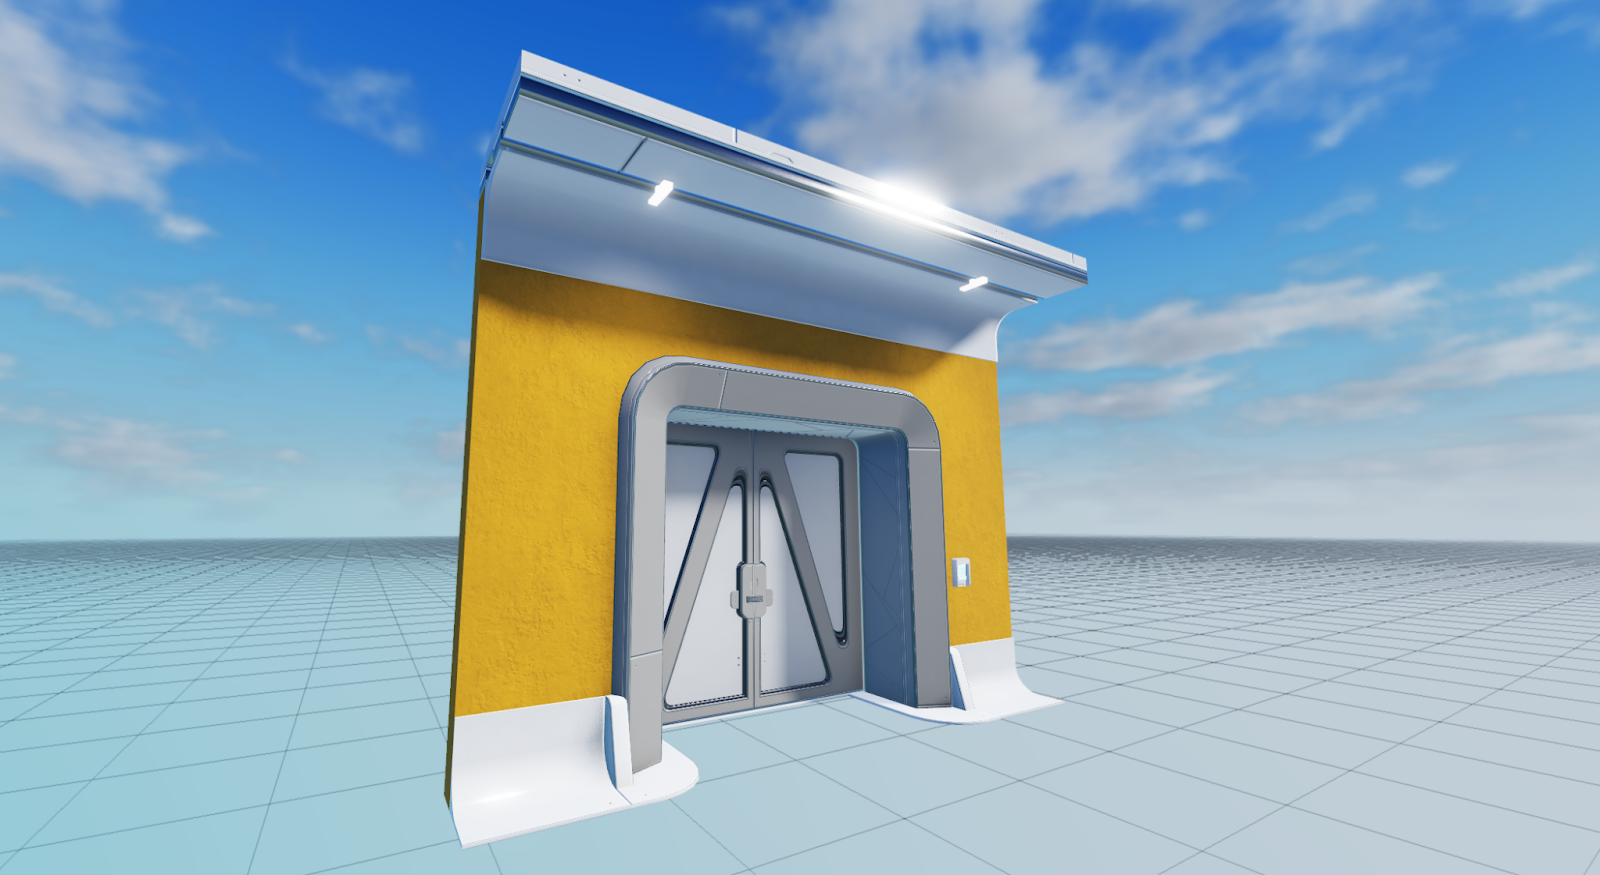
Developing polished assets is the process of planning and creating high-quality assets to replace or convert the greybox environment and meet your game's aesthetic goals and design requirements. After you have the basis for how you want to lay out your assets in the 3D space from the greybox process, it's much easier to visualize what assets are necessary to bring your environment to life.
Using the Environment Art Asset Library as a reference, this section of the environmental art curriculum shows you how to prepare what you need to turn your basic greybox layout into a futuristic laser tag environment, including guidance on:
- Choosing an art style to influence every decision you make for your assets in the design process.
- Designing tileable textures, trim sheets, a modular kit, and props that are cohesive with one another, and in accordance with your art style.
After you complete this section, you will learn how to pull all of your polished assets into the 3D space with additional terrain, light sources, and special effects to add character and storytelling elements to your environment.
Note
It's important to note the process between polishing assets and constructing your environment hardly ever looks like a straight line from your original idea to the final art. Iteration between each step and across steps is normal and almost always necessary in the development process.Choose an art style
Choosing an art style at the start of your design process allows you to have a main source of truth for the aesthetic treatment of your assets. You can treat it as your visual ground rules, constantly referencing it as you design your assets to ensure they always inform users of what you want your environment to communicate. An effective art style provides users information about the world they're playing in, such as its climate, rich history, or relationship to technology.
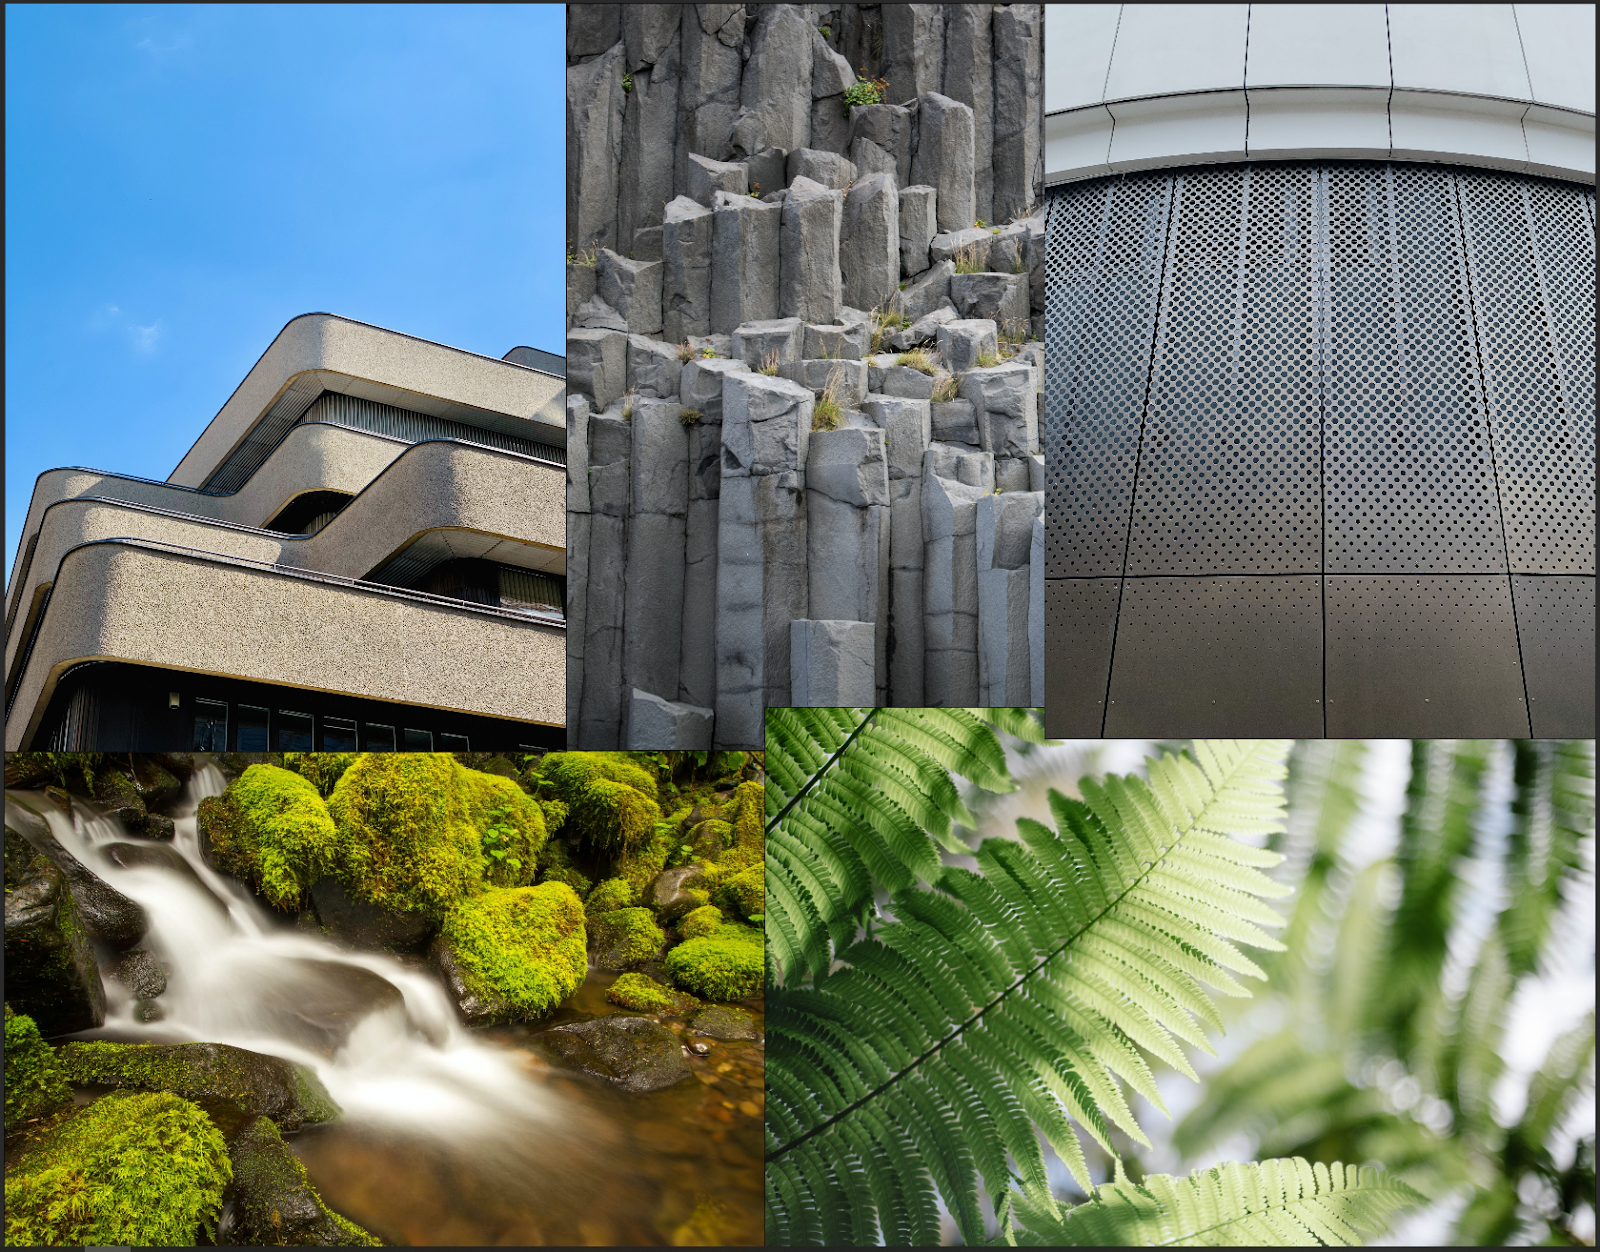
Many developers choose to create a mood or theme board, then add as many pictures as you need until you feel that you have a visual representation of what you want your world to look like. For example, the final sample laser tag environment's art style references the following images to pull references for the focal elements of the 3D space, such as lush foliage, rounded frames, rectangular concrete forms, and stylistically uniform metal adornments. Although users may never see your reference images, they will feel the impact of their influence in the cohesiveness of your world's identity.
Design textures
Now that you have an art style for your game, it's time to review your layout and figure out what textures you need to create materials for the 3D space. Environments often require textures that can cover large surfaces, as well as textures that can provide a level of detail to your assets without adding additional geometry. For example, your greybox environment needs textures that can cover the outdoor space, such as moss, flowers and stones, as well as textures to provide details to the combat pockets, such as panels and bolts to frame doorways.
There are two high-level texturing methods that you can use to meet these requirements: tileable textures and trim sheets. The following sections provide information and guidance on both texture methods, including what to consider as you find textures on the Creator Store, or design them in third-party tools.
Tileable textures
Tileable textures are textures that tile both on the X and Y axis, and they allow you to cover large surfaces in your environment, such as floors, walls, and terrain. This type of texture requires minimal manual adjustments after you apply them to block Parts because blocks have flat surfaces, meaning you don't need to account for how the texture might deform on more complex geometry. In addition, you can import tileable textures MaterialVariant objects within the MaterialService to apply to your terrain, which is a process you will learn in Create custom materials in the next section of this tutorial.
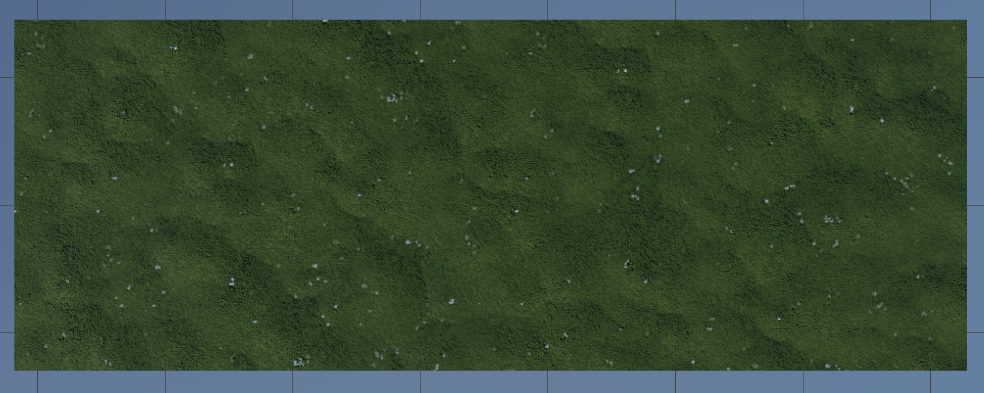
The most fundamental rule for tileable textures is that they cannot have a seam, otherwise where the texture begins and ends on a surface is noticeable to users, which can break their sense of immersion in the game. It's for this reason that tileable textures work well for natural materials, such as grass and stone, which are seamless by nature in the real world. In fact, the laser tag sample game uses the following four organic tileable textures to represent natural materials for the outdoor space, which you can use in the world building section of this tutorial.
<img src="https://prod.docsiteassets.roblox.com/assets/tutorials/environmental-art-curriculum/Section2/TileableTextures-Moss.png" alt="A sphere part with a tileable moss material applied." width="100%"/>Moss
<img src="https://prod.docsiteassets.roblox.com/assets/tutorials/environmental-art-curriculum/Section2/TileableTextures-MossFlowers.png" alt="A sphere part with a tileable moss with flowers material applied." width="100%"/>MossFlowers
<img src="https://prod.docsiteassets.roblox.com/assets/tutorials/environmental-art-curriculum/Section2/TileableTextures-MossStones.png" alt="A sphere part with a tileable moss with stones material applied." width="100%"/>MossStones
<img src="https://prod.docsiteassets.roblox.com/assets/tutorials/environmental-art-curriculum/Section2/TileableTextures-Stones.png" alt="A sphere part with a tileable stones material applied." width="100%"/>Stones
Notice how all of these sample tileable textures have equal visible distribution of their moss, flower, and rock elements. If you were to include any distinctive elements, such as a massive rock or a patch of flowers, it would attract user attention to the fact that the texture is repeating. For example, the first image in the following two images has a noticeable patch of dirt that pulls the eye to the texture's repetition. The second image makes this patch much smaller, which balances the texture's elements, and makes its repetition much less noticeable.
<img src="https://prod.docsiteassets.roblox.com/assets/tutorials/environmental-art-curriculum/Section2/TileableTextures-WithElement.jpg" alt="A tileable rock texture with a distinct patch of rocks highlighted to show that the repetition of the distinct element is noticeable." width="100%"/>


<img src="https://prod.docsiteassets.roblox.com/assets/tutorials/environmental-art-curriculum/Section2/TileableTextures-NoElement.jpg" alt="A tileable rock texture with no distinct elements to show that this technique makes the repetition of elements not noticeable." width="100%"/>
If you decide to design your own tileable textures in third-party modeling tools like Substance Designer or Blender, keep the following in mind:
- You can create textures as large as 1024x1024, but the closer you get to this maximum size, the higher the performance cost.
- Create equal visible distribution so that no one element is more distinguishable than others.
- Even if a tileable texture is technically seamless, review the overall image to ensure it doesn't have an element that is so pronounced that the texture's repetition is noticeable.
The previous point is near impossible to remove entirely, but you can set Studio material to tile organically, or add in additional decal overlays to hide the repetition effectively. For more information on these techniques, see Assemble an asset library - Creating custom materials and Assemble modular environments - Reduce visible repetition, respectively.
Trim sheets
Trim sheets are textures that tile on either the X or Y axis, and they allow you to add significantly more visual complexity to your game without having to import additional textures, saving you a negative impact on memory. Each row or column of a trim sheet has a unique visual appearance, giving you many different surface treatments to choose from when you're mapping UV data to a mesh. For example, the door frame and ceiling assets in the following two images use different layers of the same trim sheet to add detail work to the space.
<img src="https://prod.docsiteassets.roblox.com/assets/tutorials/environmental-art-curriculum/Section2/TrimSheets-Doorway.jpg" alt="An doorway with trim sheet textures applied." width="100%"/>


<img src="https://prod.docsiteassets.roblox.com/assets/tutorials/environmental-art-curriculum/Section2/TrimSheets-Ceiling.jpg" alt="A group of ceiling tiles with trim sheet textures applied." width="100%"/>
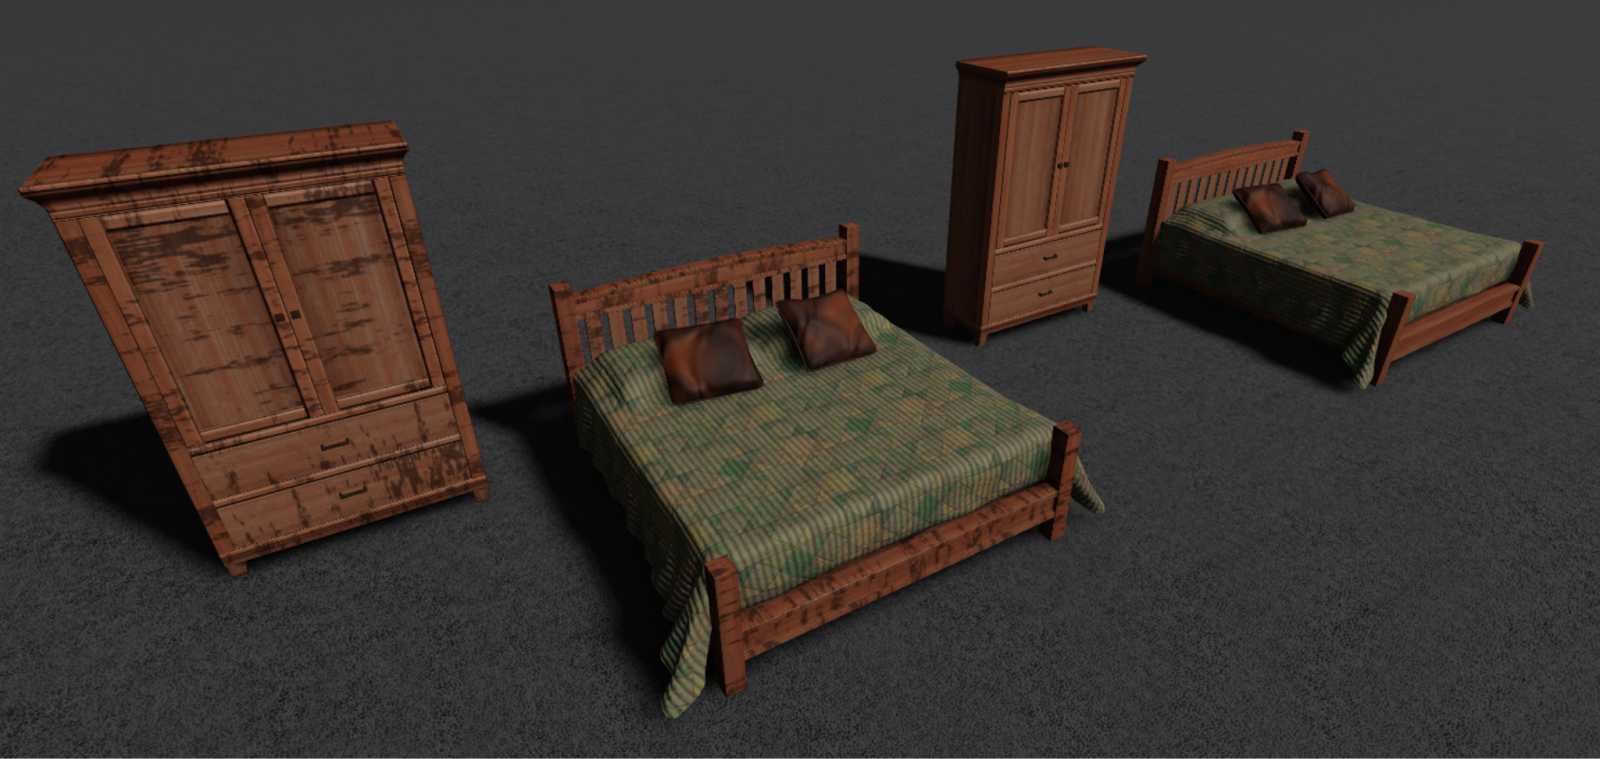
The most fundamental rule for trim sheets is to avoid contextual details that you can only apply to a single object. This is because trim sheets must have use for many types of objects in your world, and highly specific details are also distinguishable to users as they repeat in the 3D space. For example, in the following image from the Mystery of Duvall showcase, the left-side furniture set's trim sheet includes more stain detail than the right-side furniture set's trim sheet. Notice how the extra stain detail makes its repetition prominent in comparison to the furniture set on the right.
Following this fundamental rule, the final sample laser tag environment uses the following trim sheet texture maps with six rows of simple detail work to add visual interest and cohesion to its modular kit and props. You can use this trim sheet for UV unwrapping in third-party modeling tools, then utilize its texture maps in a SurfaceAppearance object when you assemble your asset library. For more information on what each of these texture maps provide to meshes, see PBR textures - Texture maps.
Note
This trim sheet file is only useful for UV unwrapping processes in third-party modeling tools. If you try to upload its texture maps to a [`SurfaceAppearance`](/docs/surfaceappearance) object without completing a UV unwrapping process, there isn't any data for Studio to map to the texture itself.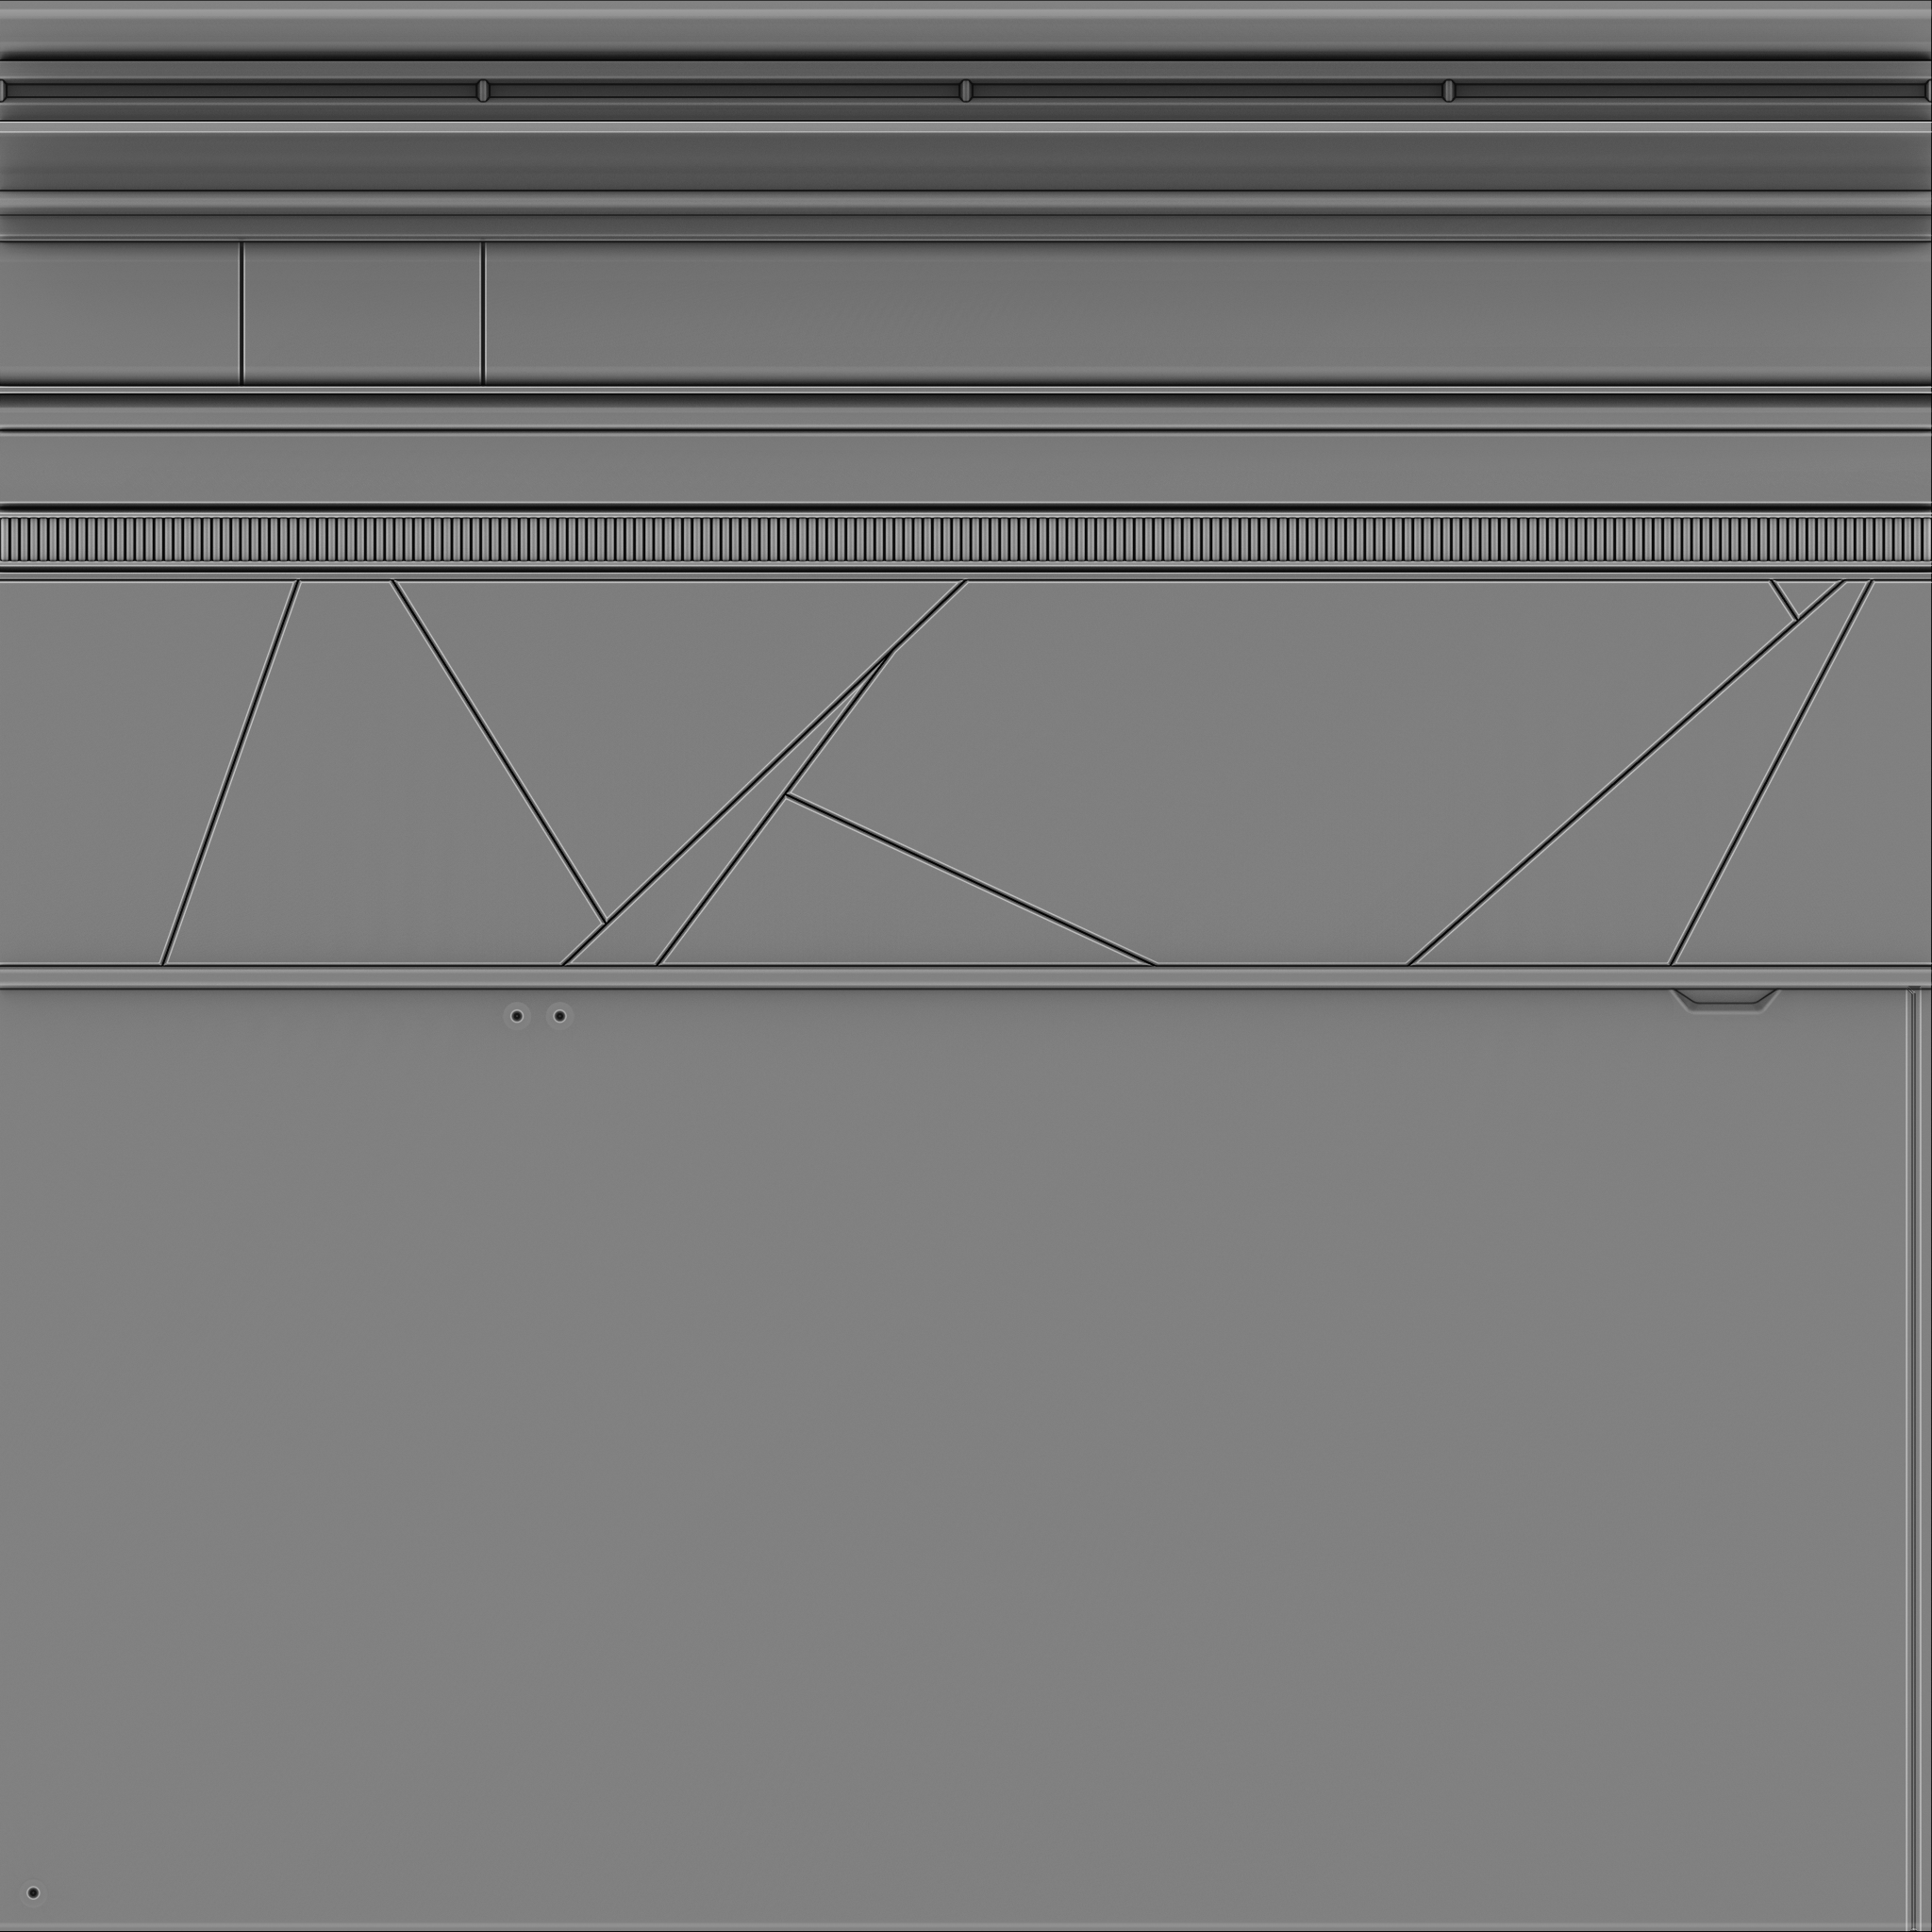
<img src="https://prod.docsiteassets.roblox.com/assets/tutorials/environmental-art-curriculum/Section2/TrimSheets-Albedo.png" alt="The sample laser tag game's trim sheet's albedo texture map." width="100%"/>Albedo
<img src="https://prod.docsiteassets.roblox.com/assets/tutorials/environmental-art-curriculum/Section2/TrimSheets-Normal.png" alt="The sample laser tag game's trim sheet's normal texture map." width="100%"/>Normal
<img src="https://prod.docsiteassets.roblox.com/assets/tutorials/environmental-art-curriculum/Section2/TrimSheets-Roughness.png" alt="The sample laser tag game's trim sheet's roughness texture map." width="100%"/>Roughness
<img src="https://prod.docsiteassets.roblox.com/assets/tutorials/environmental-art-curriculum/Section2/TrimSheets-Metalness.png" alt="The sample laser tag game's trim sheet's metalness texture map." width="100%"/>Metalness
If you decide to design your own trim sheets in third-party modeling tools like Substance Designer, Blender, or ZBrush, keep the following in mind:
- You can create textures as large as 1024x1024, but the closer you get to this maximum size, the higher the performance cost.
- The trim sheet must be equal in length both along the X and Y axis.
- You can make different design choices to include more contextual details, but once the details are on the trim sheet, you cannot easily hide them.
- Export your trim sheet's texture maps in a location that is easy to reference when you're creating an asset library.
For more information on this technique, see Building architecture - Creating trim sheets.
Design modular kits
Modular kits are sets of assets that seamlessly snap together to create variations of a larger complex object. Designing and using modular kits as a part of your development process is useful because it means you don't need to manually create each individual asset in your game. Instead, you only need to create a few assets that you can reuse and customize to create variety throughout the scene.
Not only does this process significantly speed up how quickly you can replace or convert the greybox environment, but when you UV wrap a trim sheet onto the meshes in your modular kit for detail work, it can also help each distinct object throughout the game feel cohesive. For example, the final sample laser tag environment utilizes a single SA_EC_Trim_Metal_A trimsheet to UV wrap onto all of its modular assets that create the overall building where most of the gameplay takes place, including assets that accommodate a rise in elevation between the first and second floor.
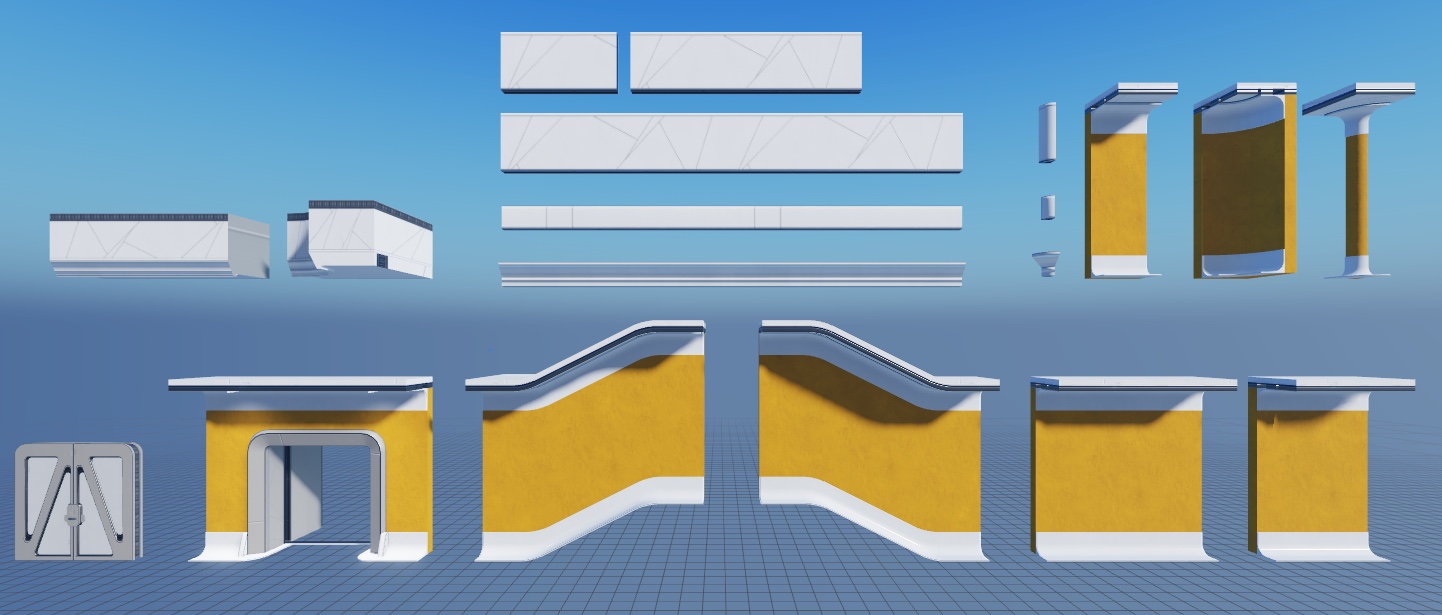
Each asset in this modular kit has a consistent pivot point location either at the forward-most, lower corner, or in a location that allows them to snap to a logical position on the building in 5 stud increments when you enable grid snapping, such as trim pieces onto walls, or doors into their doorway position. In addition, each asset is at least 5 studs tall and wide, so there is never any clashing geometry, even when you rotate and move the assets. For more information on this concept, see Assemble modular environments - The importance of consistent pivot point locations.
You can use or modify the sample modular kit for replacing graybox geometry in the world building section of this tutorial. However, if you decide to design your own modular kit in third-party modeling tools like Blender or Maya, keep the following in mind:
- It's of vital importance that modular assets have a consistent pivot location so they can connect together at predetermined, incremental distances relative to one another when you enable grid snapping.
- Each asset must have a maximum height and width that is divisible by the smallest height and width in the kit so they can move and rotate in incremental distances. For example, the sample kit's tallest and widest asset is 15 by 5 studs, which is divisible by the smallest asset of 5 by 5 studs.
- It's useful to separate larger assets like hallways into separate meshes under a model with careful naming conventions, such as a hallway
Modelwith child UpperTrim, LowerTrim, and WallMeshPartobjects. This allows you to customize each mesh of the overall model, such as modifying their individual material, collision, and rendering parameters, or removing unnecessary geometry according to where the model is within the game.
No matter what modular kit you use, it's important to test often and look at your assets from multiple perspectives to see if there is any clashing geometry. If there is, it often means that one of the asset's pivot point locations isn't relatively consistent with the other.
Design props
Props are non-modular assets that enhance an environment's level of visual storytelling while providing users important context about the world they're in. For example, if users are exploring a cave and see props like glowing orbs and skeletons, they can infer that their environment is both magical and dangerous, so it might be wise to proceed with caution.
Props are most effective when they connect to larger themes in your game's art style. For example, the final sample laser tag environment utilizes props to provide users context regarding the environment's relationship to technology and nature. In particular, the props kit includes clean, high-tech panels, crates, fire extinguishers, and security cameras alongside large rocks and a variety of plants, informing users that the world values technological advances, but not at the expense of the earth.
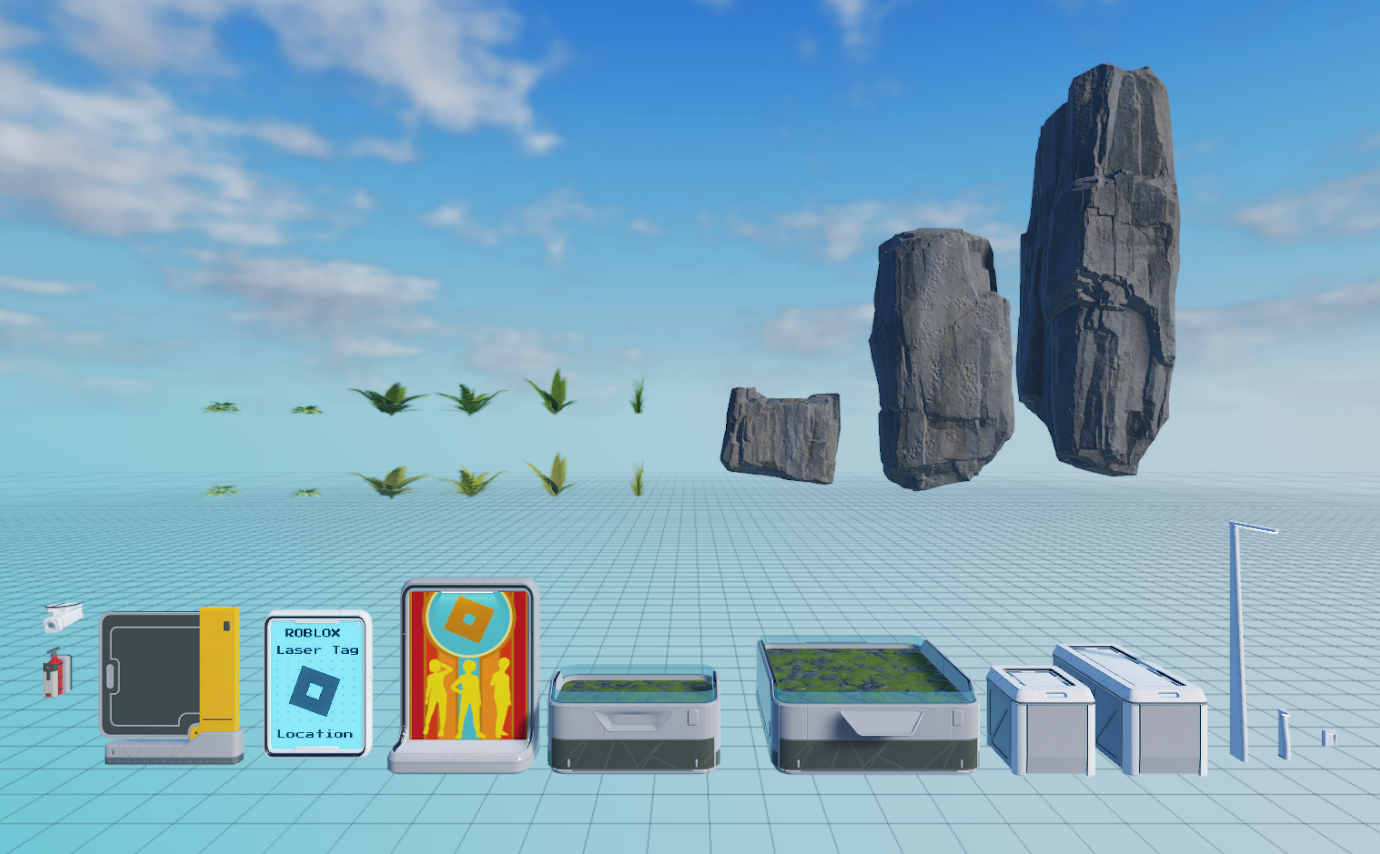
Unlike modular assets, props don't need to have consistent pivot point locations because they don't need to snap together to create a larger complex object. However, they do need to have logical pivot point locations according to where you need to place them in the 3D space. For example, in the following image, the fire extinguisher prop has a pivot point location on the back of the object so it can snap onto walls, and the crate has a pivot point location on the bottom of the object so it can snap onto floors. This allows for universal contextual placement, no matter the respective wall or floor.
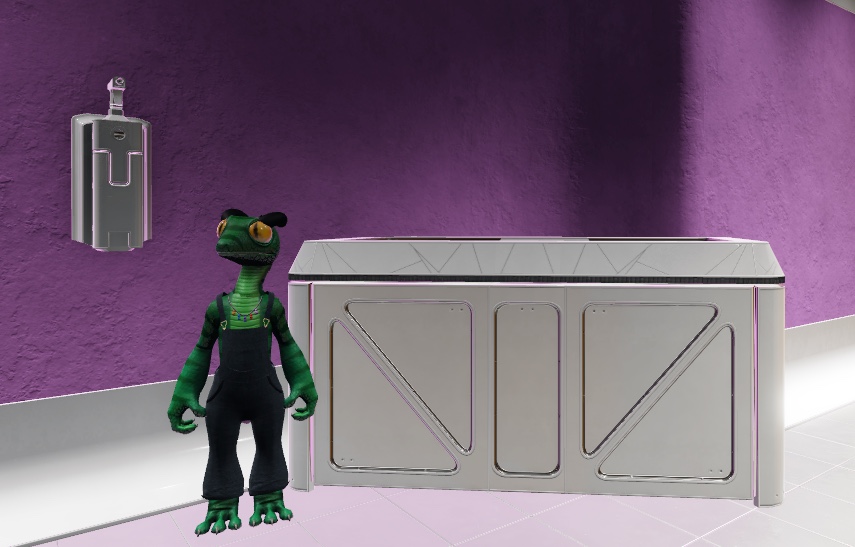
You can use or modify props from the Environment Art Asset Library in the world building section of this tutorial. However, if you decide to design your own props in third-party modeling tools like Blender or Maya, keep the following in mind:
- Users often see props from multiple angles, so it's important to include enough detail for users to understand what the prop is, but not too much detail so that it impacts performance. A good rule is to only include enough geometry that users can tell what a prop is from its silhouette. For more information on this concept, see Developing a moving world - Setting up the eye of the storm.
- You can use the same trim sheet you used for your modular assets so that you make efficient use of textures that are already within your environment, and so that every asset remains stylistically cohesive.
- Distinct visual markers in props are more noticeable the more you reuse them in your environment.
Once you have all of the high-quality assets you need to replace or convert the greybox environment, you can move on to the next section of the tutorial to learn how to assemble an asset library within your place file that you can use to turn your greybox environment into an aesthetically pleasing setting.