
Source: Roblox Creator Hub · CC BY 4.0 · View source · Code samples: MIT Imported 2026-10-03. Formatting adapted for this site.
Makeup
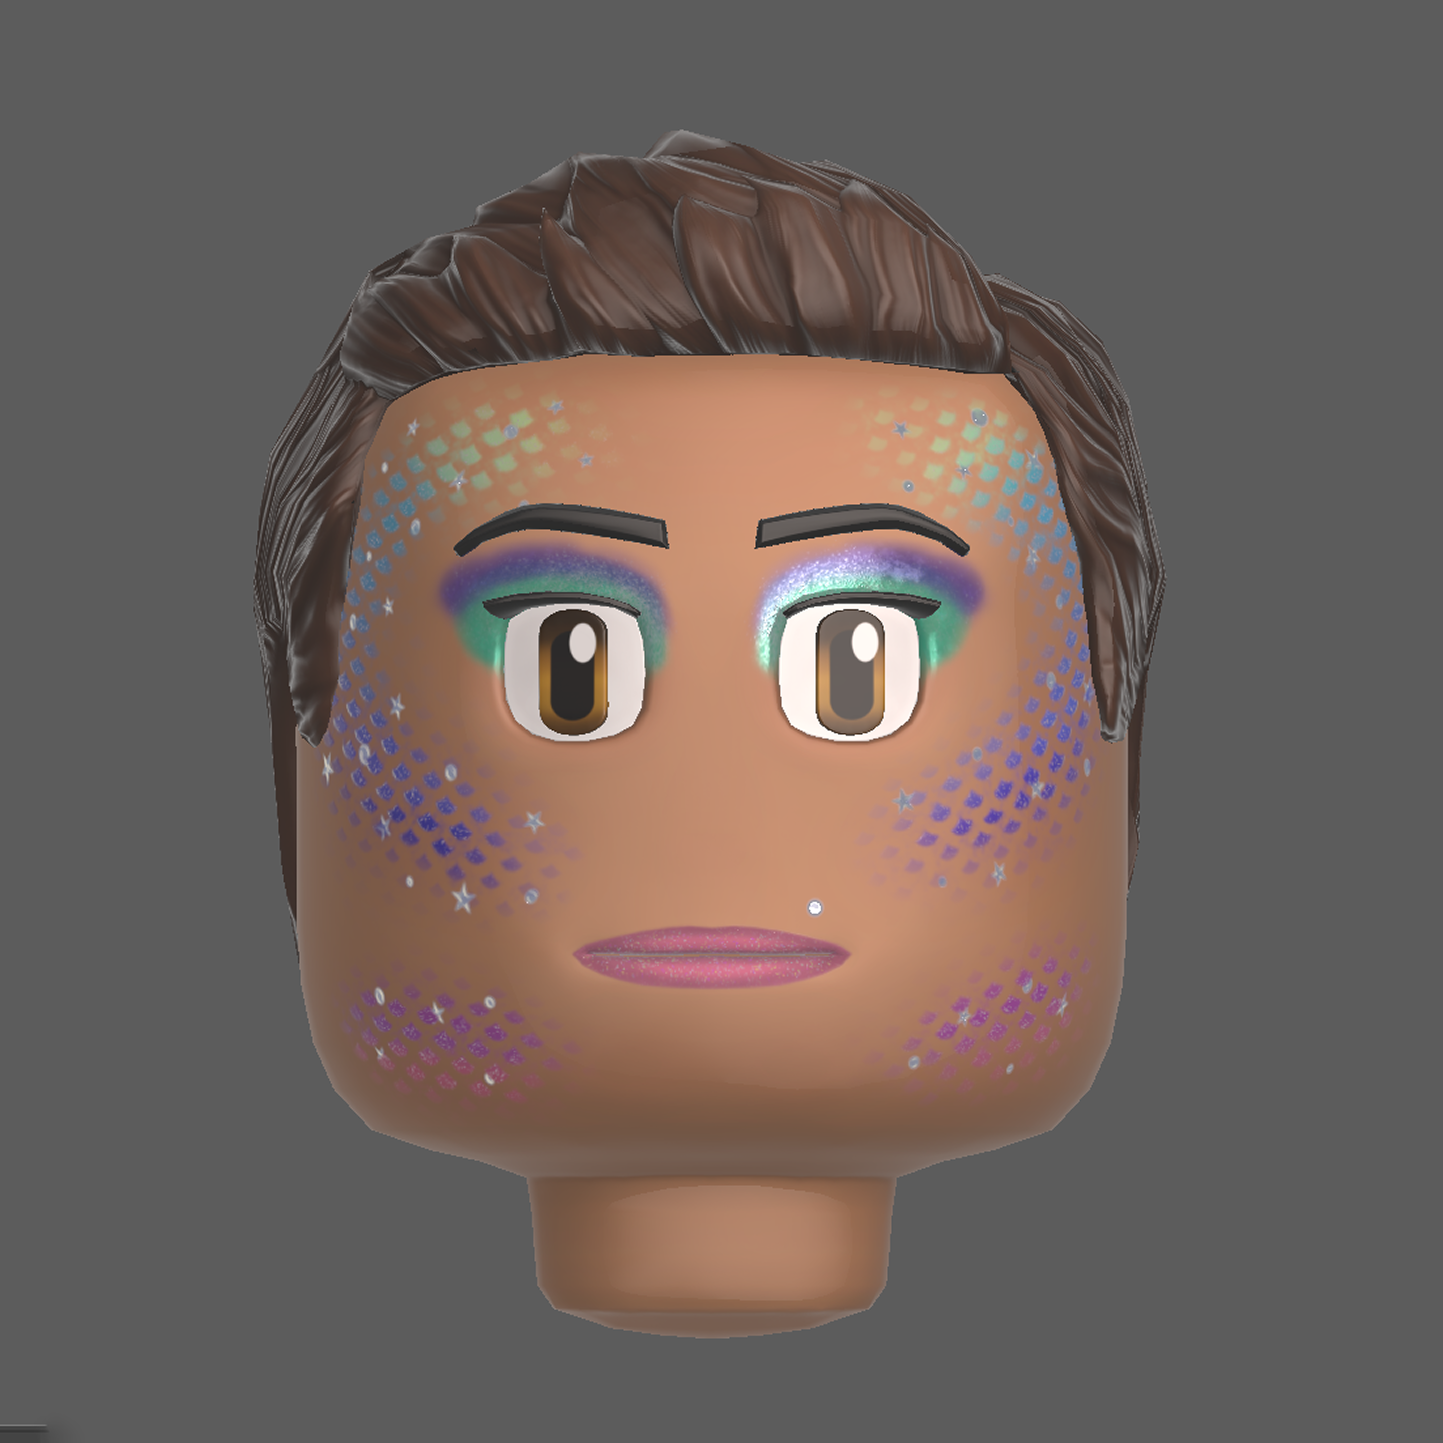
Makeup is a cosmetic item that you can apply to a face of an avatar or non-playable character for additional creative expression, such as traditional makeup art (e.g., eyeshadow, lipstick, and blush), face paint, battle markings, and camouflage.
Makeup is made up of multiple specialized texture layers baked into a Decal object, and each texture layer contains a unique makeup component like the lips or eyes region. Players can purchase makeup as a set on the Marketplace and apply it as a complete cohesive look, or swap out individual makeup components for others that match their own avatar's style.
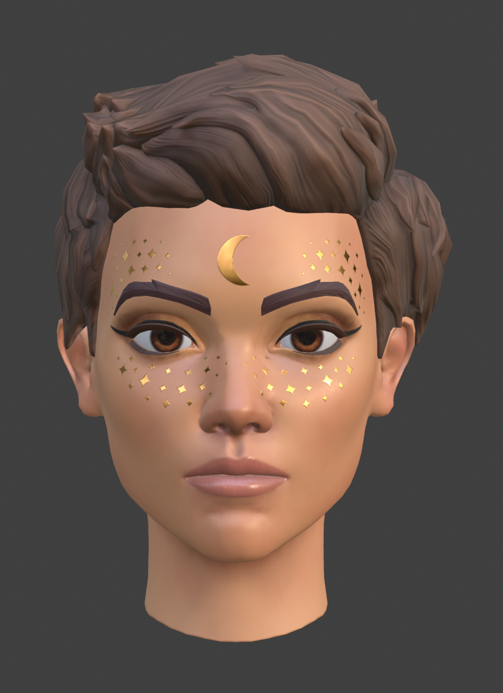
Complete look
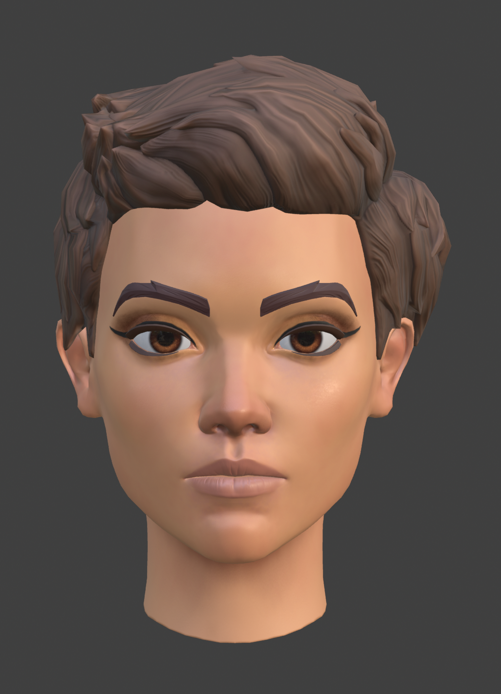
Eyes texture layer
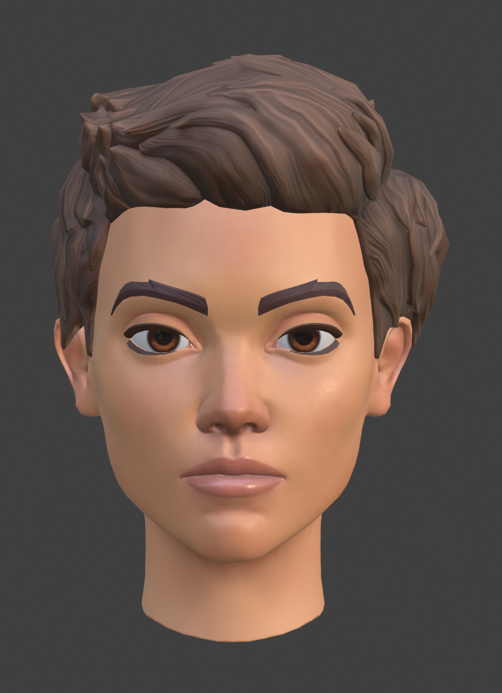
Lip texture layer
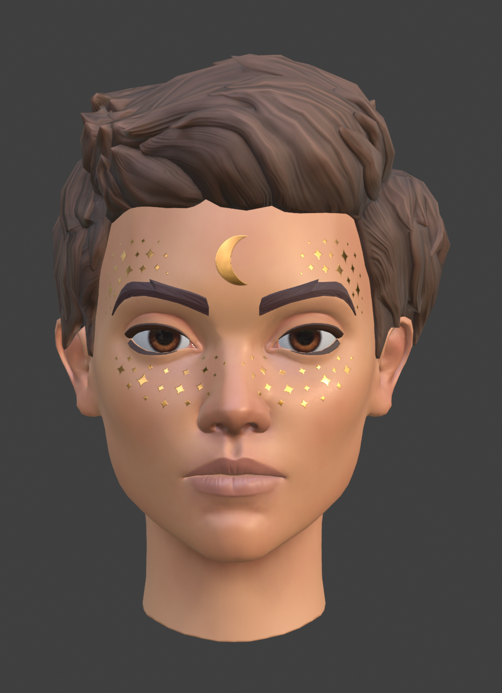
Face texture layer
This guide provides several makeup templates that you can use within your creation process, such as:
- Template textures that you can use in 2D editing software to author makeup.
- Template heads that you can use to view and test your makeup before export.
- Reference game you can use to import and test your makeup assets on characters with different skin tones and body types.
You can either use these templates as a pure reference to see how everything works, or you can use all of them at each step of the suggested creation process.
 Reference template render
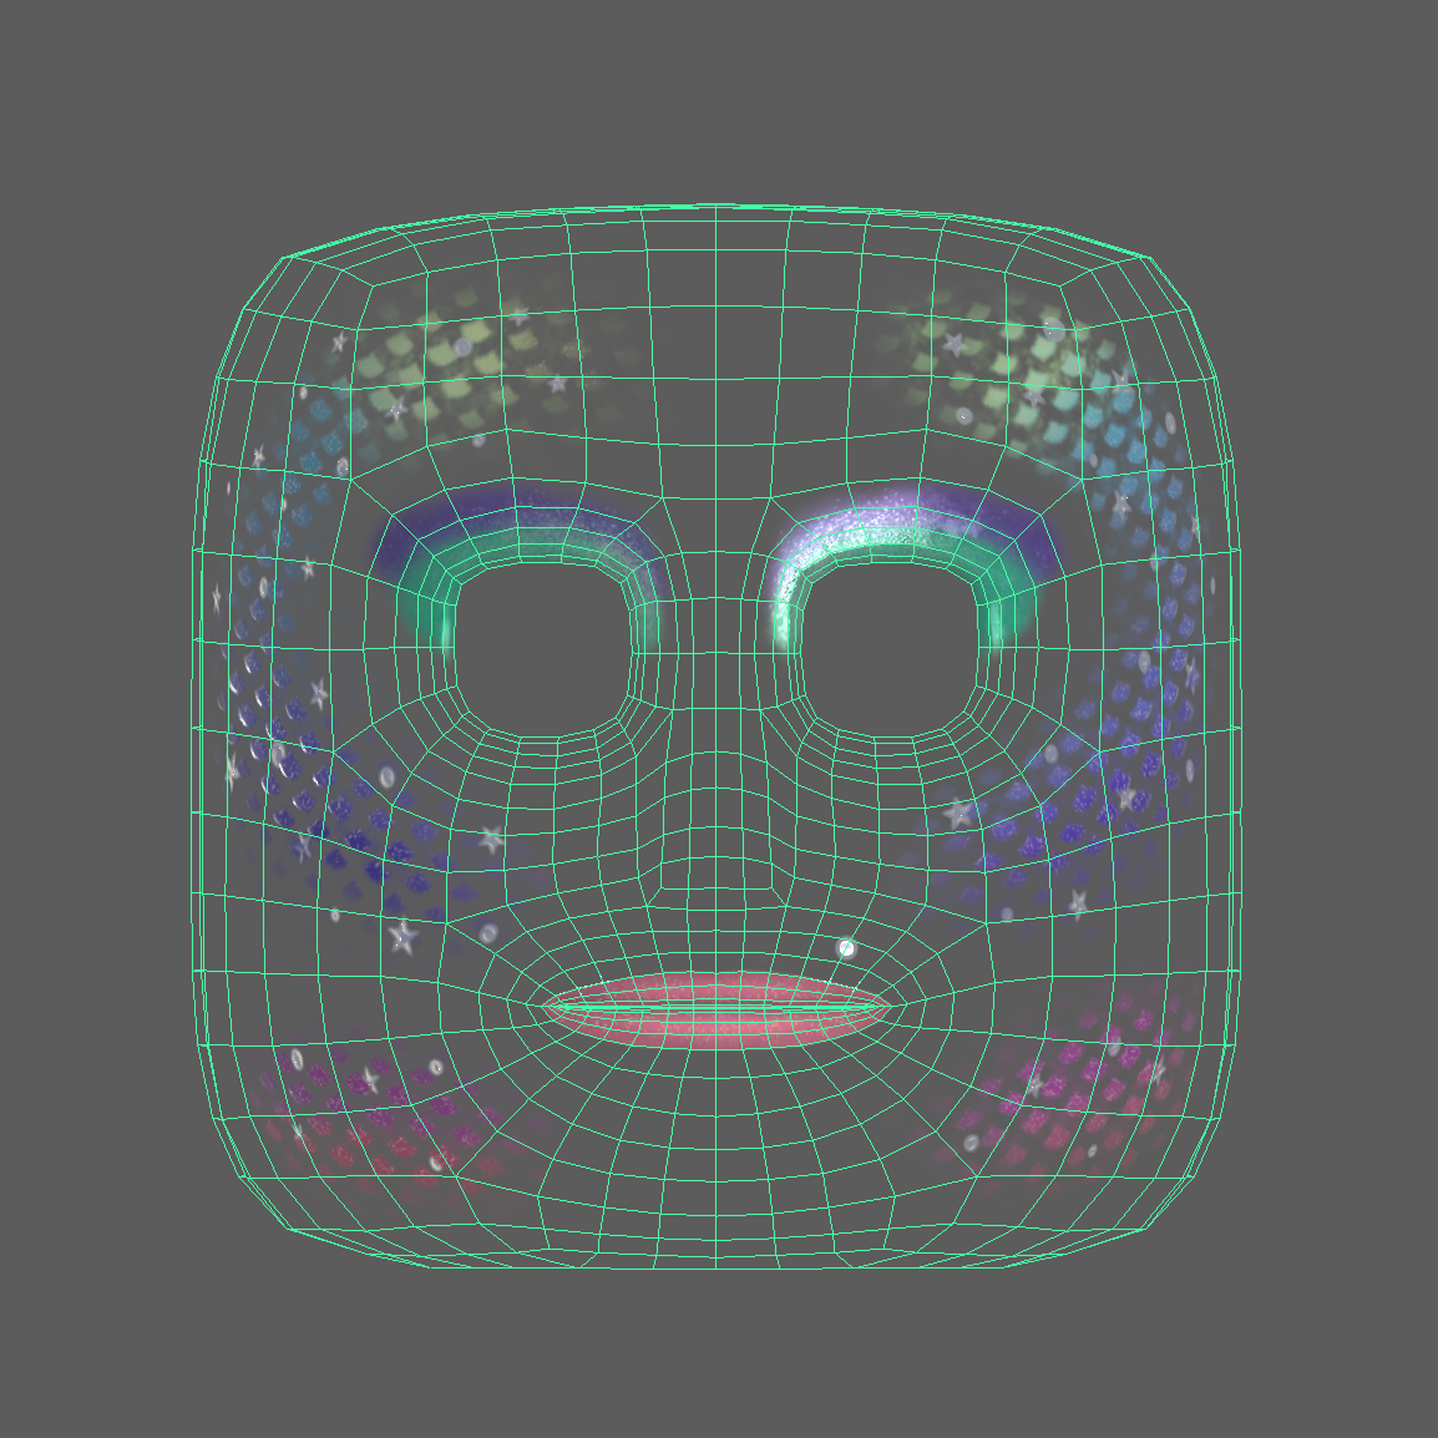
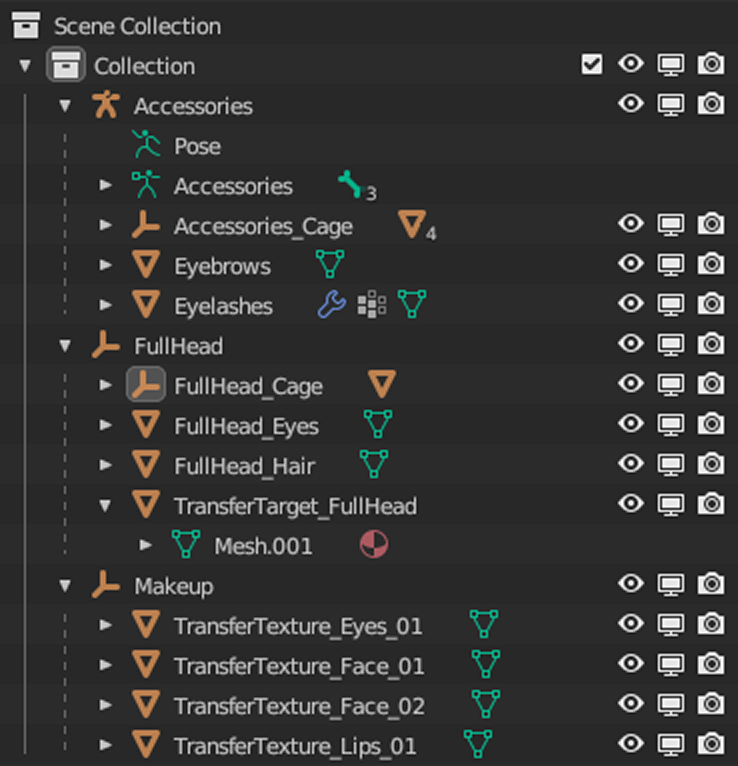 Reference template data model
Makeup components
You can apply textures to three primary regions of the face: the eyes region, lips region, and face region. Each region has overlapping surfaces with other regions to allow for seamless, continuous looks between makeup components.
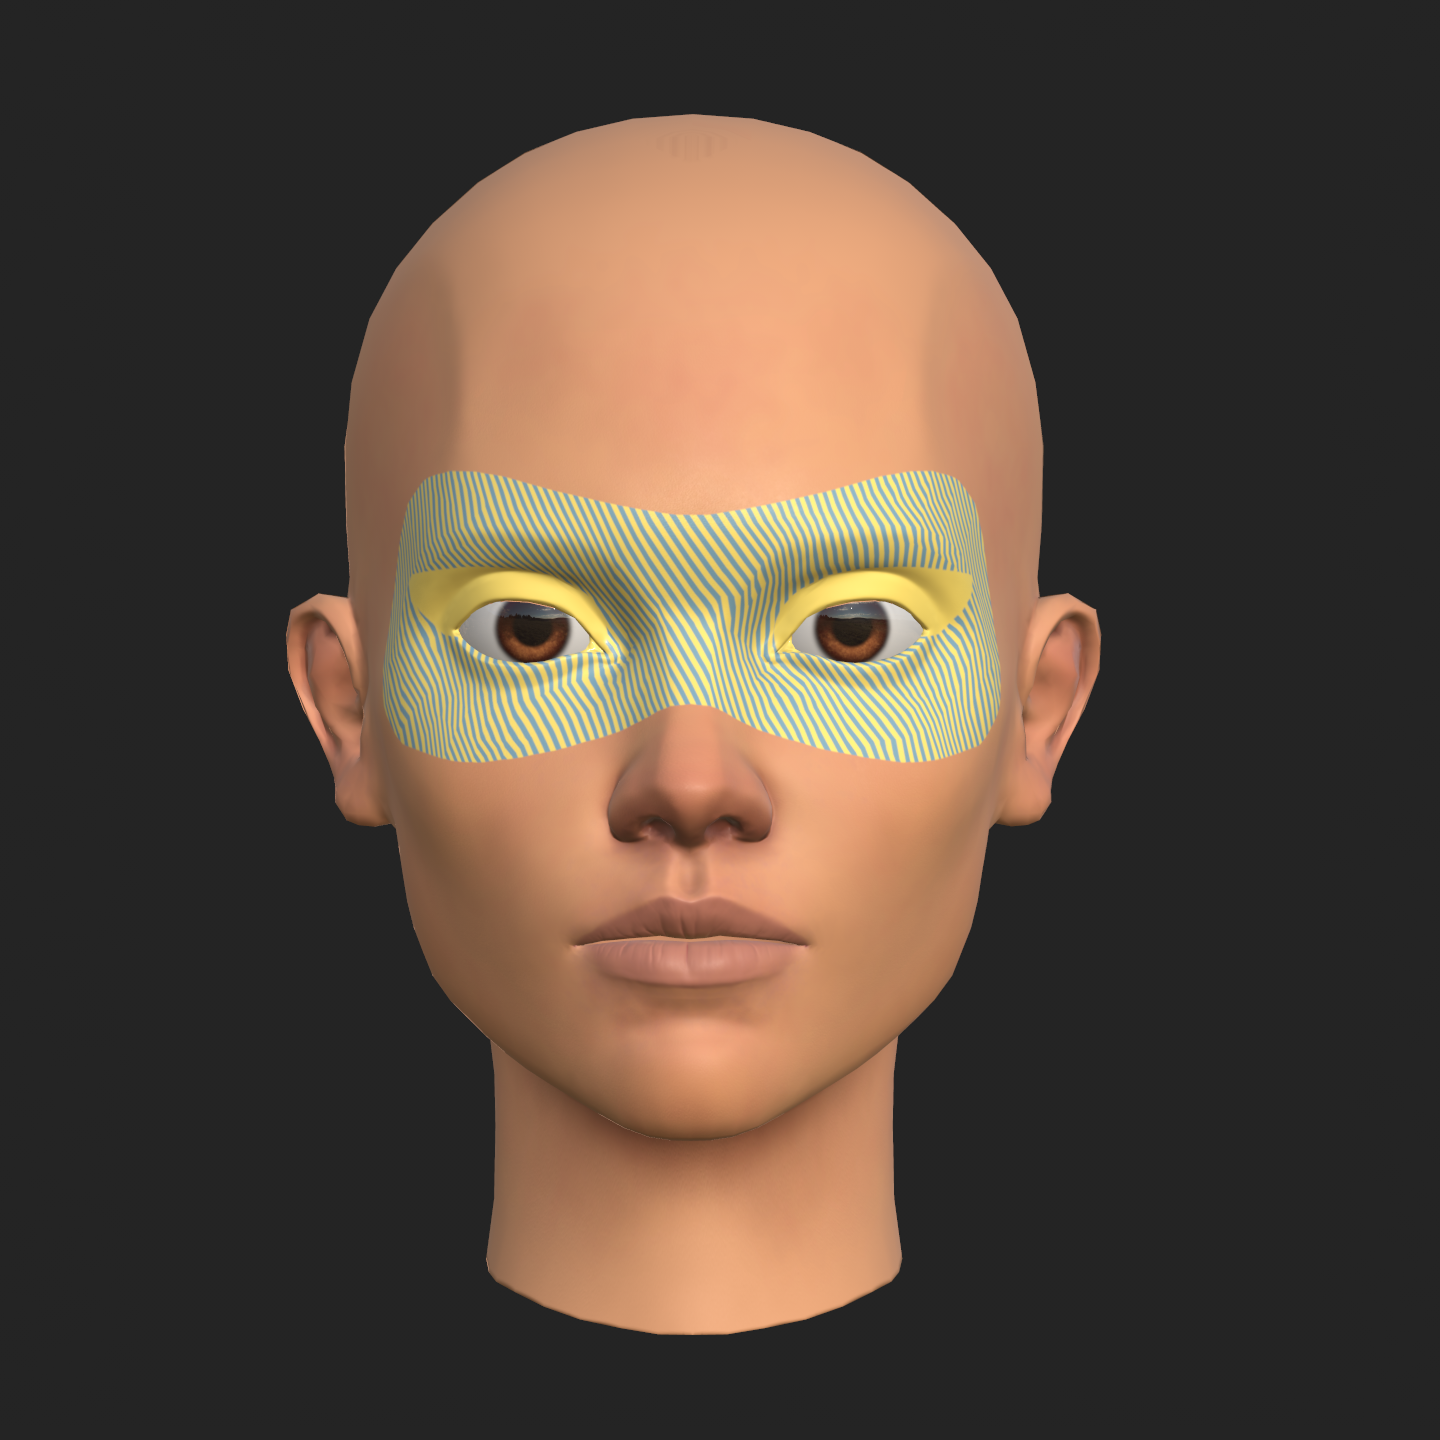 Eyes region
 Lips region
 Face region
In addition, you can include eyebrows and eyelashes with your makeup creations. Eyebrows and eyelashes are Model objects that contain MeshPart objects with skinning and caging data. This allows them to animate properly as the character's face changes expressions.
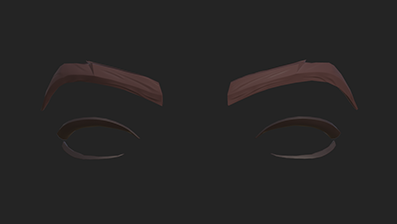 Eyebrow and eyelash mesh objects
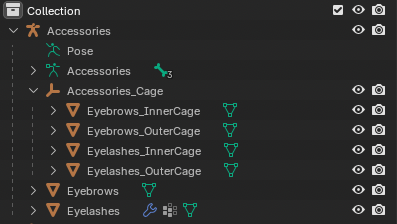 Eyebrow and eyelash data model
When you import your makeup creation from your favorite third-party modeling software into the reference game, Studio automatically detects mesh names, then generates the necessary Decal objects under the imported model. You can then quickly apply your makeup Decal objects and accessories by dragging them from the imported reference head into a character's Makeup or Accessories folder.
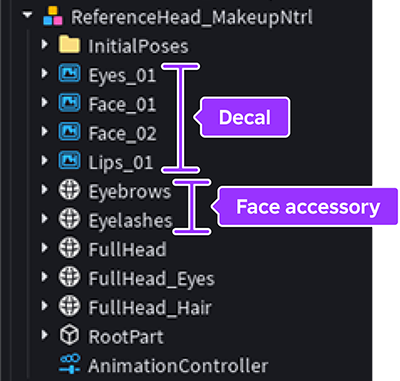 The imported model contains your makeup decals and face accessories
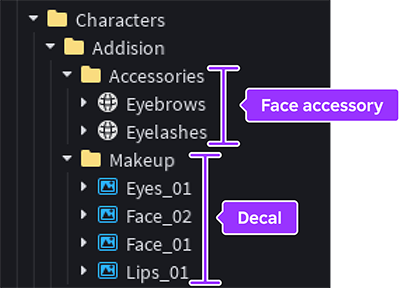 Your makeup displays at runtime when you drag your makeup assets into the correct folders
Note
Makeup assets that you create for the Marketplace can include up to 6 total Decal objects, comprised of any combination of regions.
Resources
The following are downloadable resources you can use within the creation process:
- See Template textures for image and project files you can use in 2D editing software like GIMP or Photoshop.
- See Template heads for required 3D models you can use to view and test your makeup assets.
- See Reference game to import and test your makeup assets into Studio
Note
For resources that include two templates, in almost every case it's recommended to use the mesh template to create makeup because:
- It's easier and more intuitive to use because it mimics applying makeup in the real world.
- It contains a higher-fidelity mesh and UVs with minimal distortion.
Some creators prefer using the cage template because there is only one transfer when projecting the texture, while there are two transfers before projecting the texture for the mesh template. This can result in makeup transferring more accurately with less artifacts.
Note
Be sure to review your options before starting to create makeup because you cannot start with one template, then transfer your makeup to the other.
Template textures
When you are finished making changes to any of the following template texture images:
- Export your new textures.
Exporting from Photoshop
Note
The video presenter uses File > Export > Layers to Files to export each layer as its own .png file.
Exporting from Substance Painter
Exporting from Procreate
To export textures from Procreate:
 1. Navigate to the **Layers** pane, then hide everything but your first makeup component layer, such as your eyes, lips, or face layer.

    <img src="https://prod.docsiteassets.roblox.com/assets/makeup/Procreate-ActiveLayer.jpg" width="50%" />

 1. With your makeup component layer active, navigate to the **Actions** menu > **Share** tab > **Share Textures - PNG** to save all of your makeup component's textures to a location on your device.

    <img src="https://prod.docsiteassets.roblox.com/assets/makeup/Procreate-ShareTextures.jpg" width="50%" />
    <img src="https://prod.docsiteassets.roblox.com/assets/makeup/Procreate-AllTextures.jpg" width="50%" />

 1. Delete all of the head, eyebrows, and eyelash textures.
    1. Open the location where you saved all of your makeup component's textures.
    1. Delete everything except for the following PBR textures:
       - `TransferTarget_FullHead_Mat-Color`
       - `TransferTarget_FullHead_Mat-Metallic`
       - `TransferTarget_FullHead_Mat-Roughness`
 1. Replace your makeup component's `TransferTarget_FullHead_Mat-Color` layer with a version that will export transparency in the output texture.
    1. Copy your active makeup component layer.
    1. Navigate to the **Gallery** > **Plus** icon > **Clipboard**. A new Procreate file displays with your makeup component layer.

       <img src="https://prod.docsiteassets.roblox.com/assets/makeup/Procreate-Clipboard.png" width="50%" />

    1. In the **Layers** pane, disable the **Background color** layer. Your makeup component displays without a background.

       <img src="https://prod.docsiteassets.roblox.com/assets/makeup/Procreate-HideBackground.png" width="50%" />

    1. With your makeup component layer active, navigate to the **Actions** menu > **Share** tab > **Share Image - PNG**.
    1. In the file browser, navigate to the location on your device with all of your makeup component's textures, then save/override the `TransferTarget_FullHead_Mat-Color` texture.
 1. Rename your makeup component's PBR textures appropriately so that you can easily reference each makeup component's PBR data when you reassign your textures in Blender or Maya. For example, if you are exporting texture maps for lips:
    - `Lips-Color`
    - `Lips-Metallic`
    - `Lips-Roughness`
 1. Repeat this process for every makeup component you want to import for your makeup look.

    <img src="https://prod.docsiteassets.roblox.com/assets/makeup/Procreate-Final.png" width="35%" />
Reassign the preset textures in a template head with your new textures.
Import the reference head with your new textures into Studio.
<center>Photoshop / GIMP texture images</center> <center> <img src="https://prod.docsiteassets.roblox.com/assets/makeup/resources/Photoshop-Realistic-Mesh-Thumbnail.png" width="100%" /> </center> <center> <img src="https://prod.docsiteassets.roblox.com/assets/makeup/resources/Photoshop-Realistic-Cage-Thumbnail.png" width="100%" /> </center> A comprehensive `.zip` folder with realistic texture images for use in Photoshop or your preferred image editor.<center>Substance Painter files</center> <center> <img src="https://prod.docsiteassets.roblox.com/assets/makeup/resources/Substance-Realistic-Mesh-Thumbnail.png" width="100%" /> </center> <center> <img src="https://prod.docsiteassets.roblox.com/assets/makeup/resources/Substance-Realistic-Cage-Thumbnail.png" width="100%" /> </center> A comprehensive `.zip` folder with realistic texture files for use in Substance Painter, an industry-standard PBR authoring software.<center>Procreate texture images</center> <center> <img src="https://prod.docsiteassets.roblox.com/assets/makeup/resources/Procreate-Realistic-Mesh-Thumbnail.png" width="100%" /> </center> <center> <img src="https://prod.docsiteassets.roblox.com/assets/makeup/resources/Procreate-Realistic-Cage-Thumbnail.png" width="100%" /> </center> A comprehensive `.zip` folder with realistic texture images for use in Procreate.<center>Photoshop / GIMP texture images</center> <center> <img src="https://prod.docsiteassets.roblox.com/assets/makeup/resources/Photoshop-Blocky-Mesh-Thumbnail.png" width="100%" /> </center> A comprehensive `.zip` folder with blocky texture images for use in Photoshop or your preferred image editor.<center>Substance Painter files</center> <center> <img src="https://prod.docsiteassets.roblox.com/assets/makeup/resources/Substance-Blocky-Mesh-Thumbnail.png" width="100%" /> </center> A comprehensive `.zip` folder with blocky texture files for use in Substance Painter, an industry-standard PBR authoring software.<center>Procreate texture images</center> <center> <img src="https://prod.docsiteassets.roblox.com/assets/makeup/resources/Procreate-Blocky-Mesh-Thumbnail.png" width="100%" /> </center> A comprehensive `.zip` folder with blocky texture images for use in Procreate.
Template heads
Each template head includes:
- Target head mesh object or head cage mesh object
- Eye, lip, and multiple face region mesh objects, fully linked to reference PBR textures
- Eyebrows and eyelash mesh objects
Note
The Blender and Maya templates also include a facial region reference .png file that you can use to reference how your makeup assets fit into the eye, lips, and face/cheek regions.


A comprehensive .zip folder of Blender assets, including multiple realistic reference heads pre-configured for testing in the Makeup test place or for authoring your own makeup.
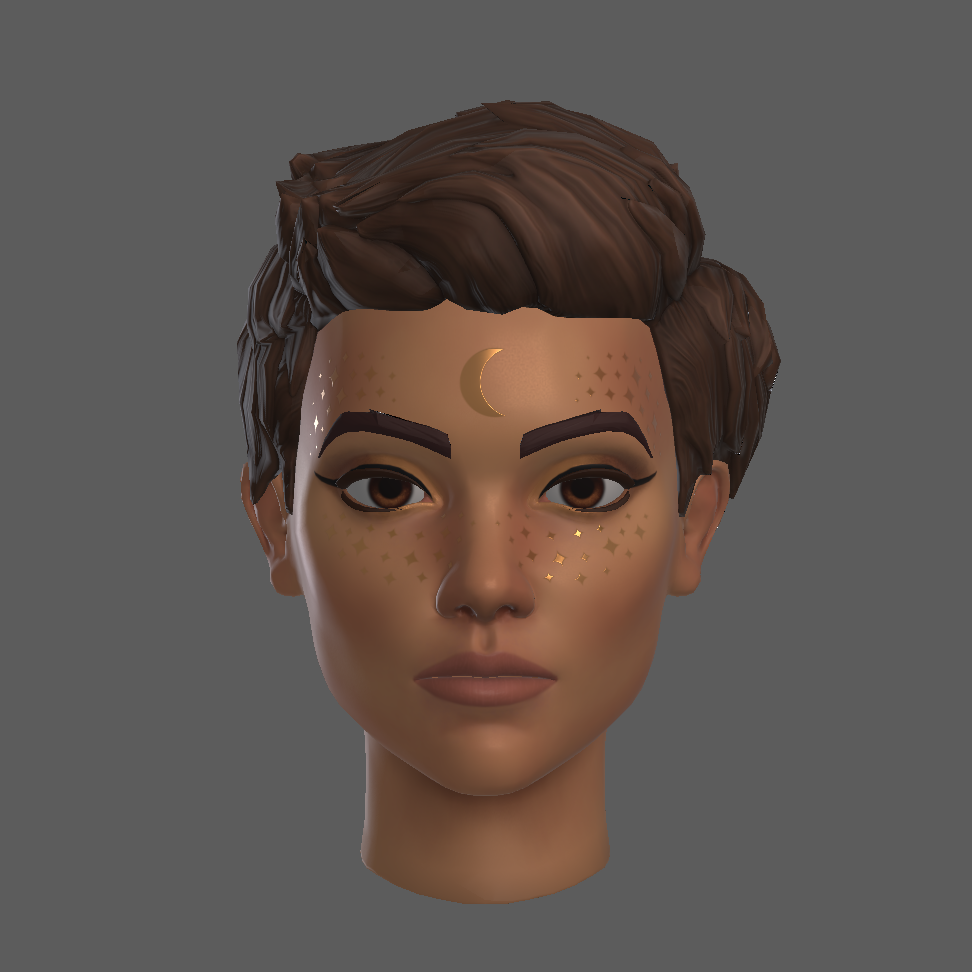

A comprehensive .zip folder of Maya assets, including multiple realistic reference heads pre-configured for testing in the Makeup test place or for authoring your own makeup.
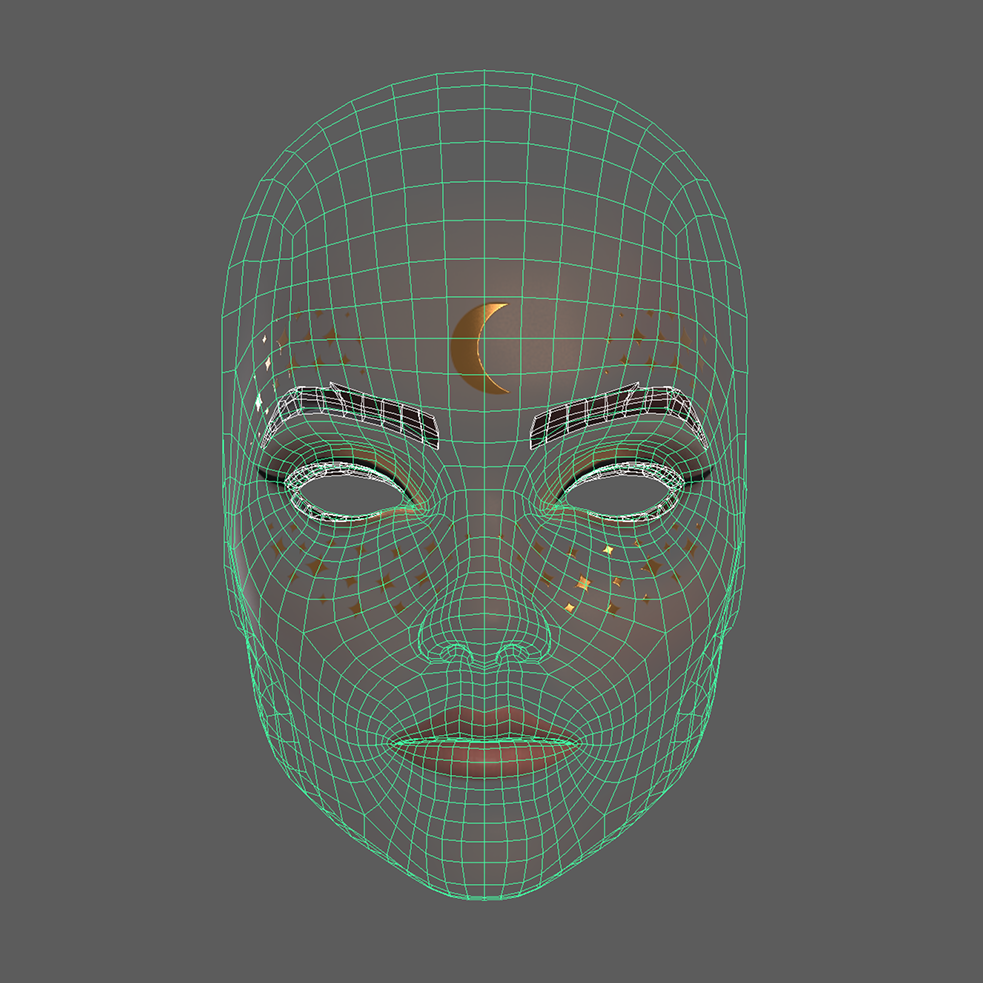

A comprehensive .zip folder of .fbx and .gltf assets, including realistic heads with various example makeup looks that are ready to be implemented into Studio for testing purposes.

A comprehensive .zip folder of Blender assets, including multiple blocky reference heads pre-configured for testing in the Makeup test place or for authoring your own makeup.
A comprehensive .zip folder of Maya assets, including multiple blocky reference heads pre-configured for testing in the Makeup test place or for authoring your own makeup.
A comprehensive .zip folder of .fbx and .gltf assets, including blocky heads with various example makeup looks that are ready to be implemented into Studio for testing purposes.
Reference game
    <center>Reference place file (download)</center>


      <center>
        <img src="https://prod.docsiteassets.roblox.com/assets/makeup/Makeup-Experience-Thumbnail.png" width="100%" />
      </center>


      At this time, you can only test makeup on the downloadable placefile.
      <br />
      In Github, select the download icon on the right-side to download the <code>MakeupBeta.zip</code> file.


    [Github link](https://github.com/Roblox/avatar/blob/main/Makeup/MakeupBeta.zip)
Creation process
Note
This process assumes that you are proficient in 3D modeling software, such as Blender or Maya, and that you understand how to update, replace, export, save, and alter materials within your modeling tool and any additional texturing software or plugins.
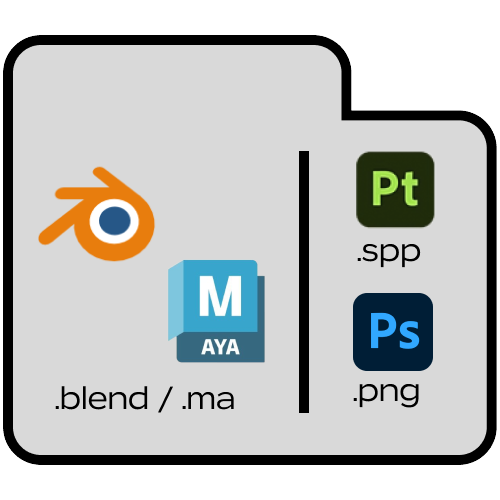 Download the 3D reference template head and texture templates applicable to your workflow.
 Modify the texture images in the tools of your choice.
 In Blender or Maya, replace the textures in the template with your new textures and export.
 While you can easily swap Decal objects in Studio to make a quick change to a character's makeup, the following instruction is best practice for implementing PBR-based textures into Roblox makeup at scale. This process requires:
- The Makeup test place and template files
- A 3D modeling tool such as Blender or Maya
- Any PBR texturing software, such as Substance Painter, Materialize, or plugins like Ucupaint (Blender).
As always with 3D art and creation workflows, there are many ways to achieve a specific goal, and the makeup and PBR publishing flow is no exception. It's recommended to try the workflow in this guide first, then adjust as necessary for your own creation requirements:
Download a reference template head and open it in the general modeling software of your choice.
Using your texturing tools or image editing software, modify the texture images associated with the different regions:
TransferTexture_Eyes,TransferTexture_Face, orTransferTexture_Lips.When you've created your new texture images, use Blender or Maya to reassign the existing file textures in the template. For more information, see Reassign textures.
Review Face caging best practices for guidance on how to adjust face cages so that your makeup displays correctly for your use case.
Export the entire template file as a
.fbxor.gltf. All 3D modeling export requirements apply, but there are a few makeup-specific settings you must configure:- If you are using Blender,
- In the export file browser window, navigate to the Include section, then enable the Custom Properties toggle for makeup UV data transfer purposes.
- In the Armature section, enable Only Deform Bones to ensure your export file includes skinning data for eyebrows and eyelashes.
- If you are using Blender,
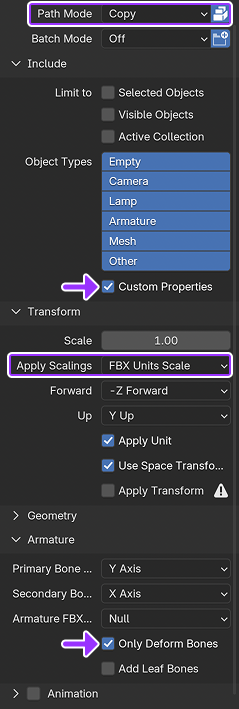 All necessary Blender export settings for makeup
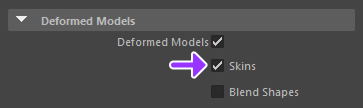
If you are using Maya, in the export file browser window, navigate to the Deformed Models section, then enable the Skins toggle to ensure your export file includes skinning data for eyebrows and eyelashes.
Import the template file into Studio. Studio automatically detects your mesh object names and associated textures, and generates
Decalobjects. Apply any makeup decals or eyebrow and eyelash accessories to characters in the test place by dropping makeup assets in the appropriate character's
MakeuporAccessoriesfolder. Click the Play button, then navigate to the character with new makeup assets to preview.