
Source: Roblox Creator Hub · CC BY 4.0 · View source · Code samples: MIT Imported 2026-10-03. Formatting adapted for this site.
On-screen UI containers
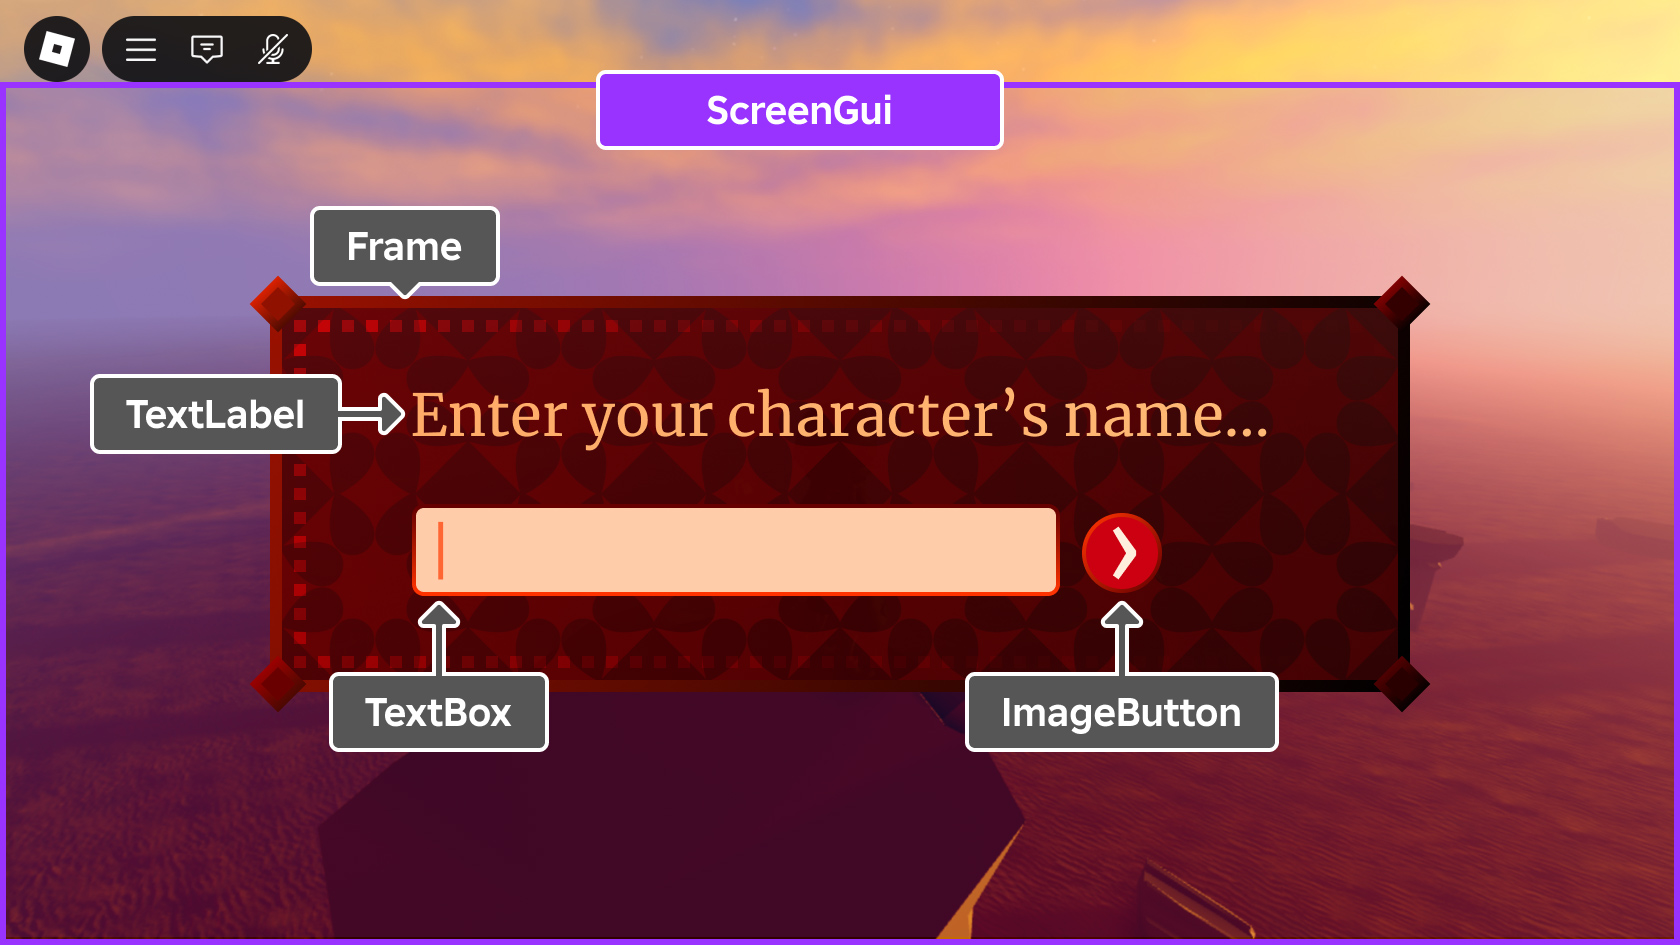
The ScreenGui container holds GuiObjects to display on a player's screen, including frames, labels, buttons, and more. All on‑screen UI objects and code are stored and changed on the client.
Note
For UI containers that hold GuiObjects that you want to display within the 3D world, such as on the face of a part, see In-game UI Containers.
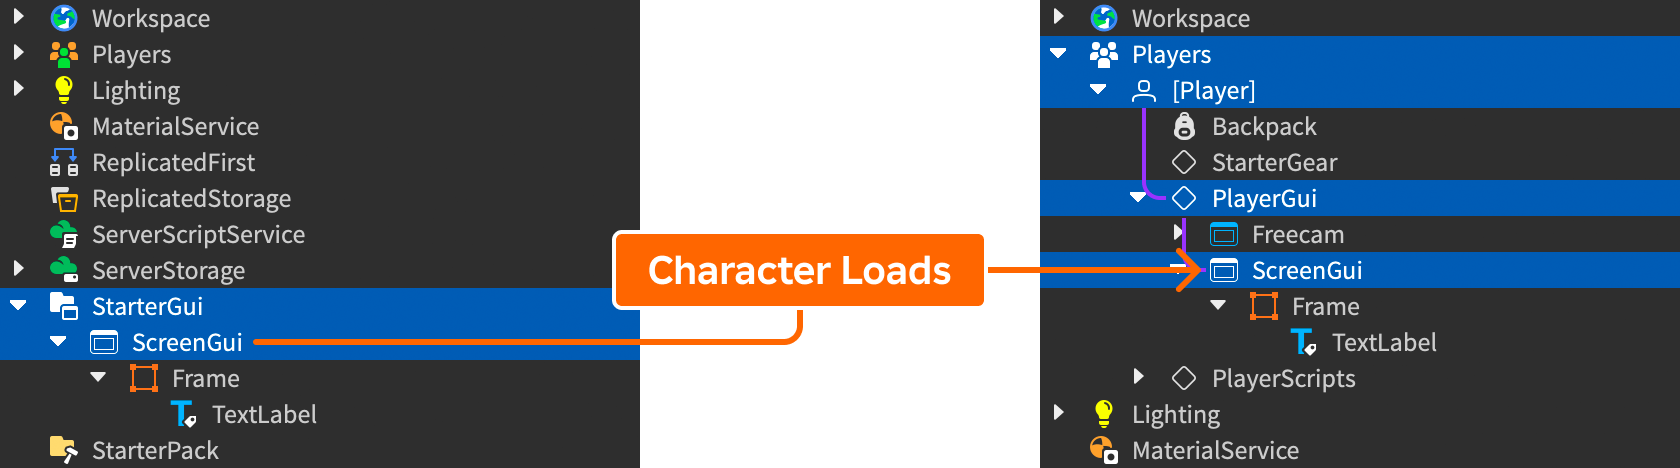
To display a ScreenGui and its child GuiObjects to every player who joins the game, place it inside the StarterGui container. When a player joins a game and their character first spawns, the ScreenGui and its contents clone into the PlayerGui container for that player, located within the Players container.
Note
By default, GuiObjects inside a ScreenGui within StarterGui appear as an overlay of the 3D viewport, simulating their appearance and position in a running game. To hide all such screen overlays, toggle off GUI overlay from the Visualization Options widget in the upper‑right corner of the 3D viewport.
Note
If Players.CharacterAutoLoads is disabled, the contents of StarterGui will not be cloned until Player:LoadCharacterAsync() is called.
As a game grows in scope, you may require multiple screen interfaces such as a title screen, settings menu, shop interface, and more. In such cases, you can place multiple unique ScreenGui containers inside StarterGui and toggle each container's Enabled property depending on whether it should be visible and active (while false, contents will not render, process user input, or update in response to changes).
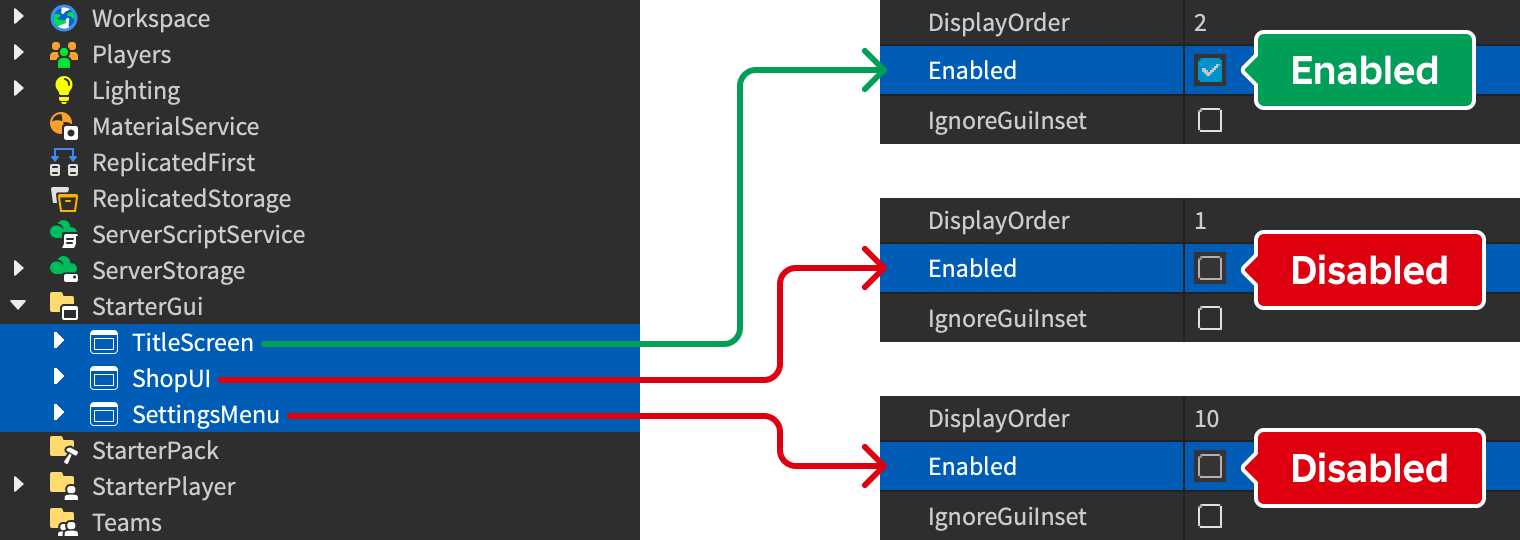
The Enabled property can be initially toggled through the Properties window and/or you can set it during playtime from a client‑side script by accessing the player's PlayerGui and setting it to true or false for the desired container(s).
Note
When using multiple ScreenGui interfaces, you can layer them by Z‑index through their DisplayOrder property. See Display Order for more information.
Container properties
The following properties let you customize the screen insets across multiple devices, the display order when using multiple screen containers, and more.
Screen insets
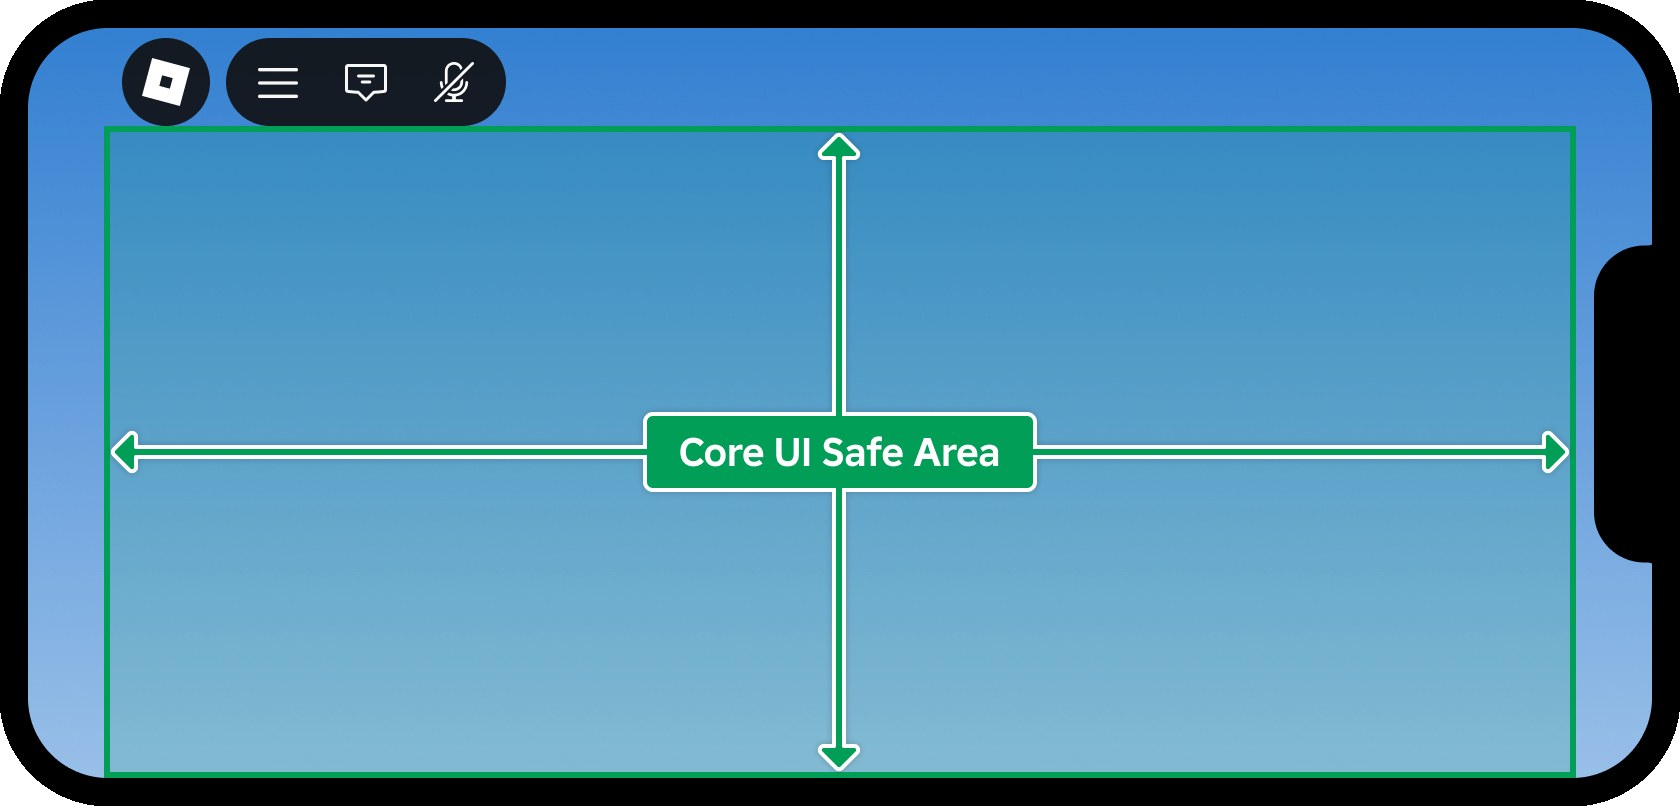
Modern phones take advantage of the entire screen but typically include notches, cutouts, and other elements that occupy screen space. Every Roblox game also includes the top bar controls for quick access to the main menu, chat, leaderboard, and more.
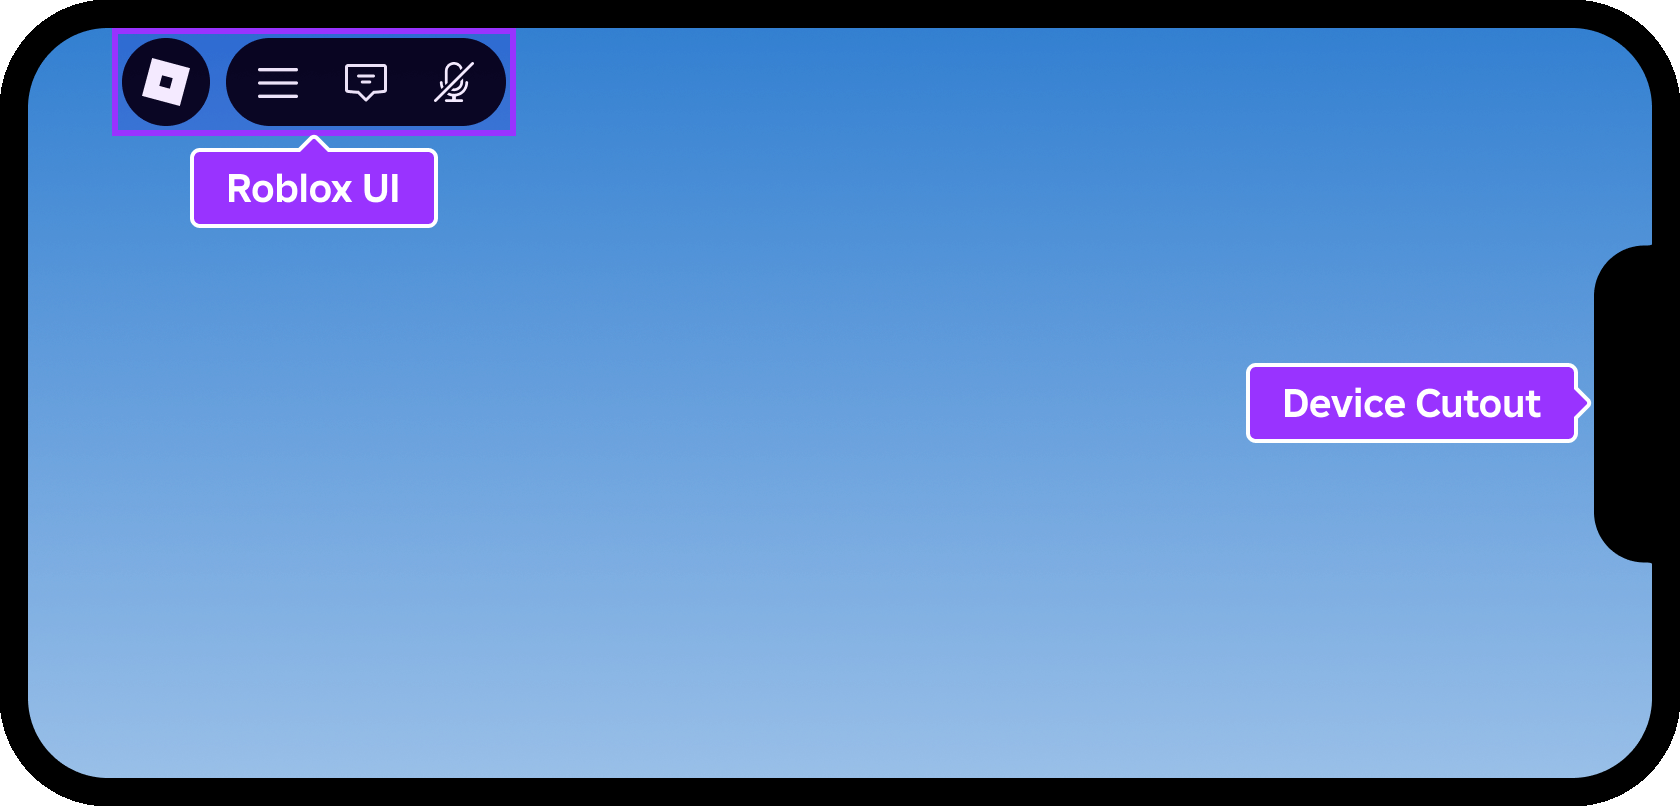
To ensure players can see and access all UI easily and without obstruction, Roblox provides the ScreenInsets property which controls the safe area insets for the contents of a ScreenGui.
CoreUISafeInsets
The default of CoreUISafeInsets keeps all descendant GuiObjects inside the core UI safe area, clear of the top bar buttons and other screen cutouts. This setting is recommended if the ScreenGui contains interactive UI elements.
DeviceSafeInsets
A setting of DeviceSafeInsets guarantees that no descendant GuiObjects are occluded by any device screen cutouts such as the camera notch, although no inset is added for Roblox core UI elements like the top bar buttons.

TopbarSafeInsets
A setting of TopbarSafeInsets keeps all descendant GuiObjects between the top bar controls and the right edge of the device safe area. The ScreenGui will then automatically flex in horizontal size based on the top bar's content.

None
No insets are added to the fullscreen area. This mode may result in UI that is obscured or completely hidden by device notches and cutouts, so you should only use it for a ScreenGui that contains non‑interactive content like background images.

Display order
When using multiple ScreenGui interfaces, you can layer them by Z‑index through their DisplayOrder property. For example, to display a modal settings menu on one ScreenGui in front of the game's main user interface on another ScreenGui, assign a higher DisplayOrder to the modal's than the underlying interface's.
Reset on spawn
The ResetOnSpawn boolean property determines if the ScreenGui resets (deletes itself and re‑clones into the player's PlayerGui) every time the player's character respawns.
| Condition | Resets |
|---|---|
| [`ResetOnSpawn`](/docs/screengui) is `true` (default). | |
| The [`ScreenGui`](/docs/screengui) is an **indirect** descendant of [`StarterGui`](/docs/startergui); for example it's placed inside a [`Folder`](/docs/folder) located within [`StarterGui`](/docs/startergui). | |
| [`ResetOnSpawn`](/docs/screengui) is `false` **and** the [`ScreenGui`](/docs/screengui) is a **direct** descendant of [`StarterGui`](/docs/startergui). |
Access player UI
As noted, parenting a ScreenGui to StarterGui clones it and its child GuiObjects into a player's PlayerGui container when they join the game and their character first spawns.
If you need to control a player's UI container during playtime, for example to show/hide a specific ScreenGui or any of its children, access it as follows from a LocalScript:
local Players = game:GetService("Players")

local player = Players.LocalPlayer
local playerGui = player.PlayerGui

local titleScreen = playerGui:WaitForChild("TitleScreen")
local settingsMenu = playerGui:WaitForChild("SettingsMenu")

titleScreen.Enabled = false  -- Hide title screen
settingsMenu.Enabled = true  -- Show settings menu
Disable default UI
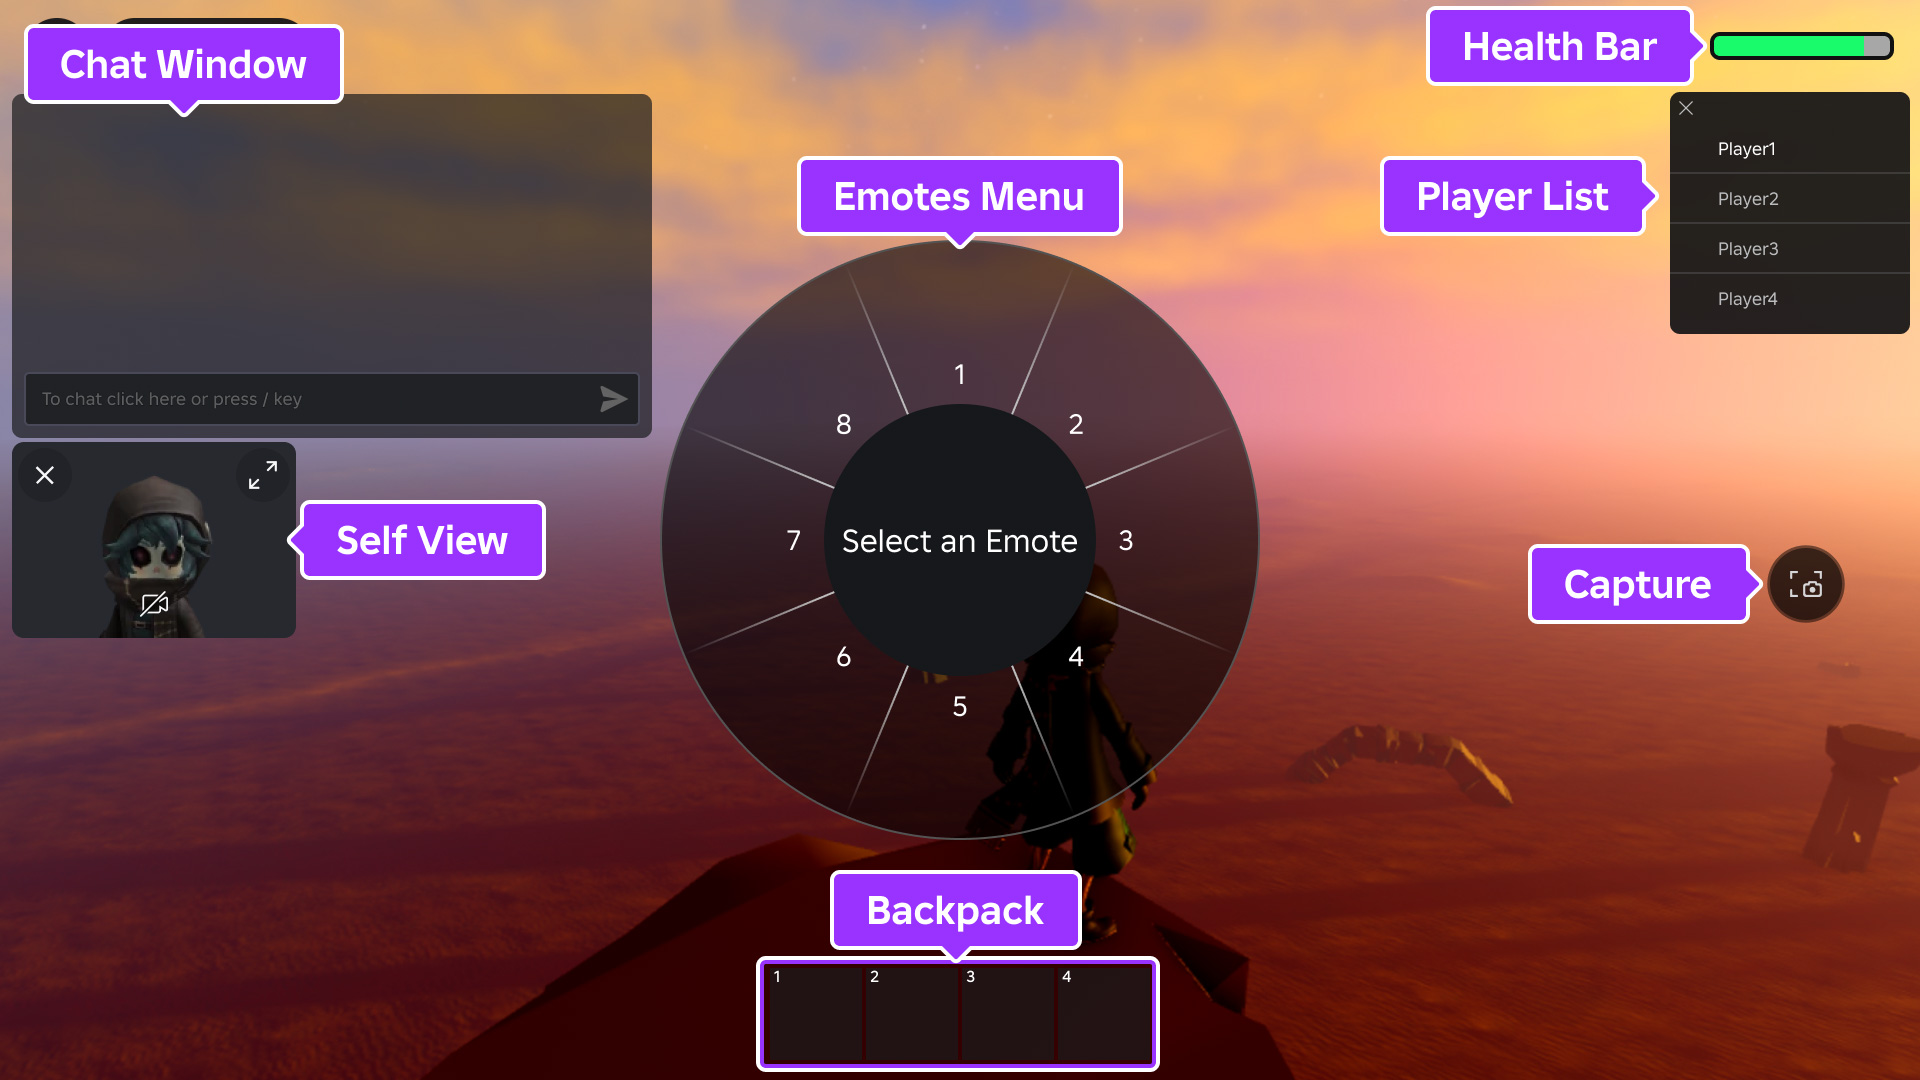
All Roblox games include several UI elements that are enabled by default. If you don't need any of these elements or if you want to replace them with your own creations, you can use the SetCoreGuiEnabled() method in a client‑side script with the associated CoreGuiType option.
| Default UI | Associated enum |
|---|---|
| Dynamically updated [`Players`](/docs/players) list, commonly used as a [leaderboard](/docs/roblox-players-leaderboards). | [`CoreGuiType.PlayerList`](/docs/enum-coreguitype#playerlist) |
| The character's [`Health`](/docs/humanoid#humanoid-health) bar. Does not appear if the character's [`Humanoid`](/docs/humanoid) is at full health. | [`CoreGuiType.Health`](/docs/enum-coreguitype#health) |
| The character's [`Backpack`](/docs/backpack) which contains [in-game tools](/docs/roblox-players-tools). Does not appear if there are no [`Tools`](/docs/tool) in the backpack. | [`CoreGuiType.Backpack`](/docs/enum-coreguitype#backpack) |
| The [text chat](/docs/roblox-chat-in-experience-text-chat) window. | [`CoreGuiType.Chat`](/docs/enum-coreguitype#chat) |
| Popup menu of character [emotes](/docs/roblox-characters-emotes). | [`CoreGuiType.EmotesMenu`](/docs/enum-coreguitype#emotesmenu) |
| A window displaying a player's perspective or view of their own character. Does not appear unless the player has enabled **Self View** from the Roblox menu. | [`CoreGuiType.SelfView`](/docs/enum-coreguitype#selfview) |
| A **capture screenshot** button along the right side of the screen. Does not appear unless the player has enabled **Captures** from the Roblox menu. | [`CoreGuiType.Captures`](/docs/enum-coreguitype#captures) |
| The **Avatar Switcher** allows users to change their platform avatar. | [`CoreGuiType.AvatarSwitcher`](/docs/enum-coreguitype#avatarswitcher) |
local StarterGui = game:GetService("StarterGui")

-- Disable default health bar and backpack
StarterGui:SetCoreGuiEnabled(Enum.CoreGuiType.Health, false)
StarterGui:SetCoreGuiEnabled(Enum.CoreGuiType.Backpack, false)
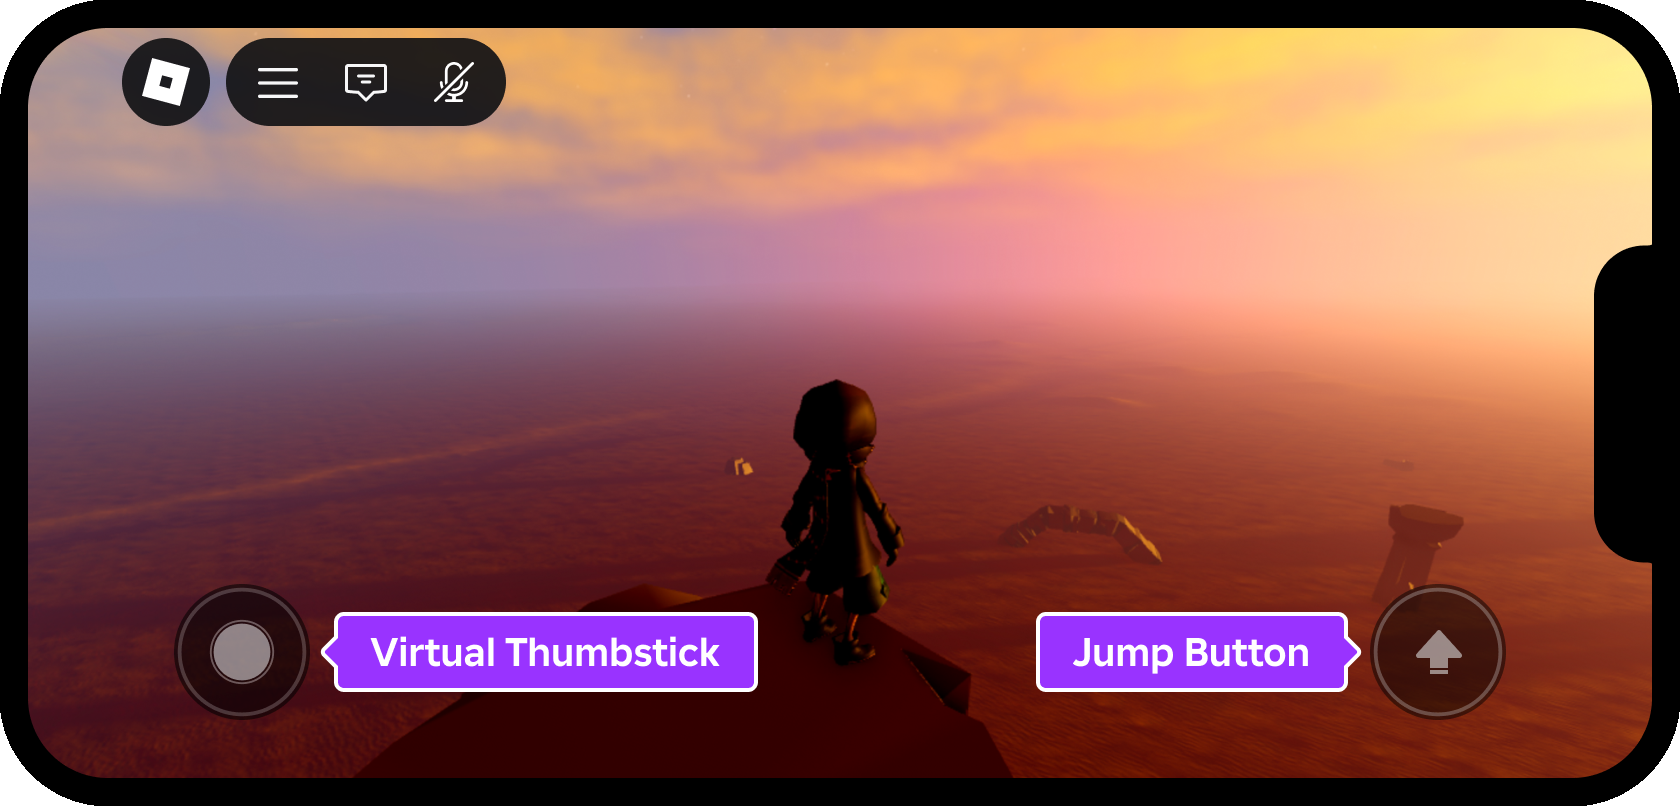
Additionally, devices with touch capabilities include a virtual thumbstick and a jump button by default. If desired, you can hide these elements by setting GuiService.TouchControlsEnabled to false in a client‑side script.
local GuiService = game:GetService("GuiService")

GuiService.TouchControlsEnabled = false