
Source: Roblox Creator Hub · CC BY 4.0 · View source · Code samples: MIT Imported 2026-10-03. Formatting adapted for this site.
Create and publish games and places
When you open Studio and create a new game, your project starts with a single place that players load into when they first join the game. Games can have one or multiple places that each contain all components for that portion of the game, including its specific environment, 3D objects, and scripts.
Note
Places are comparable to scenes in Unity or maps in Unreal Engine.
Many creators create additional places within a game to organize assets for different gameplay areas. For example, if you want players to join a dungeon before teleporting to either a vast desert or spooky island, you can organize the assets for each area into their own place.
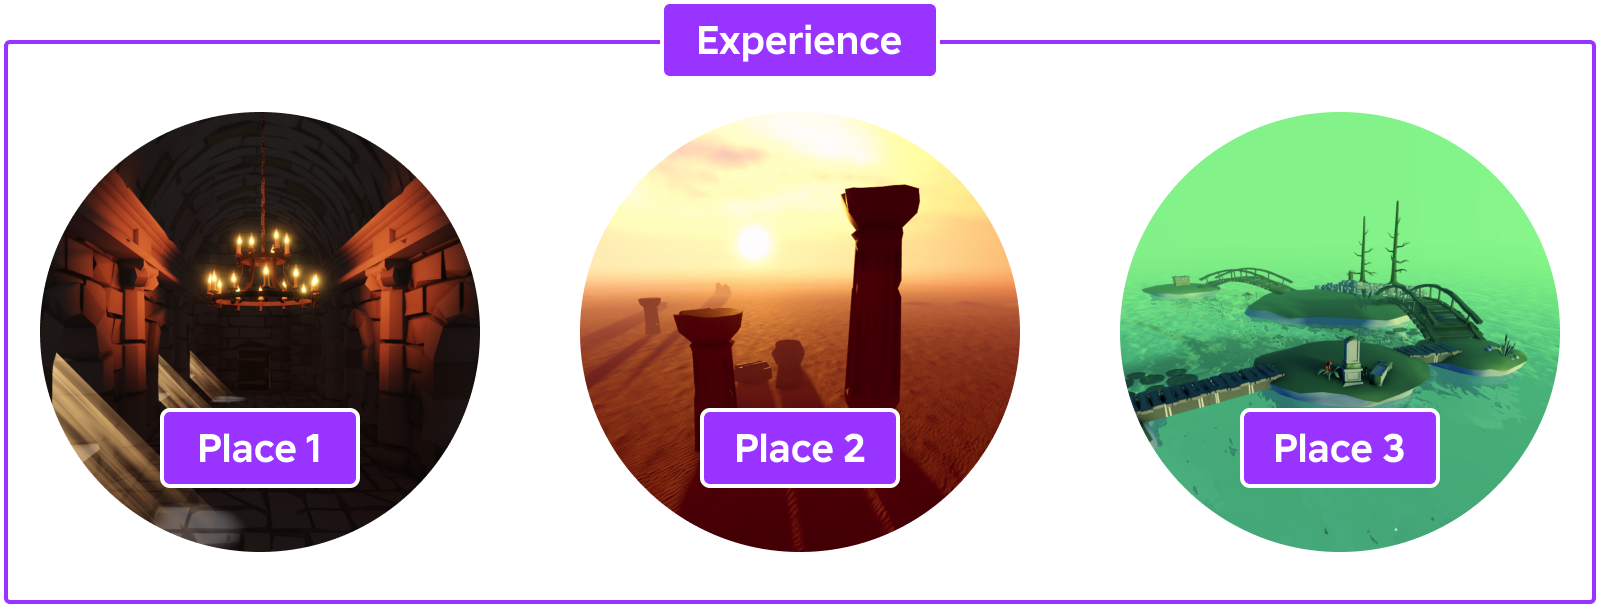
Every place is represented by a data model that stores and organizes:
- All objects that make up the 3D world of a place, such as its parts, meshes, terrain, and lighting.
- All objects that can control runtime behavior, such as scripts.
Understanding both the general structure of a place's data model, and how the Roblox engine uses it as the source of truth for a place's state is important for understanding where to store and configure different types of objects. For more information, see data model.
Create games
When you create a new game, it opens a start place that all players will load into when they join the game. The start place represents the overall game until you add additional places for different gameplay areas.
To create a game:
Open Studio.
In the Open a Template section, select a template with the objects you want to start working with for your game, such as:
- Baseplate — Starts with a
SpawnLocationand a baseplate. - Platformer — Starts with customizable platforms, coin pickups, and double-jump, dashing, rolling, and long jump character mechanics!
- Racing — Starts with a working racecar and customizable track objects.
- Baseplate — Starts with a
When Studio opens up the template, you now have Place1 that represents your overall game.
Publish games
When you publish a game, Roblox stores the data model of your start place as a .rblx file in the cloud. This is an important process because it connects the game to your account, allowing you to access and work on it from any computer.
By default, new games are set to private, meaning that they are only accessible to you as the creator, to users with Edit or Playtest access, and to group members with the appropriate roles and permissions. When you are ready to go live to everyone, you can release your game to the public and optionally mark it as a beta.
Note
When creating and collaborating on games as part of a group, the ability for group members to playtest/edit/publish games is, by default, dependent on their role permissions. However, group owners or members with sufficient permissions can adjust access on a per‑game level. For more info, see configure games.
To publish a game:
In the top-left corner of your computer, click File ⟩ Publish to Roblox.
In the Publish Experience window, fill in the following fields:
- Name / Description — The name of the game and a description that describes what a potential player should expect. See the metadata best practices dropdown at the bottom of this section for guidelines.
- Creator — The creator or group ( ) you'd like to attribute as the creator of the game.
- Devices — Each applicable device type that you want to support. The default options are practical for most new creators.
Click Create.
Metadata best practices
Your game's name and description create an important first impression and contribute to how easily players find your game through Roblox's dynamic discovery systems.
Game name
All games should adhere to the following best practices for naming:
Keep the name consistent – Renaming a game too often reduces the chances that players can find it using a previous name.
Avoid spamming – Frequent repetition of words or phrases may result in demotion of your game.
Note
Obby Madness
Note
Obby Madness OBBY OBBY OBBY OBBY OBBY
- Use decorations cautiously – Decorating the name with one or two well-placed emojis isn't harmful, but misplaced or excessive decorations can confuse players who quickly want to identify the game.
Note
🌍 Evolution Simulator 🌍
Note
🐒🐬🐊 Ev🌍luti🌍n Simulator 🌷🍀🌿
Game description
A well-written description promotes the genre and unique qualities of your game while also providing the best context for both players and Roblox's dynamic discovery systems.
- Summarize your game – Summarize what your game is about in the first sentence, as this is your opportunity to present the most accurate impression of its genre and content.
Note
Compete with racers around the world in some of the craziest courses you've ever seen!
Note
Fight off hordes of zombies with bats, guns, swords, and a bunch of weapons hidden throughout challenging mazes.
- Provide keywords – Include all keywords that may be relevant to your game. This makes it easier for players and Roblox to understand the themes and genres presented in your game.
Note
Do you enjoy being a sheriff? Join and rid our town of robbers and crooks! Arrest the bad guys, throw them in jail, and even have a guns-blazing shoot-out outside the saloon.
Note
Open your own restaurant, make delicious food, get lots of customers, and expand! Earn experience along the way and learn more recipes. If you love cooking and starting your own business, this is your chance to become a tycoon!
- Avoid spamming – Avoid repeating keywords or adding irrelevant keywords. This may result in demotion of your game.
Note
Play our fun granny obby game. Obby obby obby obby obby obby obby adopt me bloxburg arsenal ninja legends parkour tycoon battle disaster survival super hero simulator run jump gun rpg pokemon wild west space alien piggy baldi granny murder mystery prison life jail break mario zelda dungeon quest.
Note
Roblox supports places up to 100 MB (104,857,600 bytes). Beyond that limit, Save to Roblox and Publish to Roblox might fail. The data that Studio uploads to Roblox is slightly smaller than the .rbxl file format, so you can export your place to .rbxl to get a sense of its size.
Very few places, even the most complex ones, reach this limit, and when they do, it's often due to inefficiencies in the place. See Troubleshooting.
Create additional places
After you have published your game, you can add additional places for different gameplay areas. To create a new place within an existing game:
- Open an existing place file or create a new place from any Studio template.
- Select File ⟩ Publish to Roblox As….
- In the Publish Experience window, click the tile for the game you'd like to add the place to.
- Select Add as a new place, then click Create.
Whether you choose to have a single, large place or many smaller places is mostly personal preference. For more information, see design for performance.
Change start place
The start place of a game cannot be instantly swapped with another place, but you can overwrite the current start place.
To change the start place:
Save your current start place to a .rbxl file or to a new place within the game. 2. Go to the Creator Dashboard and select the game with the start place that you want to change. 3. Go to Configure ⟩ Places. 4. Click Edit in Studio for the intended new start place. Studio opens and loads that specific place.

- In the top-left corner of Studio, go to File ⟩ Publish to Roblox As….
Note
Do not select Publish to Roblox as this would publish the place over itself.
Click the tile for the same game, then choose the current start place. Click Overwrite.

If the game is live, it's recommended that you restart its servers.
Make game public
By default, new games are set to private, meaning they are only accessible to you and your creator team who have Edit permissions (see manage collaborators).
To make your game publicly available to anyone outside of the creator team, you have to meet the publishing requirements below.
Note
You can make up to 5 private games that have never been public before public per day. This limit resets daily. Making an existing public game private and then public again does not count toward this limit.
Audience
A game's target audience can be set through its Audience setting:
In the Creator Dashboard, select your game.
Navigate to Configure ⟩ Settings.
Under Audience, choose from the options below:
 <table>
 <thead>
     <tr>
         <th>Audience</th>
         <th>Description</th>
     </tr>
 </thead>
 <tbody>
     <tr>
         <td>**Private**</td>
         <td>Available only to users who have **Edit** permissions for the game.</td>
     </tr>
     <tr>
         <td>**Limited**</td>
 <td>
 Available only to those who are part of the selected category of users. Not discoverable to the general public on Roblox.
 - **Playtesters** — Available to users who have **playtest** permissions for the game.
 - **Friends** — Available to the game owner's friends. This option only appears for [user‑owned](/docs/roblox-projects-collaboration#user-owned-games) games.
 - **Community Members** — Available only to group members. This option only appears for [group‑owned](/docs/roblox-projects-collaboration#group-owned-games) games.
 </td>
     </tr>
     <tr>
         <td>**Public**</td>
         <td>Available and discoverable to the general public on Roblox.</td>
     </tr>
 </tbody>
 </table>
For Public games, you can choose Exclude from Recommendations to omit the game from the Recommended For You category on Roblox. The game is still public, but has more limited reach and exposure. To widen your audience while still excluded from recommendations, create an ad campaign as outlined in Ads Manager. If you enable sponsored ads, the game's analytics charts might show some users from Recommended For You.
- Click Save Changes.
Publishing requirements
Publishing requirements depend on the target audience and apply to all publish actions:
- Publishing a new game.
- Updating an existing public game (publishing a new version of a place).
- Publishing to a different game via Publish to Roblox As.
- Setting your audience to Limited (any option under Limited) or changing it from Public to Private.
Private games
A game published as Private is only available to the owner or users with Edit permissions.
Those with playtest permissions can't play private games. To enable their access, make sure you meet the requirements for Public games and then set the audience to Limited ⟩ Playtesters.
Public/Limited games
Publishing to a Public audience or Limited audience (playtesters, friends, or community members) has various requirements.
To reach 16+ and Trusted Friends:
- Have an account that is in good standing and at least 2 days old.
- Complete an age check through facial age estimation or government ID.
- Complete the content maturity & compliance questionnaire.
To reach all ages including Roblox Kids and Select, you must meet all of the previous requirements plus:
- Verify your account through facial age estimation if you are under 18 years old, or through government ID if you are 18 years old or older.
- Enable 2FA on your Roblox account.
- Meet one of the following:
- Maintain an active Roblox Plus or Roblox Premium subscription for 2 consecutive months.
- Pay a one-time, refundable fee.
- Game must pass the evaluation process for Kids and Select accounts.
Optional fees
If you do not have a Roblox Plus or Roblox Premium subscription for 2 consecutive months and you want to publish a game to users of all ages, you have the option to pay either a publishing or expedited review fee.
Publishing fee
The publishing fee is a one-time, refundable fee of 1,000 Robux per game that allows you to publish and expand the reach of your game to users of all ages. This fee is intended to make it expensive and logistically difficult for bad actors to create large numbers of accounts and flood the platform with spam.
If your game maintains 25 highly engaged players for 60 days without moderation, you will receive a refund of the publishing fee. However, if your game is permanently moderated or taken down for not meeting Roblox's Community Standards within the 60-day period, the fee will not be refunded.
To pay the publishing fee:
- In the Creator Hub, select the game you want to release to users of all ages.
- In the left-hand navigation, navigate to Audience > Reach.
- Under Experience reach, navigate to the Refundable publishing fee section, then click the blue Pay button. A pop-up dialog displays.
- Click the Pay 1,000 button to confirm your payment.
Expedited review fee
The expedited review fee is a one-time, refundable fee of 50,000 Robux per game that allows you to accelerate the safety and compliance reviews required to publish your game to users of all ages. This fee is intended to provide launch flexibility and financial accountability for qualified creators who haven't yet met the highly engaged age-checked player requirement for Kids and Select accounts.
Note
While the expedited review fee accelerates safety and compliance reviews for creators planning a timed launch or running an off-platform campaign and need to know exactly when their game will be ready for all ages, all games must continue to meet the same standards as other Roblox Kids and Select games.
After 90 days, you can request a refund. As long as your game remains in good standing and maintains 25 highly engaged players, you can withdraw your fee and maintain Roblox Kids and Select eligibility. If your game hasn't hit those organic milestones yet, you can leave the fee in place to maintain your eligibility for Kids and Select audiences. However, if your game is permanently moderated or taken down for not meeting Roblox's Community Standards, the fee will not be refunded.
To pay the expedited review fee:
- In the Creator Hub, select the game you want to expedite for a safety review.
- In the left-hand navigation, navigate to Audience > Reach.
- Under Experience reach, navigate to the blue alert, then click the gray Pay button. A pop-up dialog displays.
- Click the Pay 50,000 button to confirm your payment.
Note
If a minor violation is found during the 48-hour review, you must make the appropriate adjustments to your game, then resubmit. The 48-hour clock restarts from the point of resubmission.