Source: Roblox Creator Hub · CC BY 4.0 · View source · Code samples: MIT Imported 2026-10-03. Formatting adapted for this site.
Reassign textures
To import custom makeup textures, use Blender or Maya to reassign the existing textures on the reference template head to your custom texture images. After replacing the textures, export the entire head model, then import it into Studio.
Note
The following information is specific to applying makeup textures to Roblox's template heads that already have PBR texture nodes assigned. For information on assigning textures from scratch, see Assign textures in Blender and Maya.
Blender
Note
The video presenter opts to clear all existing image links by navigating to File > External Data > Unpack Resources and selecting Remove Pack. This is a method to unassign all images instead of individually unassigning textures like step #5 in the following instructions.
To reassign textures in Blender:
Unzip and open the Blender reference head file.
Switch to the Shading tab.
In the Outliner, expand the Makeup collection and select the face region you intend to replace textures for.
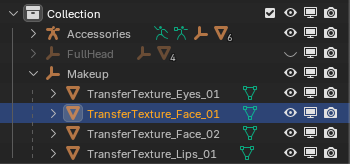
In the node graph, select the texture image you intend to update, such as
Neutral_FaceDecal_ALB.pngClick the X to remove the existing image assignment.

Click the folder icon to browse for a new image.

Repeat for all PBR textures that you intend to replace.
Delete any texture nodes you are not using.
Verify your final node graph looks similar to the original reference with nothing unintentionally missing.

Note
After replacing your PBR textures, export the entire template file as a .fbx or .gltf. All 3D modeling export requirements apply, but there are a few makeup-specific settings you must configure:
- In the export file browser window, navigate to the Include section, then enable the Custom Properties toggle for makeup UV data transfer data purposes.
- In the Armature section, enable Only Deform Bones to ensure your export file includes skinning data for eyebrows and eyelashes.
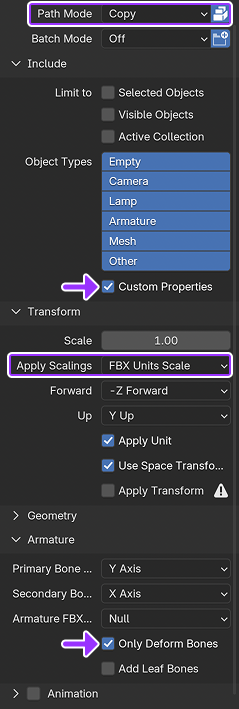 All necessary Blender export settings for makeup
Maya
To reassign textures in Blender:
Unzip and open the Maya reference head file.
In the Status Line near the top of the default layout, click on the Hypershade icon.

Move your mouse over the material's texture you intend to replace.
Click and hold right mouse-click and drag the selector to Graph Network.
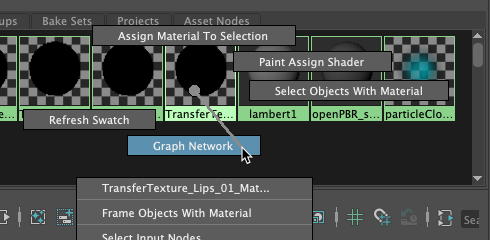
In the newly displayed node graph, click on the Texture Node you intend to replace, such as
Neutral_Eyes_ALB.png.In the right Property Editor, navigate to Image Name and click the folder icon. A file browser displays.

- Select the texture image file you want to use as a replacement.
- Repeat for all PBR textures that you intend to replace.
- Delete any texture nodes you are not using.
- Verify your final node graph looks similar to the original reference with nothing unintentionally missing.

Note
After replacing your PBR textures, export the entire template file as a .fbx or .gltf. All 3D modeling export requirements apply, but there are a few makeup-specific settings you must configure:
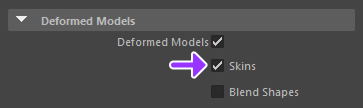
In the export file browser window, navigate to the Deformed Models section.
Enable the Skins toggle to ensure your export file includes skinning data for eyebrows and eyelashes.