
Source: Roblox Creator Hub · CC BY 4.0 · View source · Code samples: MIT Imported 2026-10-03. Formatting adapted for this site.
Create HUD meters
A HUD or Heads-Up Display is a set of UI elements that are always visible or accessible during gameplay, such as score displays, health meters, and menu buttons. Including a HUD is essential for most games because it displays information that helps players to be successful in their gameplay objectives.
A common HUD element is a health meter with an icon on the left which can be adapted into a timer bar, progress bar, or similar.
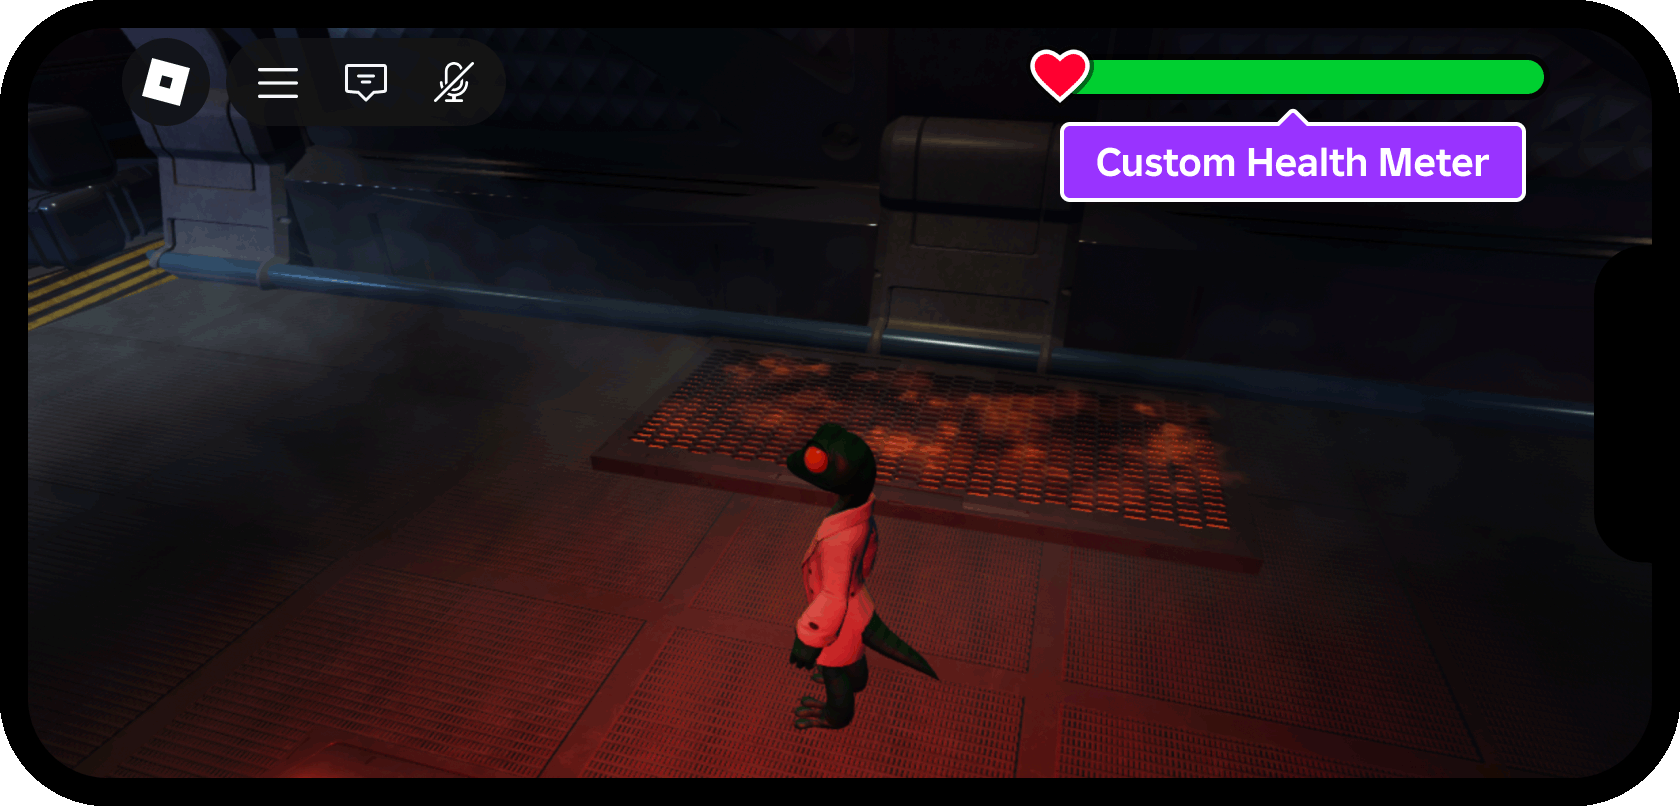
Using Hazardous Space Station as a starting place and UI Fundamentals - HUD Meter as a finished reference place, this tutorial demonstrates:
- Setup and use of the Device Emulator to test your design on multiple emulated screens.
- Usage of
StarterGuias both a design and storage container. - How to position/size UI elements around built‑in Roblox controls and device notches/islands, such as the camera notch on modern phones.
- How to replace the default Roblox health meter with your own meter and hook it up to the character's health level.
- How to animate the center portion of the health meter and set its color between five color gradient keypoints (red, orange, yellow, lime, green).
Enable the Device Emulator
Roblox is inherently cross‑platform, as players can discover and join games on their phone or tablet, then later continue where they left off on their PC or console. Mobile devices (phones and tablets) have the least amount of screen space, so it's important that your UI elements fit on smaller screens and that they're clearly visible to players.
The best way to test UI designs across platforms is Studio's Device Emulator. This tool provides a preset selection of devices and allows you to add your own custom presets.
Open the Hazardous Space Station template in Studio.
From Studio's Test menu, toggle on Device Emulator.
From the bar directly above the main viewport, select a phone emulation such as iPhone X or Samsung Galaxy A51. Then, set the view size to Fit to Window to utilize the maximum space in Studio.

Create a screen container
A ScreenGui container holds UI objects (GuiObjects) to display on a player's screen (in this tutorial, the entirety of the health meter). To display a ScreenGui and its child objects to every player who joins the game, place it inside the StarterGui container. When a player joins and their character first spawns, the ScreenGui and its contents clone into the PlayerGui container for that player, located within the Players container.
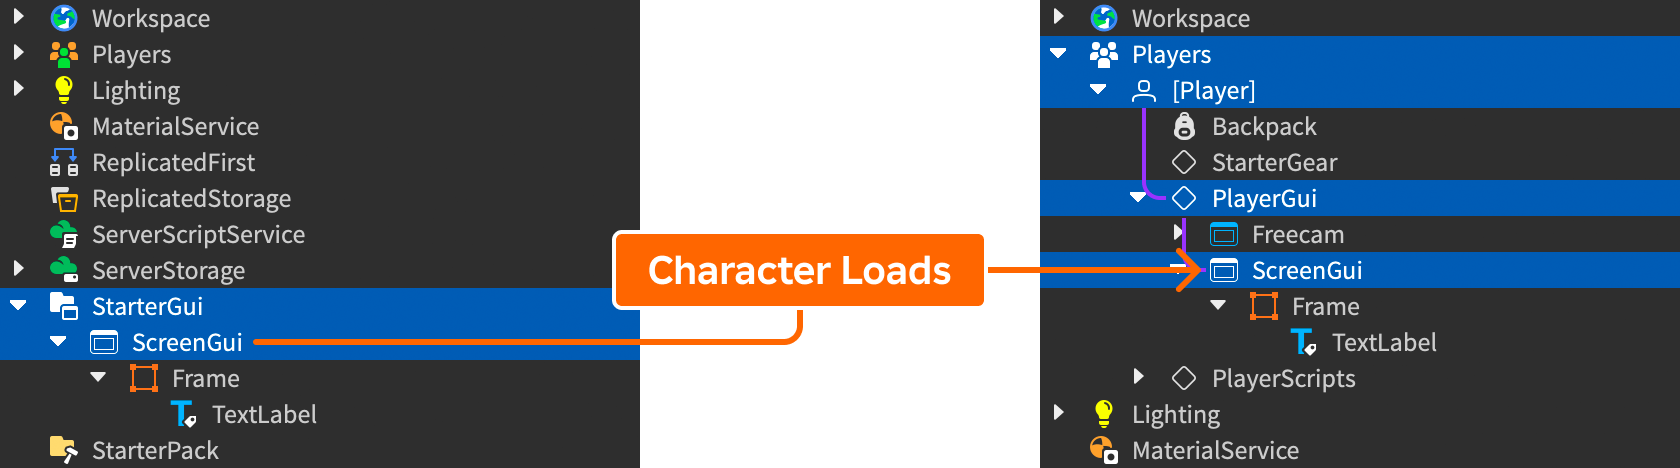
To insert an empty ScreenGui:
In the Explorer window, locate the
StarterGuicontainer.
Hover over the container, click the ⊕ button, and insert a
ScreenGui.
Rename the new container HUDContainer to reflect its purpose.

Utilize safe areas
Modern phones take advantage of the entire screen but typically include notches, cutouts, and other elements that occupy screen space. Every Roblox game also includes the top bar controls for quick access to the main menu, chat, leaderboard, and more.
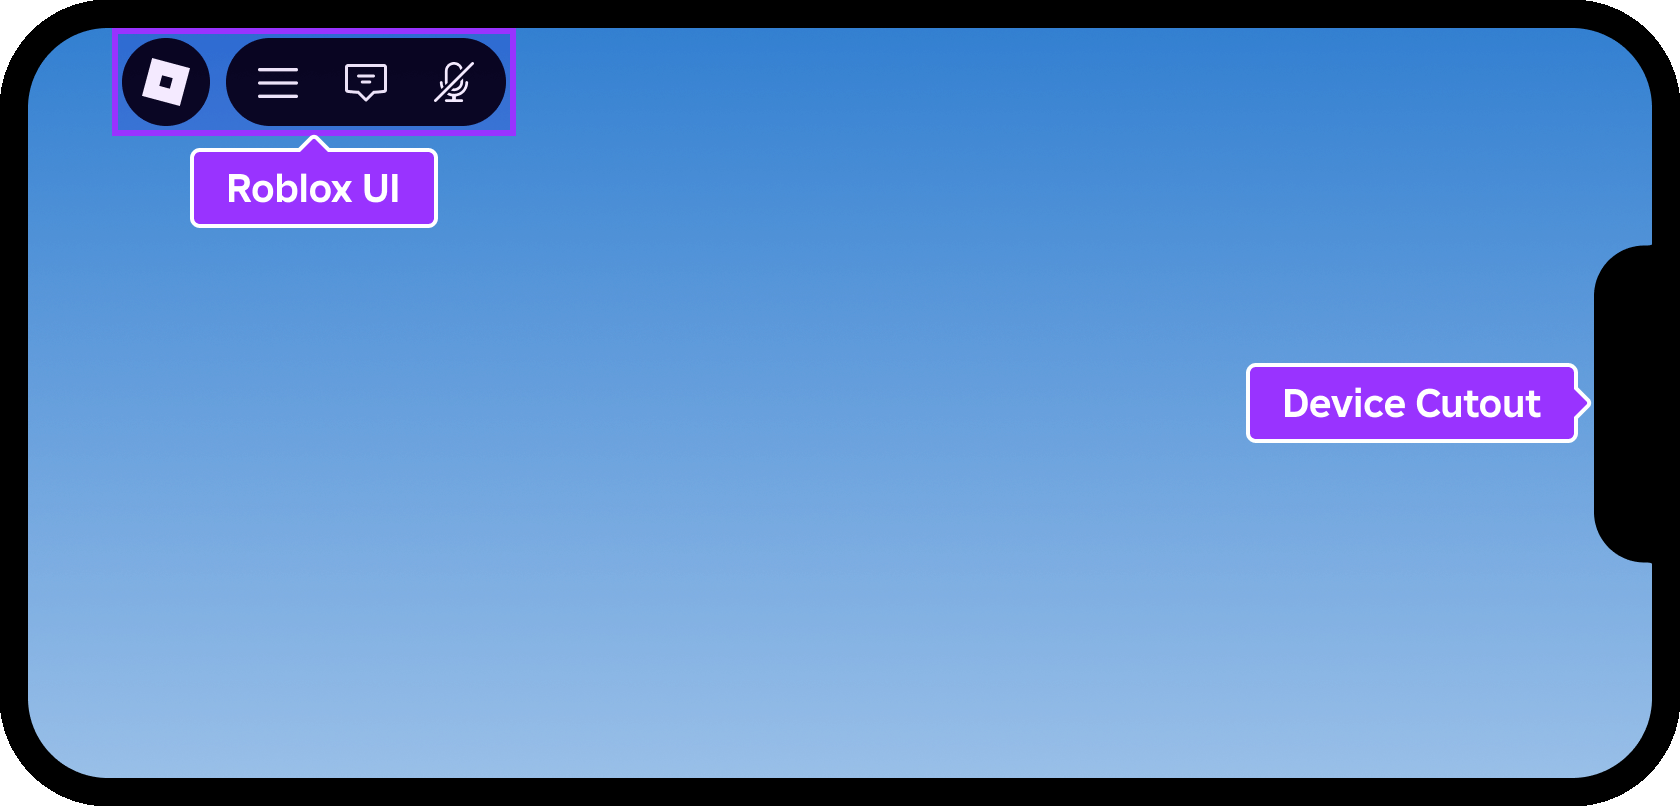
To ensure players can see and access all UI without obstruction, Roblox provides the ScreenInsets property which controls the safe area insets for the contents of a ScreenGui. Every UI object that you position inside a ScreenGui is relative to the inset bounds.
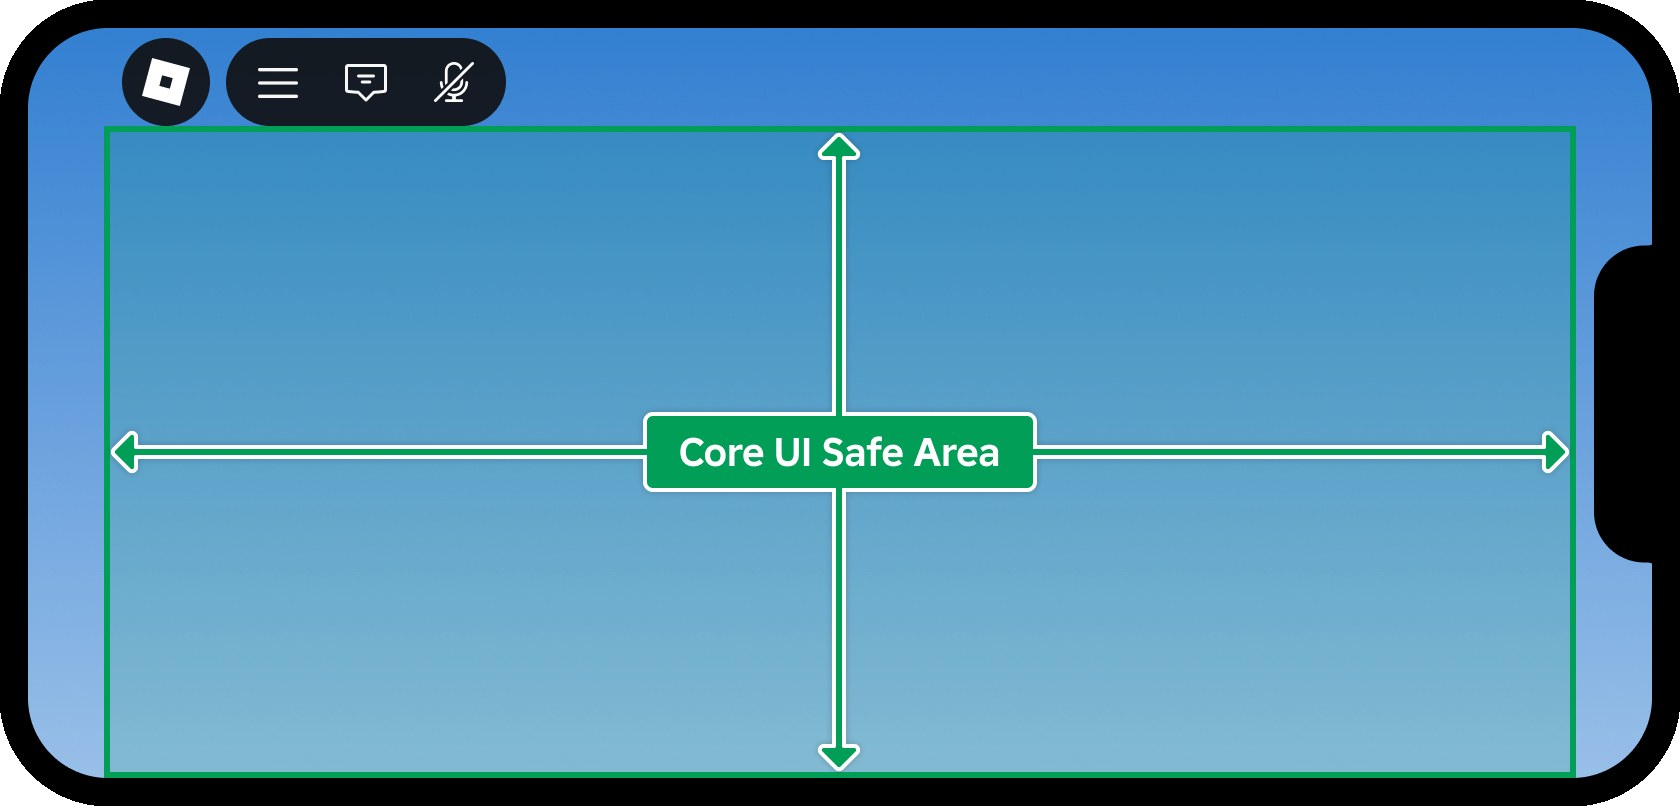
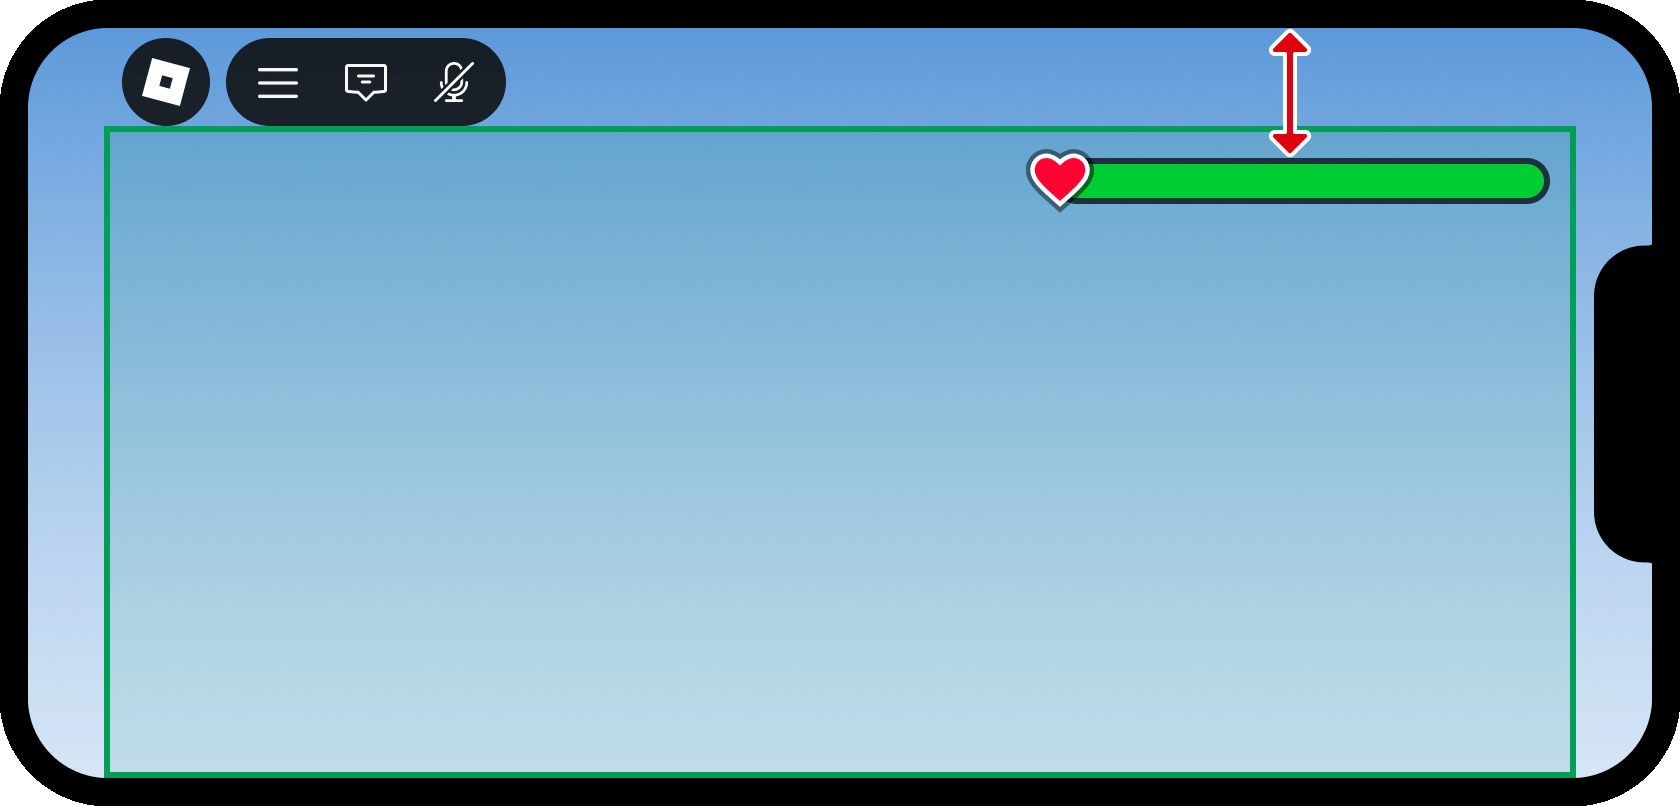
While the default of CoreUISafeInsets ensures all UI objects remain clear of Roblox UI and device cutouts, DeviceSafeInsets can be a better option to utilize limited screen space, as illustrated below.
CoreUISafeInsets
Note
CoreUISafeInsets keeps the meter clear of all obstructions, but it adds a large gap between the meter and the physical top edge of the screen.
DeviceSafeInsets
Note
DeviceSafeInsets tucks the meter against the physical top edge of the screen, and the meter's right alignment keeps it clear of the Roblox UI.

In the Explorer window, select HUDContainer.
In the Properties window, set the
ScreenInsetsproperty toDeviceSafeInsets.
Set edge padding
With ScreenInsets set to DeviceSafeInsets, content can now extend directly up to the physical top edge of the screen. However, a small amount of padding can help push the health meter (and other objects inside the container) slightly away from the screen edges for a cleaner appearance and to prevent them from being clipped.
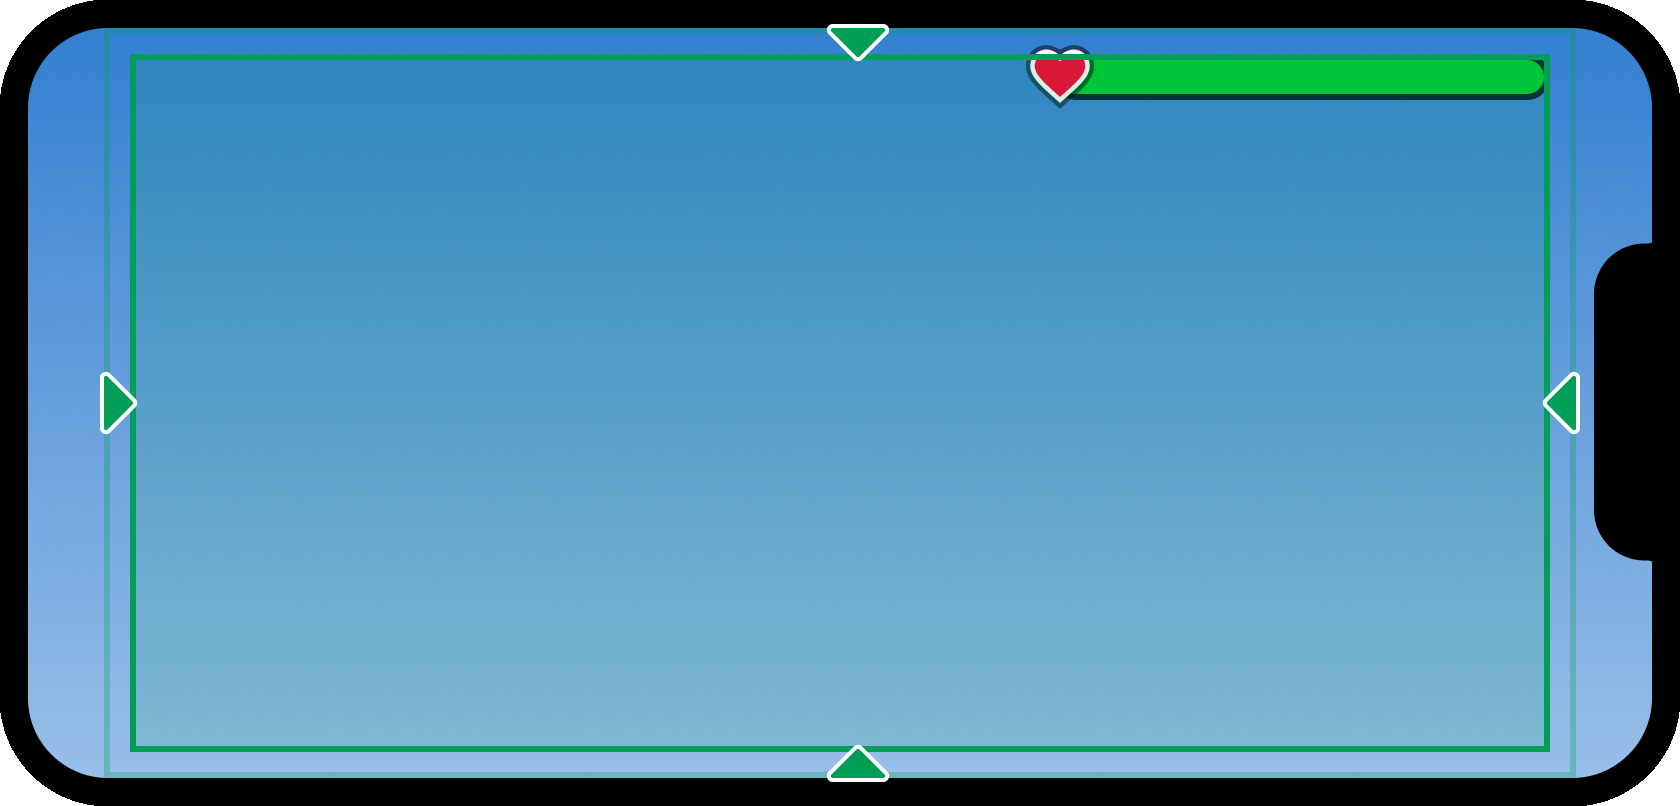
One way to apply padding to a UI container is through the insertion of a UIPadding modifier:
Insert a
UIPaddingmodifier into HUDContainer.
With the new
UIPaddingobject selected, enter a value of0, 16for all edges of the container (PaddingBottom,PaddingLeft,PaddingRight,PaddingTop). This applies padding of 16 pixels all around the container, regardless of the screen's resolution.
Construct the health meter
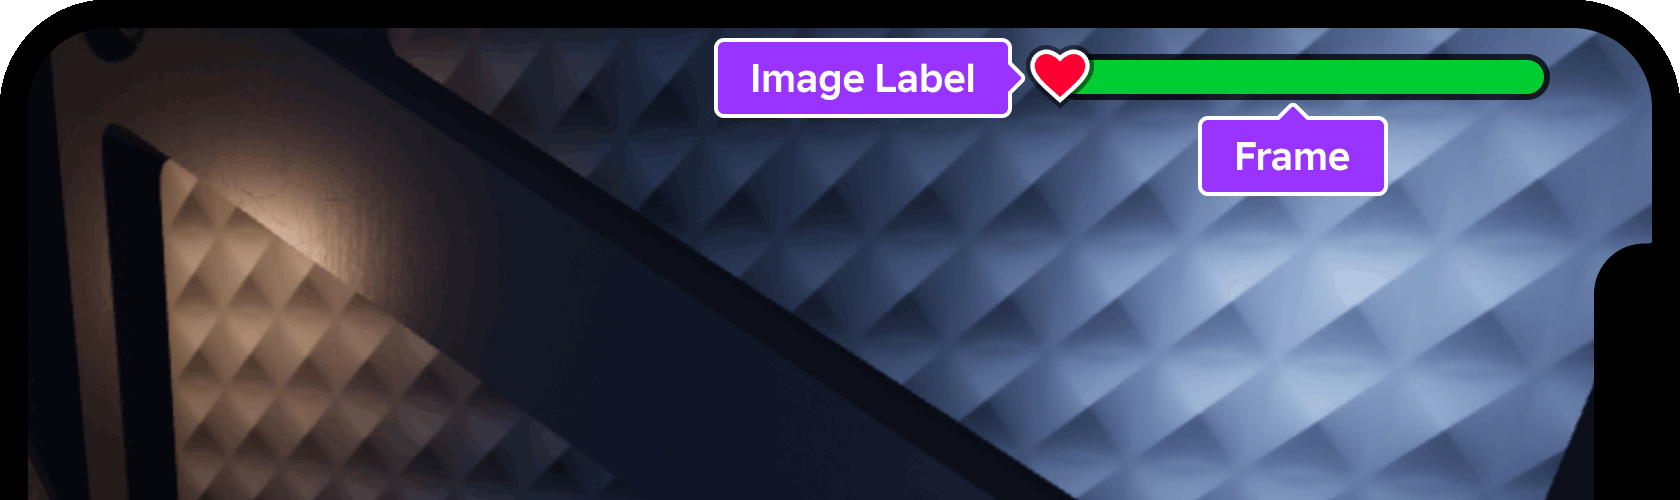
With the screen container configured, you can begin constructing the health meter using Roblox UI objects such as frames and an image label.
Create the parent frame
Similar to design applications like Figma and Photoshop, a Frame in Roblox serves as a container for other UI objects. For this tutorial, the entire health meter will be contained in a single parent frame, making it simple to reposition across various HUD layouts.
Insert a
Frameinto HUDContainer. The new frame appears in the upper-left corner as an empty white square.
Note
If the new frame doesn't appear in the viewport, make sure you've toggled on GUI overlay from the Visualization Options widget in the upper‑right corner of the 3D viewport.
Rename the new frame instance to MeterBar.

Position the frame
In Roblox, the position of a UI object is represented by a UDim2 coordinate set containing Scale and Offset values for both the X and Y axes:
Scalevalues represent a percentage of the container's size along the corresponding axis, additive of anyOffsetvalues.Offsetvalues represent how many pixels to shift the object on the corresponding axis, additive of anyScalevalues.
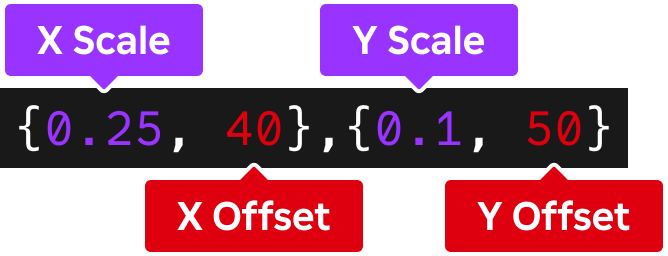
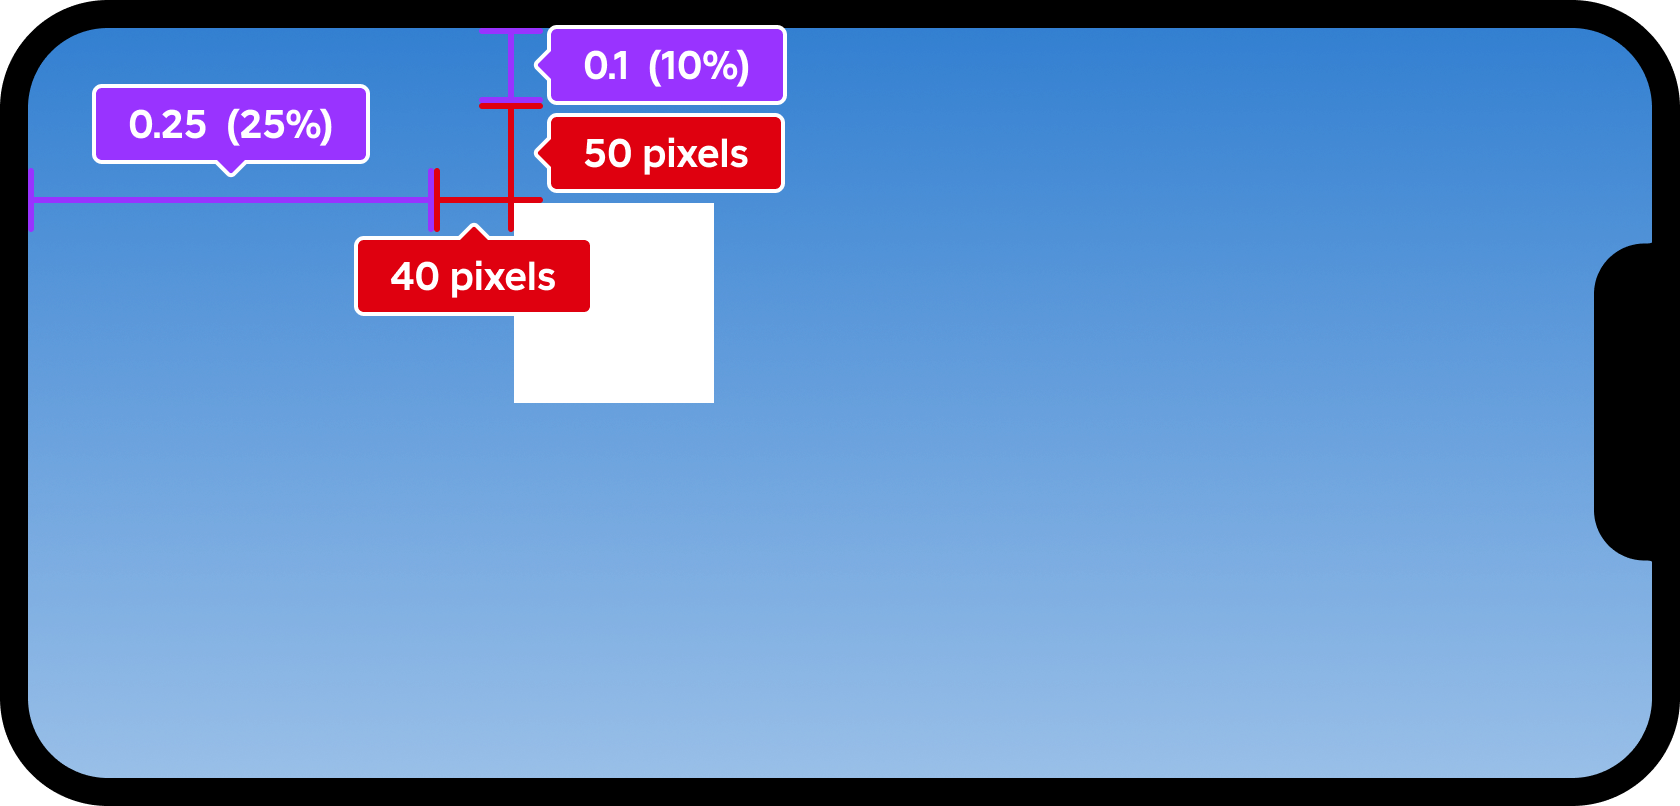
To position a UI object in the upper-right corner of the screen container, Scale is the best approach because an X value of 1 (100%) represents the right edge of the container, regardless of the screen's physical pixel size. Similarly, a Y scale value of 0 (0%) represents the top edge of the container.
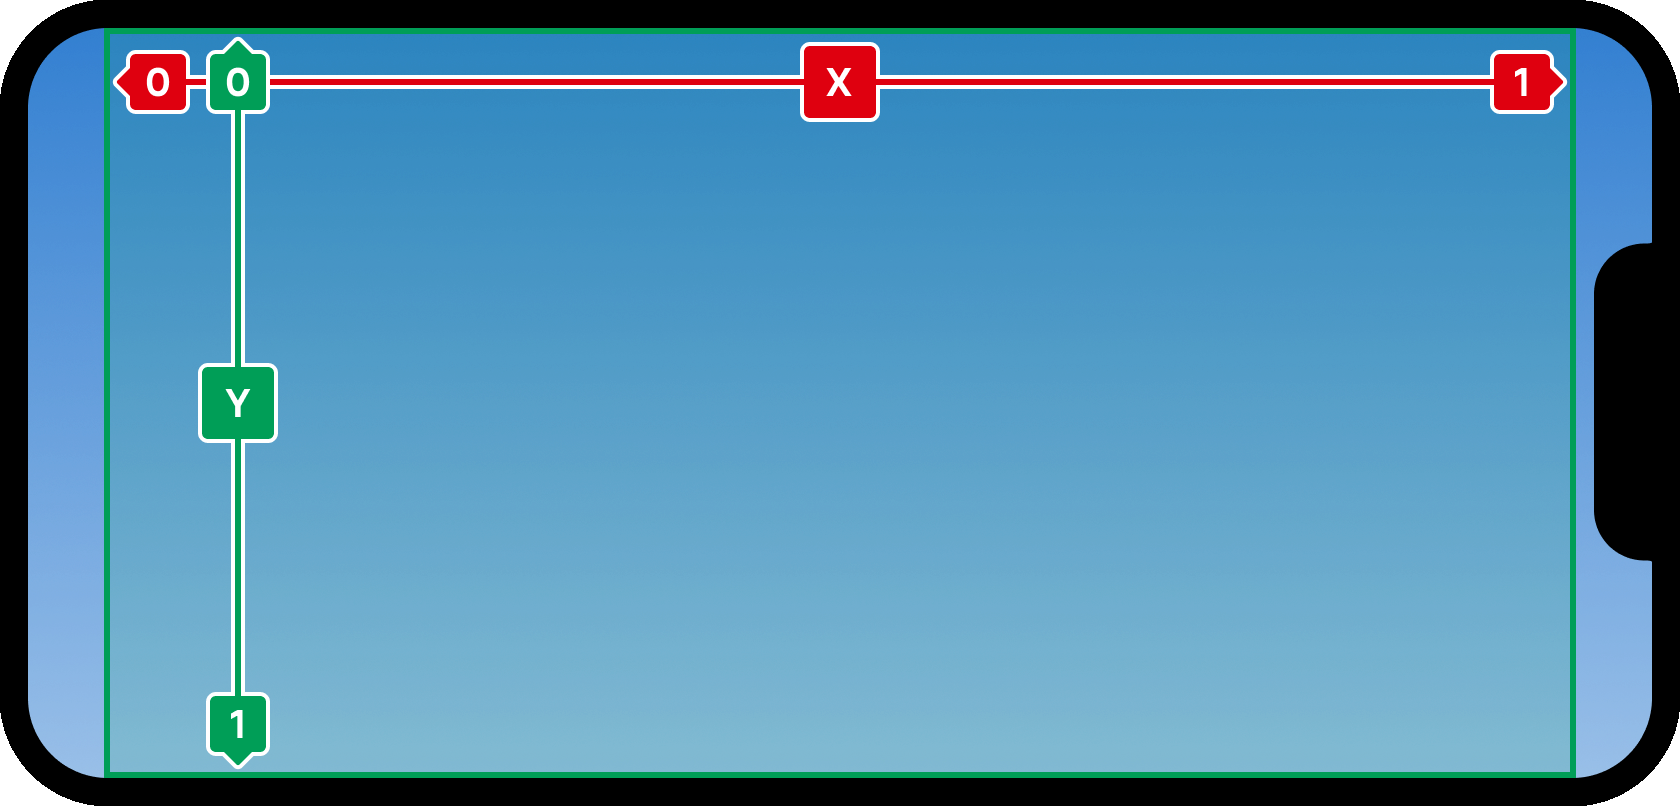
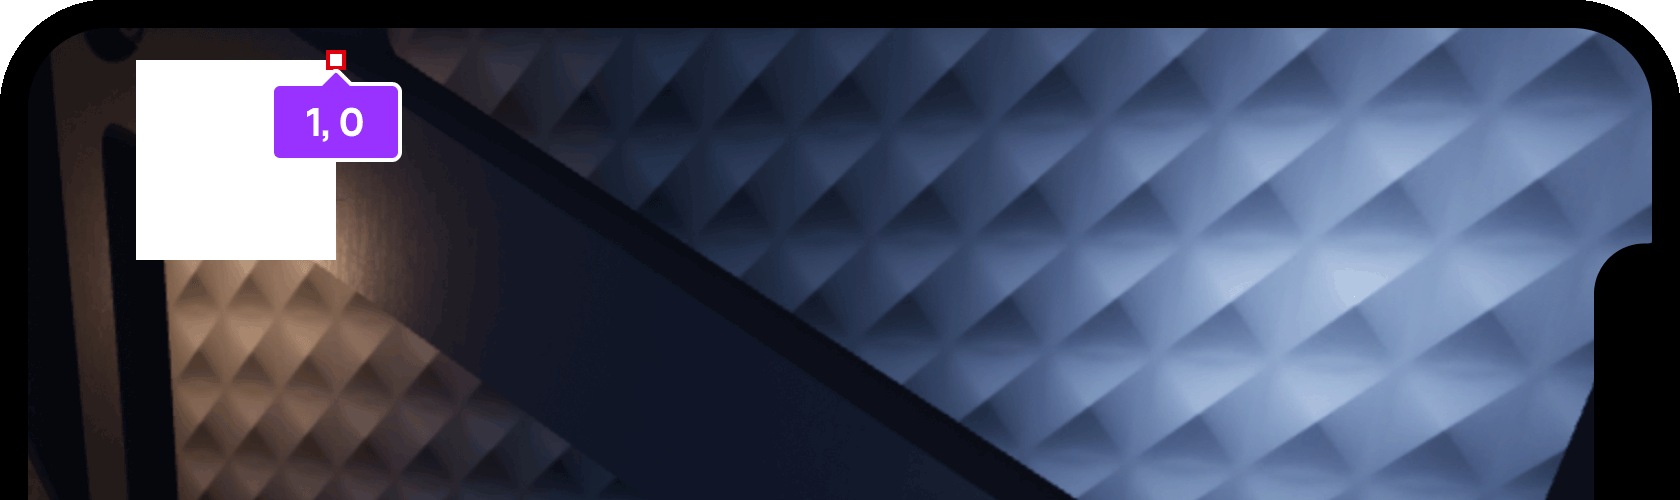
Additionally, you'll need to set an upper-right anchor point for the parent frame to define its origin point. Acceptable values are between 0 and 1, relative to the size of the object, so an anchor value of 1, 0 puts the frame's anchor point in its upper‑right corner.
In the Explorer window, select the MeterBar frame that you inserted previously.
In the Properties window, enter
1, 0, 0, 0forPositionand press Enter. Studio will automatically add the brackets to form theUDim2of{1, 0},{0, 0}.Enter
1, 0for theAnchorPointproperty. The frame should now be positioned in the upper‑right corner of the device safe area, slightly indented from the edge as a result of the padding.
Resize the frame
Like position, the Size of a UI object is represented by a UDim2 coordinate set containing Scale and Offset values for both the X and Y axes.
By default, the new frame's size is {0, 100},{0, 100} , meaning 100 pixels in both width (X) and height (Y). While a strict pixel value is useful in certain cases, many UI elements scale more responsively across multiple screens when set to a percentage of the overall screen container size.
With the MeterBar frame selected, access the Properties window and navigate to the
Sizeproperty.Enter a value of
0.35, 0, 0.05, 0to set a percentage size of 35% wide and 5% tall with no added pixel offsets.
Style the frame
By default, Frames are filled in solid white. The final health meter should have a darker and slightly opaque fill, as well as a dark outline, so that it stands out better on both light and dark backgrounds.
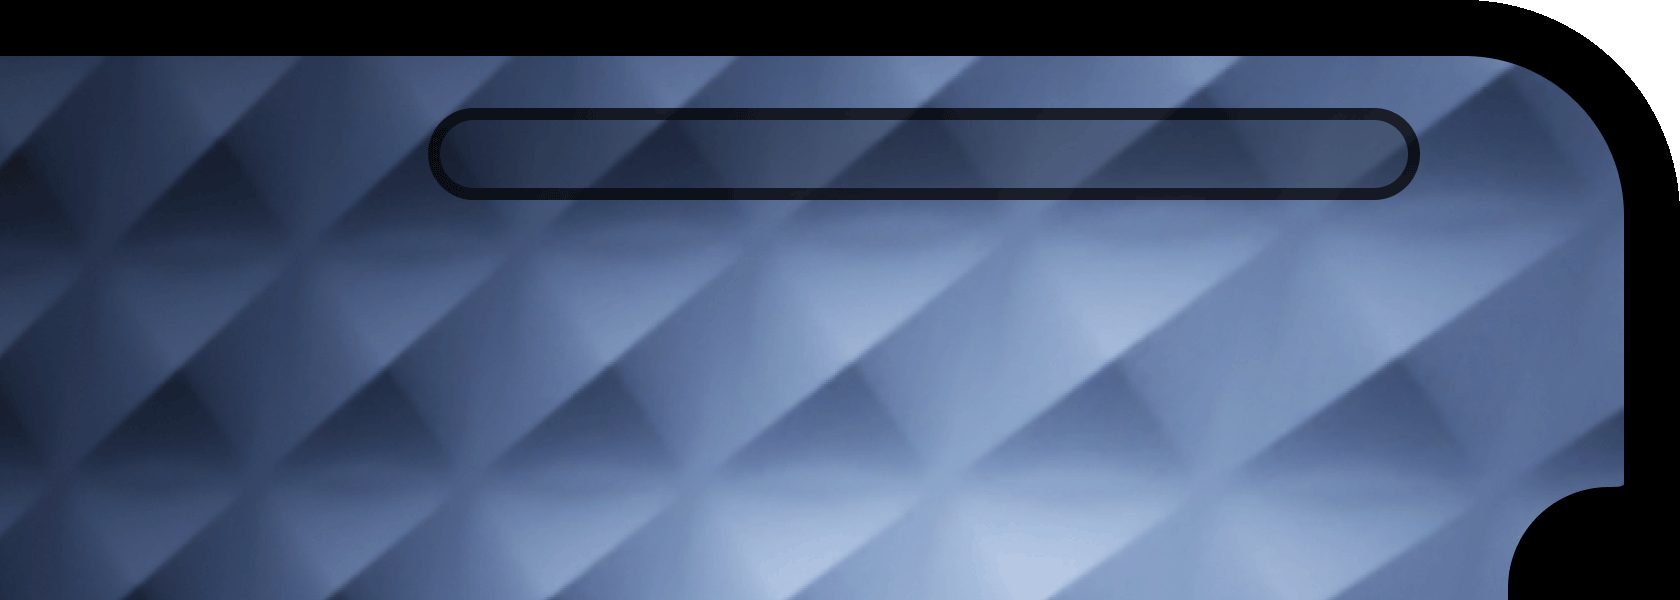
With the MeterBar frame selected, enter
0for theBackgroundColor3property. Studio will automatically convert it to the RGB value of[0, 0, 0].Enter
0.75for theBackgroundTransparencyproperty. In Roblox, transparency ranges from0for fully opaque to1for fully transparent, so0.75equals 25% opacity in other applications such as Figma or Photoshop.
Insert a
UIStrokeobject, a powerful UI modifier that adds a customizable stroke to the frame.
With the new
UIStrokeselected, set the following properties:Thickness=3Transparency=0.25(75% opaque)

To finalize the meter frame's styling, you can round the corners to form a "pill" shape instead of a sharp rectangle.
Insert a
UICornerinstance into the MeterBar frame.
With the new
UICornerselected, set theCornerRadiusto0.5, 0. Using a scale value of0.5(50%) instead of a pixel value is especially convenient for the meter bar because it ensures a fully rounded curve no matter how tall or wide the container becomes.
Create the inner fill
Now that the health meter's containing frame is complete, you can add an inner fill portion to represent the character's variable health. Since it only needs to be a solid‑filled region, a sub‑child Frame inside the parent frame is suitable.
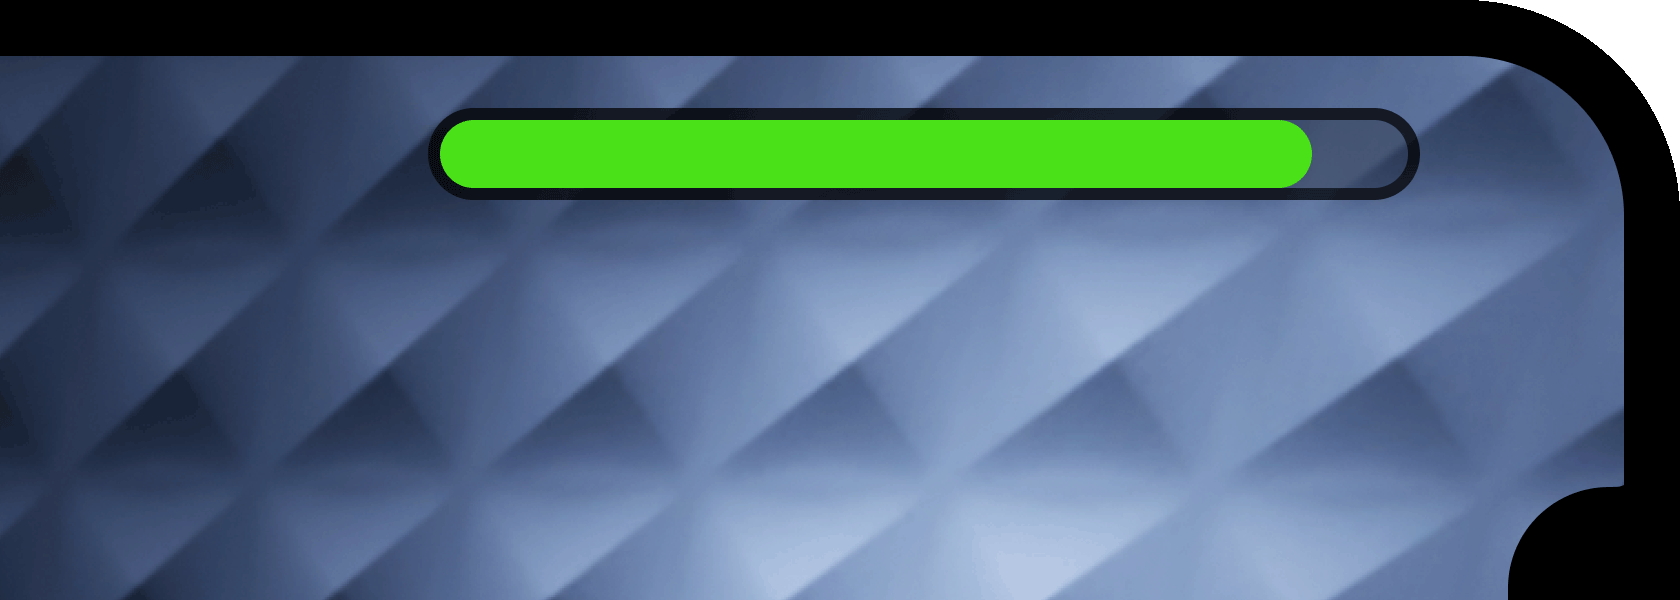
Insert a child
Frameinto the MeterBar frame.Rename the new frame instance to InnerFill.

With InnerFill selected, set the following properties:
AnchorPoint=0, 0.5(left edge and vertical center)Position=0, 0, 0.5, 0Size=1, 0, 1, 0
Since children of frames are positioned and sized relative to their parent, use of scale makes the inner frame fill the parent's full width and height, starting from the parent's left edge.

To match the "pill" shape of the parent frame, insert an additional
UICornerinto InnerFill.
With the new
UICornermodifier selected, set itsCornerRadiusproperty to0.5, 0to match the "pill" shape of the parent MeterBar frame.
To better represent that a full meter indicates good health, select InnerFill and set its
BackgroundColor3property to[0, 225, 50](in a later task, you'll script this color to change based on actual health).
Add the icon
To more clearly indicate the purpose of the meter, you can add an image label to the left side, in this case a red heart which commonly symbolizes health or life.
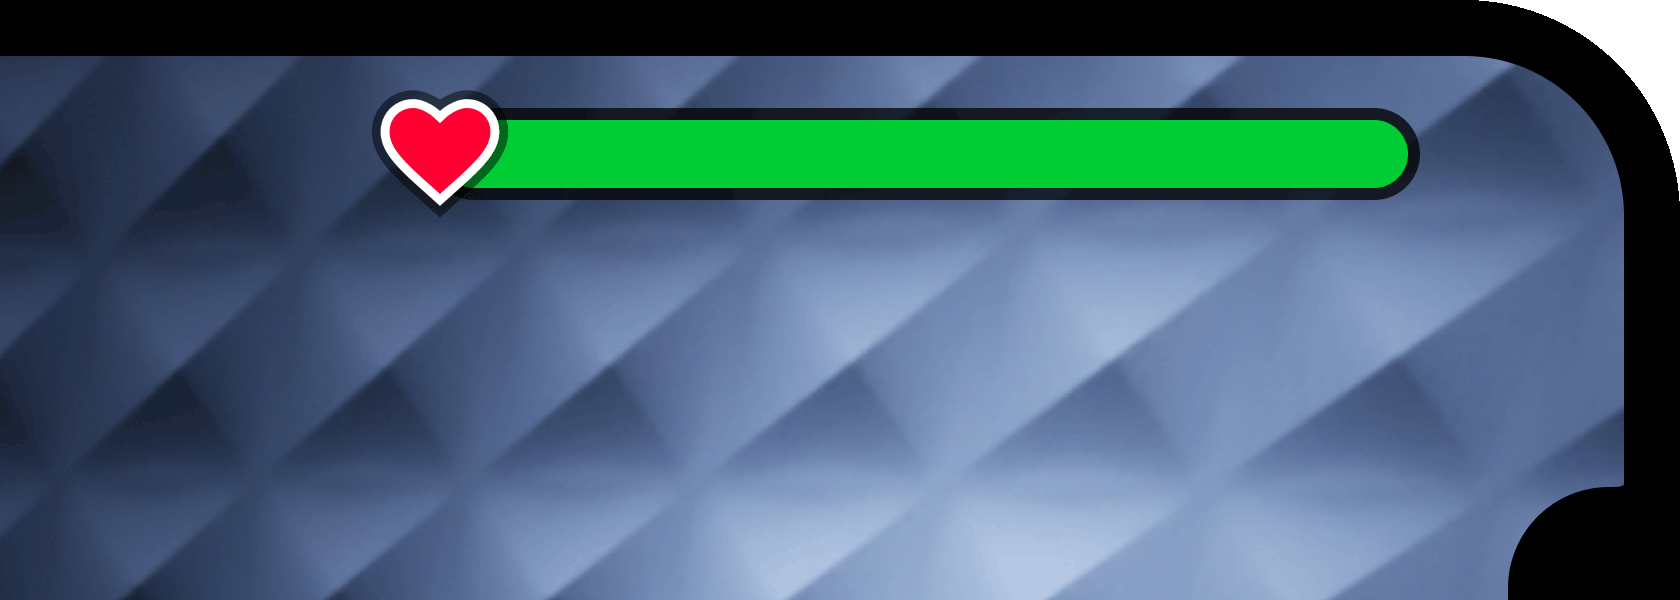
Insert an
ImageLabelinto the MeterBar frame. This object lets you apply a 2D image asset that has been uploaded as a decal to Roblox.Rename the new label instance to Icon.

With Icon selected, set its
ZIndexproperty to2. While newly inserted UI objects always layer in front of objects inserted previously, this change ensures the icon always displays in front of the meter's frame elements.
Locate the icon's
Imageproperty and enterrbxassetid://91715286435585, the reference to a pre‑uploaded heart image (if desired, you can import your own image and use its asset ID).
To ensure the icon
ImageLabelalways stays at a 1:1 aspect ratio, insert aUIAspectRatioConstraint. Although this constraint has customizable properties to control the aspect ratio, you can leave its default values intact.
With Icon selected, finalize the appearance and position by changing the following properties:
AnchorPoint=0.5, 0.5(center anchor)BackgroundTransparency=1(100% transparent)Position=0, 0, 0.5, 0(left side of meter and vertical center)Size=2, 0, 2, 0(200% the overall size of the MeterBar frame, constrained to 1:1 by theUIAspectRatioConstraint)

Constrain the size
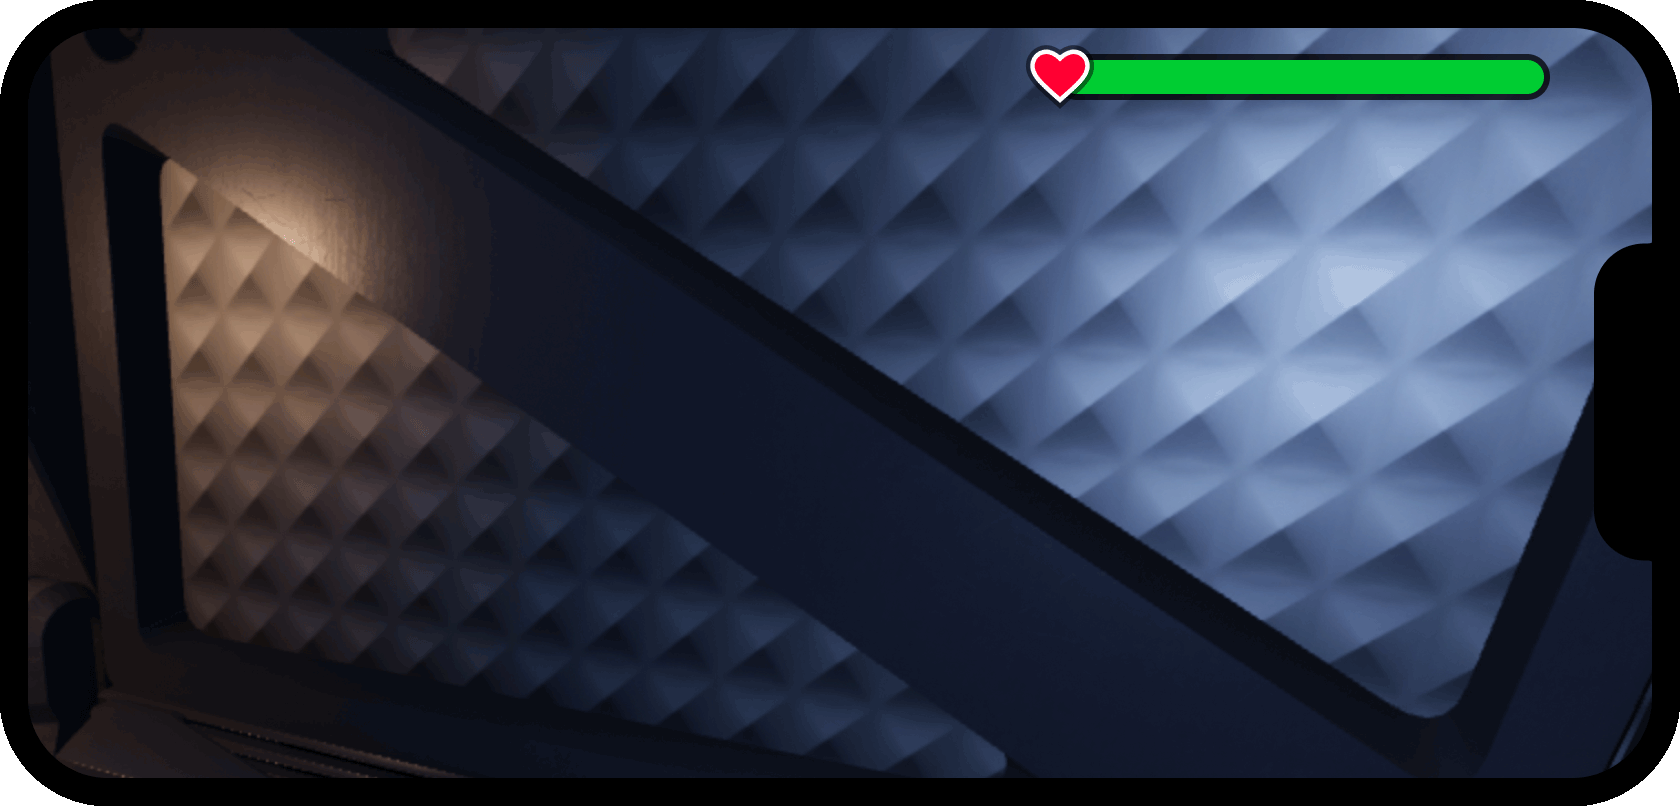
While a scale height of 0.05 (5%) looks good on modern phone screens and gaming monitors which are 16:9 aspect ratio or wider, the meter may look slightly too tall on tablet screens and older phones. You can check this by emulating a tablet like iPad 7th Generation from the Device Emulator.
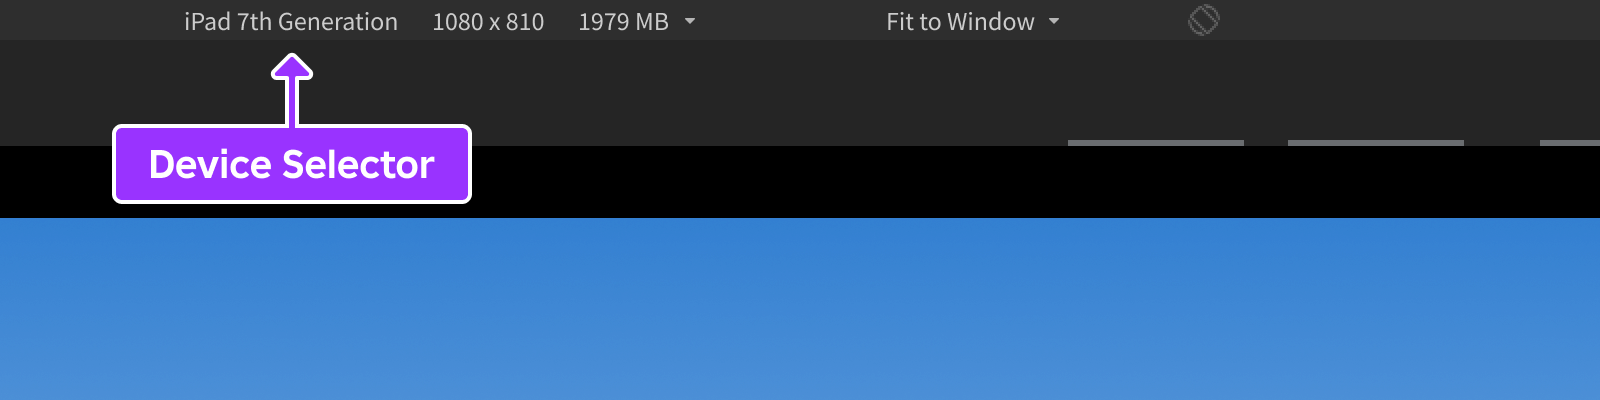
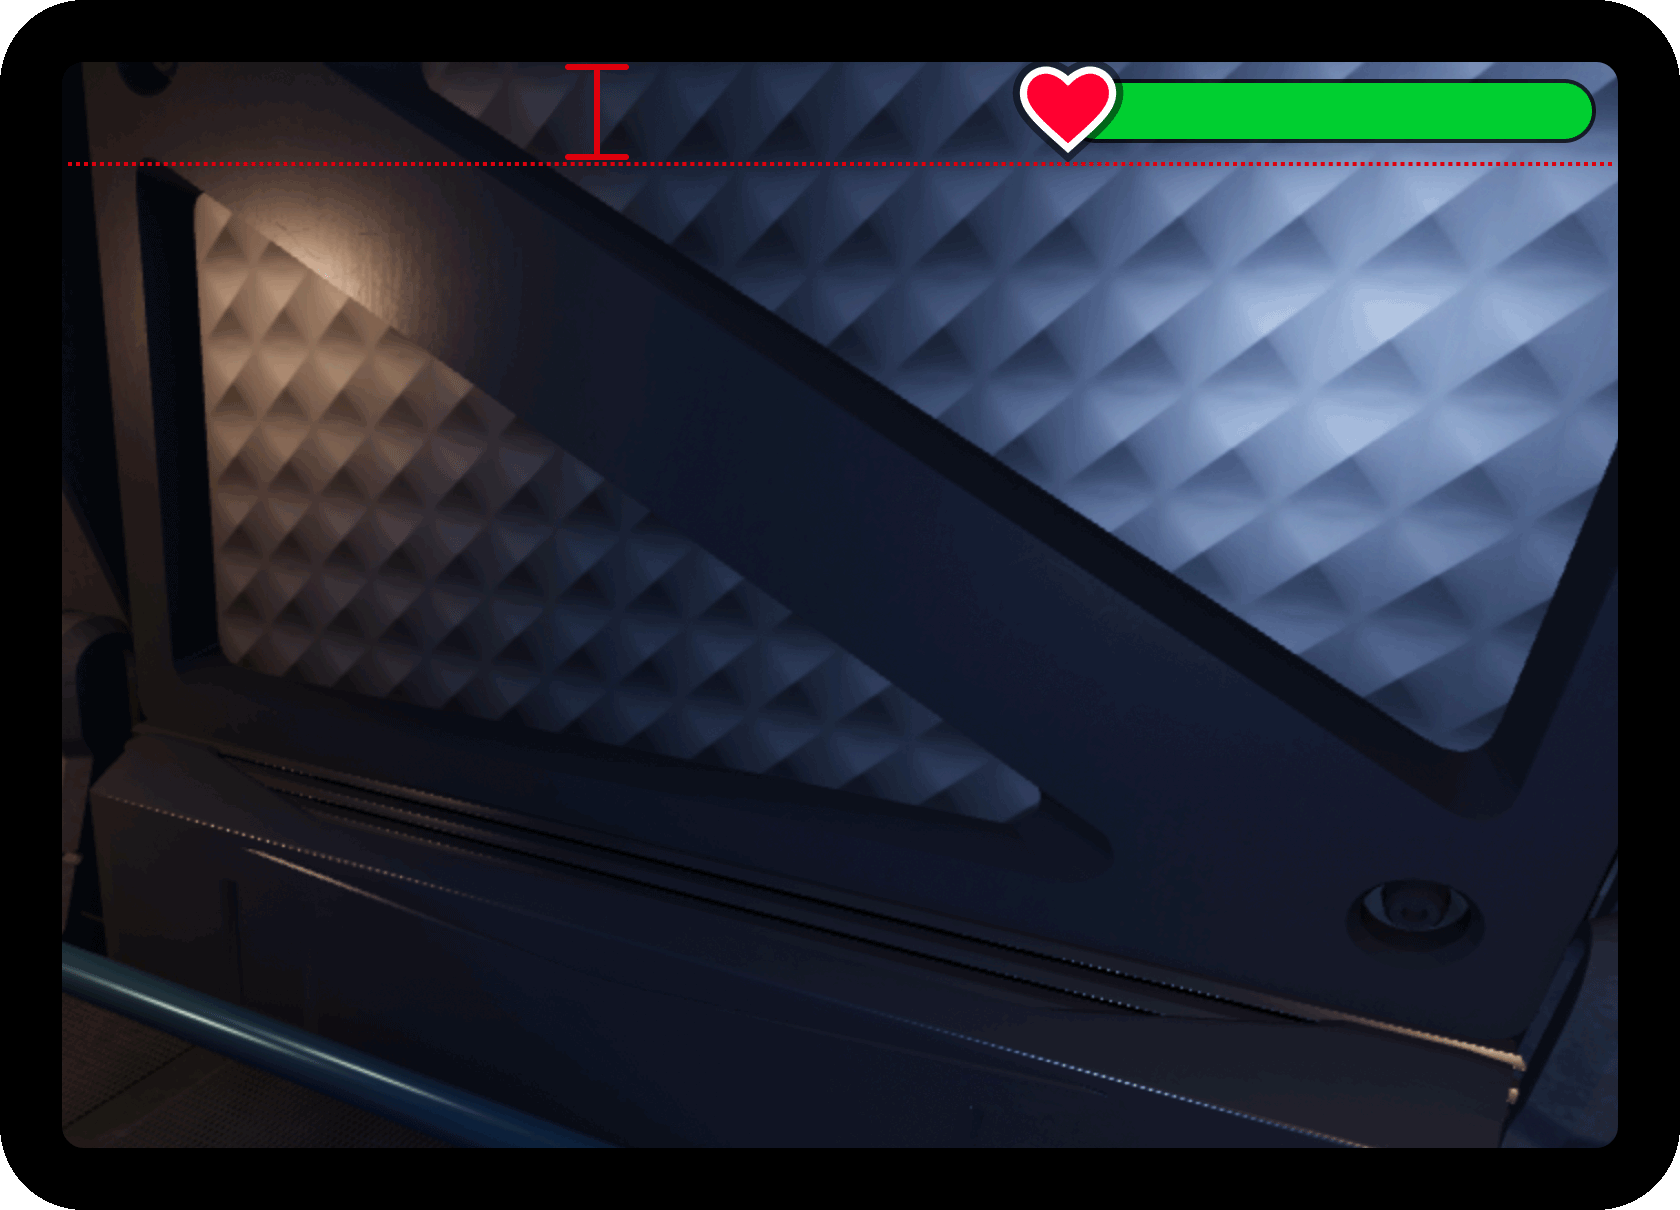
To keep the meter bar's height more consistent with wider screens, you can apply a UISizeConstraint to limit the maximum pixel height.
Insert a
UISizeConstraintinto the MeterBar frame.
With the new constraint selected, set its
MaxSizeproperty toinf, 20to restrict its height to 20 pixels while enforcing no width restriction.
Now, the meter bar maintains a more consistent height between wider and taller screens.
Phone
Tablet

Replace the default health meter
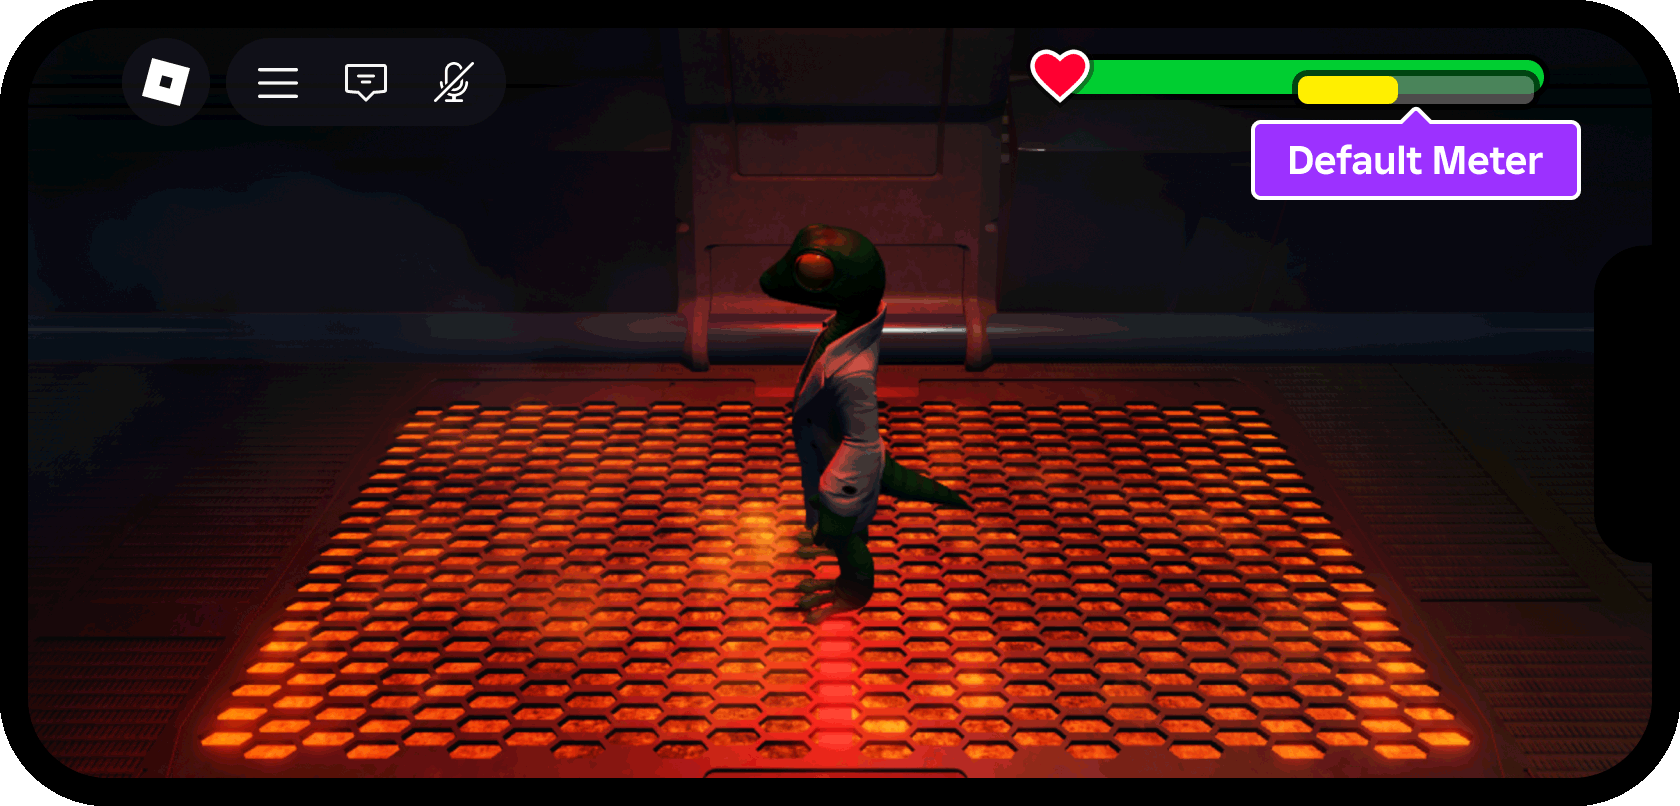
Roblox games include a default health meter which becomes visible when characters take damage. If you keep the default meter visible, it will duplicate and potentially overlap the custom meter.
Disable the default meter
To disable the default health meter, you'll use a client script (LocalScript) within StarterPlayerScripts that calls StarterGui:SetCoreGuiEnabled().
In the Explorer window, expand the
StarterPlayercontainer and locate theStarterPlayerScriptscontainer within it.
Insert a new
LocalScriptinto the container and rename it to HideDefaultHealthMeter to describe its purpose. Scripts withinStarterPlayerScriptsautomatically run when the local player joins a game, making it an ideal container to run a script that permanently hides the default meter.
When you insert a new script, it automatically opens in a new script editor tab (if it doesn't, double‑click the script in the Explorer window).
Paste the following code inside the HideDefaultHealthMeter script:
 ```lua title="HideDefaultHealthMeter"
 local StarterGui = game:GetService("StarterGui")

 -- Hide default health meter
 StarterGui:SetCoreGuiEnabled(Enum.CoreGuiType.Health, false)
 ```
Code Explanation
 <table>
 <thead>
 <tr>
   <td>Line</td>
   <td>Purpose</td>
 </tr>
 </thead>
 <tbody>
 <tr>
   <td>`1`</td>
   <td>Gets a reference to a core [service](/docs/roblox-scripting-services), [`StarterGui`](/docs/startergui), which represents the same container where you created the custom health meter and whose contents clone into the [`PlayerGui`](/docs/playergui) container for each player that joins the game.</td>
 </tr>
 <tr>
   <td>`4`</td>
   <td>Calls the service's [`SetCoreGuiEnabled()`](/docs/startergui#startergui-setcoreguienabled) method and instructs the default health meter to be disabled (`false`).</td>
 </tr>
 </tbody>
 </table>
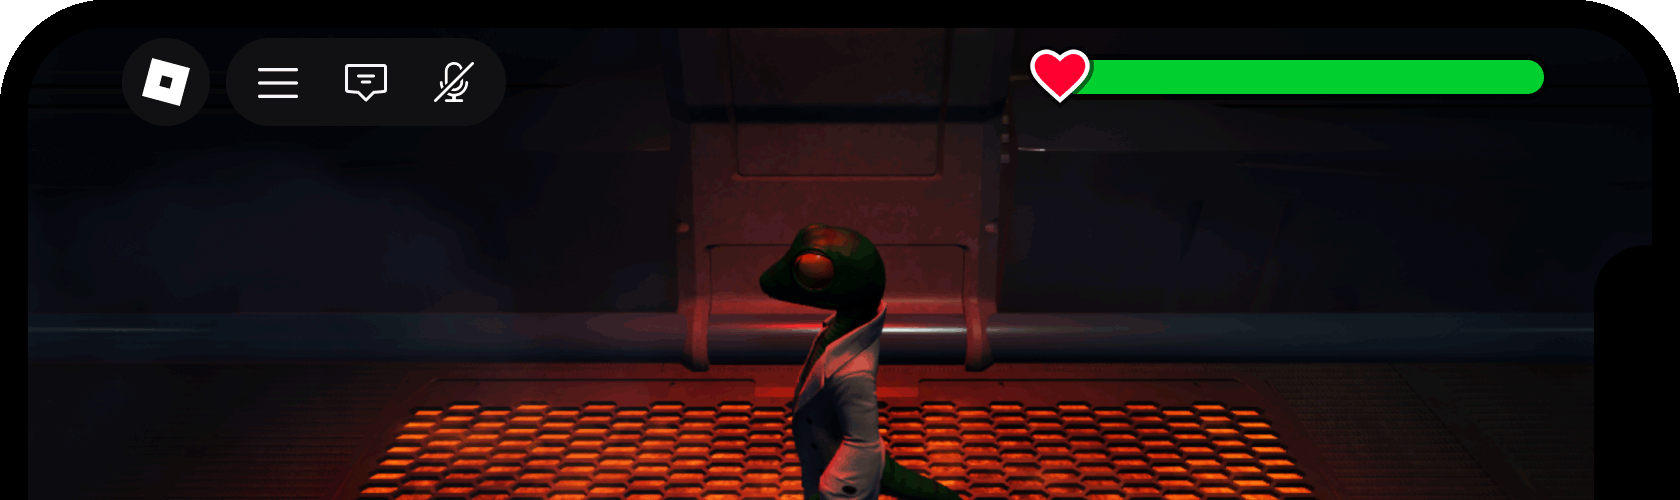
If you playtest the game now and take damage, you'll notice that the default meter is disabled and hidden (you'll script the custom meter to reflect health changes in the next section).
Listen for health changes
All default Roblox character models contain a Humanoid class which provides special behaviors and functionality to the character, such as setting its walk/run speed and managing its health. Health changes on the server replicate to each player's client and you can detect these changes to update both the size and color of the custom health meter.
In the Explorer window, locate the
StarterCharacterScriptscontainer withinStarterPlayer.
Insert a new
LocalScriptinto the container and rename it to UpdateCustomMeter to describe its purpose. Scripts withinStarterCharacterScriptsautomatically run each time the player's character spawns, making it an ideal container to run a script that fully resets the health meter on each respawn.
In the editor window for the UpdateCustomMeter script, paste the following code:
 ```lua title="UpdateCustomMeter"
 local Players = game:GetService("Players")

 -- Reference to local player, character, and humanoid
 local player = Players.LocalPlayer
 local character = player.Character
 local humanoid = character:WaitForChild("Humanoid")

 -- Reference to meter bar inner frame
 local playerGui = player:WaitForChild("PlayerGui")
 local meterBarInner = playerGui.HUDContainer.MeterBar.InnerFill

 -- Gradient sequence colors (red, orange, yellow, lime, green)
 local gradient = {
     Color3.fromRGB(225, 50, 0),
     Color3.fromRGB(255, 100, 0),
     Color3.fromRGB(255, 200, 0),
     Color3.fromRGB(150, 225, 0),
     Color3.fromRGB(0, 225, 50)
 }

 -- Function to get color in gradient sequence from fractional point
 local function getColorFromSequence(fraction: number): Color3
     -- Each color in gradient defines the beginning and/or end of a section
     local numSections = #gradient - 1

     -- Each section represents a portion of 1
     local sectionSize = 1 / numSections

     -- Determine which section the requested fraction falls into
     local sectionStartIndex = 1 + math.clamp(fraction, 0, 1) // sectionSize

     -- Get the colors at the start and end of the section
     local sectionColorStart = gradient[sectionStartIndex]
     local sectionColorEnd = gradient[sectionStartIndex + 1] or sectionColorStart

     -- Normalize fraction to be a number from 0 to 1 within the section
     local fractionOfSection = math.clamp(fraction, 0, 1) % sectionSize / sectionSize

     -- Lerp between beginning and end based on the normalized fraction
     return sectionColorStart:Lerp(sectionColorEnd, fractionOfSection)
 end

 local function onHealthChanged()
     -- Calculate new health as percentage of max
     local healthFraction = math.max(0, humanoid.Health / humanoid.MaxHealth)

     -- Set the bar to new size/color targets
     meterBarInner.Size = UDim2.new(healthFraction, 0, 1, 0)
     meterBarInner.BackgroundColor3 = getColorFromSequence(healthFraction)
 end

 -- Listen for changes to humanoid health
 humanoid.HealthChanged:Connect(onHealthChanged)

 -- Initially set (or reset) bar size/color to current health
 onHealthChanged()
 ```
Code Explanation
 <table>
 <thead>
 <tr>
   <td>Lines</td>
   <td>Purpose</td>
 </tr>
 </thead>
 <tbody>
 <tr>
   <td>`4`‑`6`</td>
   <td>Gets references to the local [`Player`](/docs/player), their [`Character`](/docs/player#player-character) model, and the [`Humanoid`](/docs/humanoid) class within it.</td>
 </tr>
 <tr>
   <td>`9`‑`10`</td>
   <td>Gets a reference to the meter's **InnerFill** object which must be resized and recolored as the character's health changes.</td>
 </tr>
 <tr>
   <td>`13`‑`19`</td>
   <td>Declares an array of five colors (red, orange, yellow, lime, green) to recolor the meter at various points; for example, green for 100% health, yellow for 50%, red for 0%, or a blend at any fraction between the keypoints.</td>
 </tr>
 <tr>
   <td>`22`‑`41`</td>
   <td>Helper function which returns the color blend between any of the gradient color keypoints.</td>
 </tr>
 <tr>
   <td>`43`‑`50`</td>
   <td>Function which handles any changes to health. Here, it calculates the new health as a percentage of the character's [`MaxHealth`](/docs/humanoid#humanoid-maxhealth), resizes **InnerFill** to that scale percentage, and recolors it to the color returned from the `getColorFromSequence()` function.</td>
 </tr>
 <tr>
   <td>`53`</td>
   <td>The main [event](/docs/roblox-scripting-events) connection which detects [`Health`](/docs/humanoid#humanoid-health) changes replicated from the server and calls the `onHealthChanged()` function.</td>
 </tr>
 <tr>
   <td>`56`</td>
   <td>Initially (upon character spawn or respawn) calls the `onHealthChanged()` function to size and color **InnerFill** to the correct percentage. Typically this will be the full width and green.</td>
 </tr>
 </tbody>
 </table>
If you playtest the game now, you'll notice that the custom meter correctly updates both size and color as the character takes damage:
Note
By default, the Roblox health metering system includes a gradual healing effect which allows characters to slowly regenerate health. If you wish to disable this effect, insert an empty Script named Health into the StarterCharacterScripts container. This will prevent the default internal script from loading for each player character, effectively removing the regeneration effect.
Animate the meter bar
To add an extra level of polish to the custom meter, you can animate health changes through tweening, gradually changing the meter bar's size and color over ½ second.
Access the script editor tab for the UpdateCustomMeter script that you edited previously.
Select all lines (CtrlA or ⌘A) and then paste over them (CtrlV or ⌘V) with the following code:
 ```lua title="UpdateCustomMeter"
 local Players = game:GetService("Players")
 local TweenService = game:GetService("TweenService")

 -- Reference to local player, character, and humanoid
 local player = Players.LocalPlayer
 local character = player.Character
 local humanoid = character:WaitForChild("Humanoid")

 -- Tween properties
 local tweenInfo = TweenInfo.new(0.5, Enum.EasingStyle.Exponential, Enum.EasingDirection.Out)

 -- Reference to meter bar inner frame
 local playerGui = player:WaitForChild("PlayerGui")
 local meterBarInner = playerGui.HUDContainer.MeterBar.InnerFill

 -- Gradient sequence colors (red, orange, yellow, lime, green)
 local gradient = {
     Color3.fromRGB(225, 50, 0),
     Color3.fromRGB(255, 100, 0),
     Color3.fromRGB(255, 200, 0),
     Color3.fromRGB(150, 225, 0),
     Color3.fromRGB(0, 225, 50)
 }

 -- Function to get color in gradient sequence from fractional point
 local function getColorFromSequence(fraction: number): Color3
     -- Each color in gradient defines the beginning and/or end of a section
     local numSections = #gradient - 1

     -- Each section represents a portion of 1
     local sectionSize = 1 / numSections

     -- Determine which section the requested fraction falls into
     local sectionStartIndex = 1 + math.clamp(fraction, 0, 1) // sectionSize

     -- Get the colors at the start and end of the section
     local sectionColorStart = gradient[sectionStartIndex]
     local sectionColorEnd = gradient[sectionStartIndex + 1] or sectionColorStart

     -- Normalize fraction to be a number from 0 to 1 within the section
     local fractionOfSection = math.clamp(fraction, 0, 1) % sectionSize / sectionSize

     -- Lerp between beginning and end based on the normalized fraction
     return sectionColorStart:Lerp(sectionColorEnd, fractionOfSection)
 end

 local function onHealthChanged()
     -- Calculate new health as percentage of max
     local healthFraction = math.max(0, humanoid.Health / humanoid.MaxHealth)

     -- Tween the bar to new size/color targets
     local tweenGoal = {
         Size = UDim2.new(healthFraction, 0, 1, 0),
         BackgroundColor3 = getColorFromSequence(healthFraction)
     }
     local meterBarTween = TweenService:Create(meterBarInner, tweenInfo, tweenGoal)
     meterBarTween:Play()
 end

 -- Listen for changes to humanoid health
 humanoid.HealthChanged:Connect(onHealthChanged)

 -- Initially set (or reset) bar size/color to current health
 onHealthChanged()
 ```
Key Additions/Changes
 <table>
 <thead>
 <tr>
   <td>Lines</td>
   <td>Purpose</td>
 </tr>
 </thead>
 <tbody>
 <tr>
   <td>`2`</td>
   <td>Gets a reference to [`TweenService`](/docs/tweenservice) to implement tweening functionality within the script.</td>
 </tr>
 <tr>
   <td>`10`</td>
   <td>Creates a [`TweenInfo`](/docs/tweeninfo) constructor which defines the intended tween's duration, [easing style](/docs/roblox-ui-animation#style), and [easing direction](/docs/roblox-ui-animation#direction).</td>
 </tr>
 <tr>
   <td>`52`‑`57`</td>
   <td>Instead of simply setting the bar's size and color as in the [previous version](#listen-for-health-changes), declares a `tweenGoal` table with the target size/color, creates a new tween using the `tweenInfo` and `tweenGoal` parameters, and plays the new tween.</td>
 </tr>
 </tbody>
   </table>
If you playtest the game now, you'll notice that the custom meter tweens between each change in health:
Add a damage effect
The default health meter system includes a brief, subtle red tint on the screen edges when the character is damaged. By disabling the default meter, this effect is removed, but you can replace it with your own implementation.
Access the script editor tab for the UpdateCustomMeter script that you edited previously.
Select all lines and paste over them with the following code:
 ```lua title="UpdateCustomMeter"
 local Workspace = game:GetService("Workspace")
 local Players = game:GetService("Players")
 local TweenService = game:GetService("TweenService")

 -- Reference to local player, character, and humanoid
 local player = Players.LocalPlayer
 local character = player.Character
 local humanoid = character:WaitForChild("Humanoid")

 -- Tween properties
 local tweenInfo = TweenInfo.new(0.5, Enum.EasingStyle.Exponential, Enum.EasingDirection.Out)

 -- Variable to store/cache character health
 local cachedHealth = humanoid.Health / humanoid.MaxHealth

 -- Get (or create new) color correction effect inside player camera
 local colorCorrection = Workspace.CurrentCamera:FindFirstChildWhichIsA("ColorCorrectionEffect") or Instance.new("ColorCorrectionEffect", Workspace.CurrentCamera)
 colorCorrection.Name = "DamageColorEffect"

 -- Reference to meter bar inner frame
 local playerGui = player:WaitForChild("PlayerGui")
 local meterBarInner = playerGui.HUDContainer.MeterBar.InnerFill

 -- Gradient sequence colors (red, orange, yellow, lime, green)
 local gradient = {
     Color3.fromRGB(225, 50, 0),
     Color3.fromRGB(255, 100, 0),
     Color3.fromRGB(255, 200, 0),
     Color3.fromRGB(150, 225, 0),
     Color3.fromRGB(0, 225, 50)
 }

 -- Function to get color in gradient sequence from fractional point
 local function getColorFromSequence(fraction: number): Color3
     -- Each color in gradient defines the beginning and/or end of a section
     local numSections = #gradient - 1

     -- Each section represents a portion of 1
     local sectionSize = 1 / numSections

     -- Determine which section the requested fraction falls into
     local sectionStartIndex = 1 + math.clamp(fraction, 0, 1) // sectionSize

     -- Get the colors at the start and end of the section
     local sectionColorStart = gradient[sectionStartIndex]
     local sectionColorEnd = gradient[sectionStartIndex + 1] or sectionColorStart

     -- Normalize fraction to be a number from 0 to 1 within the section
     local fractionOfSection = math.clamp(fraction, 0, 1) % sectionSize / sectionSize

     -- Lerp between beginning and end based on the normalized fraction
     return sectionColorStart:Lerp(sectionColorEnd, fractionOfSection)
 end

 local function onHealthChanged()
     -- Calculate new health as percentage of max
     local healthFraction = math.max(0, humanoid.Health / humanoid.MaxHealth)

     -- Tween the bar to new size/color targets
     local tweenGoal = {
         Size = UDim2.new(healthFraction, 0, 1, 0),
         BackgroundColor3 = getColorFromSequence(healthFraction)
     }
     local meterBarTween = TweenService:Create(meterBarInner, tweenInfo, tweenGoal)
     meterBarTween:Play()

     -- Show damage effect if new health is lower than cached health
     if healthFraction < cachedHealth then
         -- Cache new health value
         cachedHealth = healthFraction

         -- Set color correction to red as the initial tint before tweening
         colorCorrection.TintColor = Color3.fromRGB(255, 25, 25)
         colorCorrection.Saturation = 2.5

         -- Tween the tint back to white (neutral and no tint change from normal)
         local colorCorrectionTweenGoal = {
             TintColor = Color3.fromRGB(255, 255, 255),
             Saturation = 0
         }
         local colorCorrectionTween = TweenService:Create(colorCorrection, tweenInfo, colorCorrectionTweenGoal)
         colorCorrectionTween:Play()
     end
 end

 -- Listen for changes to humanoid health
 humanoid.HealthChanged:Connect(onHealthChanged)

 -- Initially set (or reset) bar size/color to current health
 onHealthChanged()
 ```
Key additions/changes
 <table>
 <thead>
 <tr>
   <td>Lines</td>
   <td>Purpose</td>
 </tr>
 </thead>
 <tbody>
 <tr>
   <td>`14`</td>
   <td>Sets a placeholder reference (`cachedHealth`) to track the character's health amount between changes, so you can compare if a change is lower (damage).</td>
 </tr>
 <tr>
   <td>`17`‑`18`</td>
   <td>On the initial character spawn, creates a new [`ColorCorrectionEffect`](/docs/colorcorrectioneffect) inside the player's current [`Camera`](/docs/camera), or gets a reference to the same instance on later respawns. By parenting this [post‑processing effect](/docs/roblox-environment-post-processing-effects) to the player's camera, it only applies to their local screen, not to every player's screen on the server.</td>
 </tr>
 <tr>
   <td>`68`‑`83`</td>
   <td>First performs a conditional check to confirm that the health change is lower than the `cachedHealth` value, indicating damage; if so, it sets `cachedHealth` to the new value. Next, it sets the [`ColorCorrectionEffect`](/docs/colorcorrectioneffect) tint to
[255, 25, 25] (red) with higher saturation, then tweens the tint back to the default of neutral white ( [255, 255, 255] ) with no saturation.
If you playtest the game now, you'll notice that the screen briefly flashes red whenever the character takes damage:
Note
If you decide to adapt the custom meter bar to another purpose, such as a mana meter or poison meter, you can change the TintColor on line 73 to something more suitable to the event, such as light blue ([200, 225, 255]) or toxic green ([0, 255, 75]) .
Note
If your health meter doesn't match the appearance or behavior displayed in this tutorial, remember that you can inspect UI Fundamentals - HUD Meter as a completed reference template.