
Source: Roblox Creator Hub · CC BY 4.0 · View source · Code samples: MIT Imported 2026-10-03. Formatting adapted for this site.
Emote Bar
Emotes are a core component of any social game. The EmoteBar developer module aims to provide players an accessible, customizable way to facilitate meaningful social interaction.
Module usage
Installation
To use the EmoteBar module in a game:
From Studio's Window menu or Home tab toolbar, open the Toolbox and select the Creator Store tab.
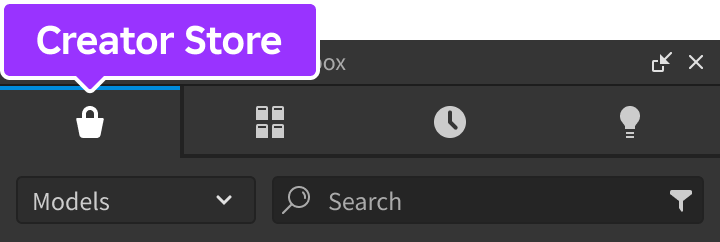
Make sure the Models sorting is selected, then click the See All button for Categories.

Locate and click the Packages tile.
Locate the Emote Bar module and click it, or drag-and-drop it into the 3D view.

In the Explorer window, move the entire EmoteBar model into
ReplicatedStorage. Upon running the game the module will begin running.
Configuration
The module is preconfigured with 7 emotes and it can be easily customized with your own emotes and display options. Additionally, if the player owns any emotes from previous Roblox events such as Lil Nas X, Royal Blood, or Twenty One Pilots, those emotes will be automatically added to the list of available emotes.
In ServerScriptService, create a new
Scriptand rename it ConfigureEmotes.
Paste the following code into the new ConfigureEmotes script. The
useDefaultEmotessetting offalseoverrides the default emotes and lets you define custom emotes via the setEmotes function.local ReplicatedStorage = game:GetService("ReplicatedStorage") local EmoteBar = require(ReplicatedStorage.EmoteBar) EmoteBar.configureServer({ useDefaultEmotes = false, }) EmoteBar.setEmotes({ { name = "Hello", animation = "rbxassetid://3344650532", image = "rbxassetid://7719817462", defaultTempo = 1, }, { name = "Applaud", animation = "rbxassetid://5915693819", image = "rbxassetid://7720292217", defaultTempo = 2, }, })
Note
If you want to disable loading of user-owned emotes into the emote bar or wheel, make sure the UserEmotesEnabled property is disabled for the StarterPlayer object. Note that this property can only be set in Studio and cannot be set by scripts at runtime.
Also note that this developer module will modify the local user's emotes via HumanoidDescription:SetEmotes(), meaning that calls to HumanoidDescription:GetEmotes() will return values modified by this module.
Mega emotes
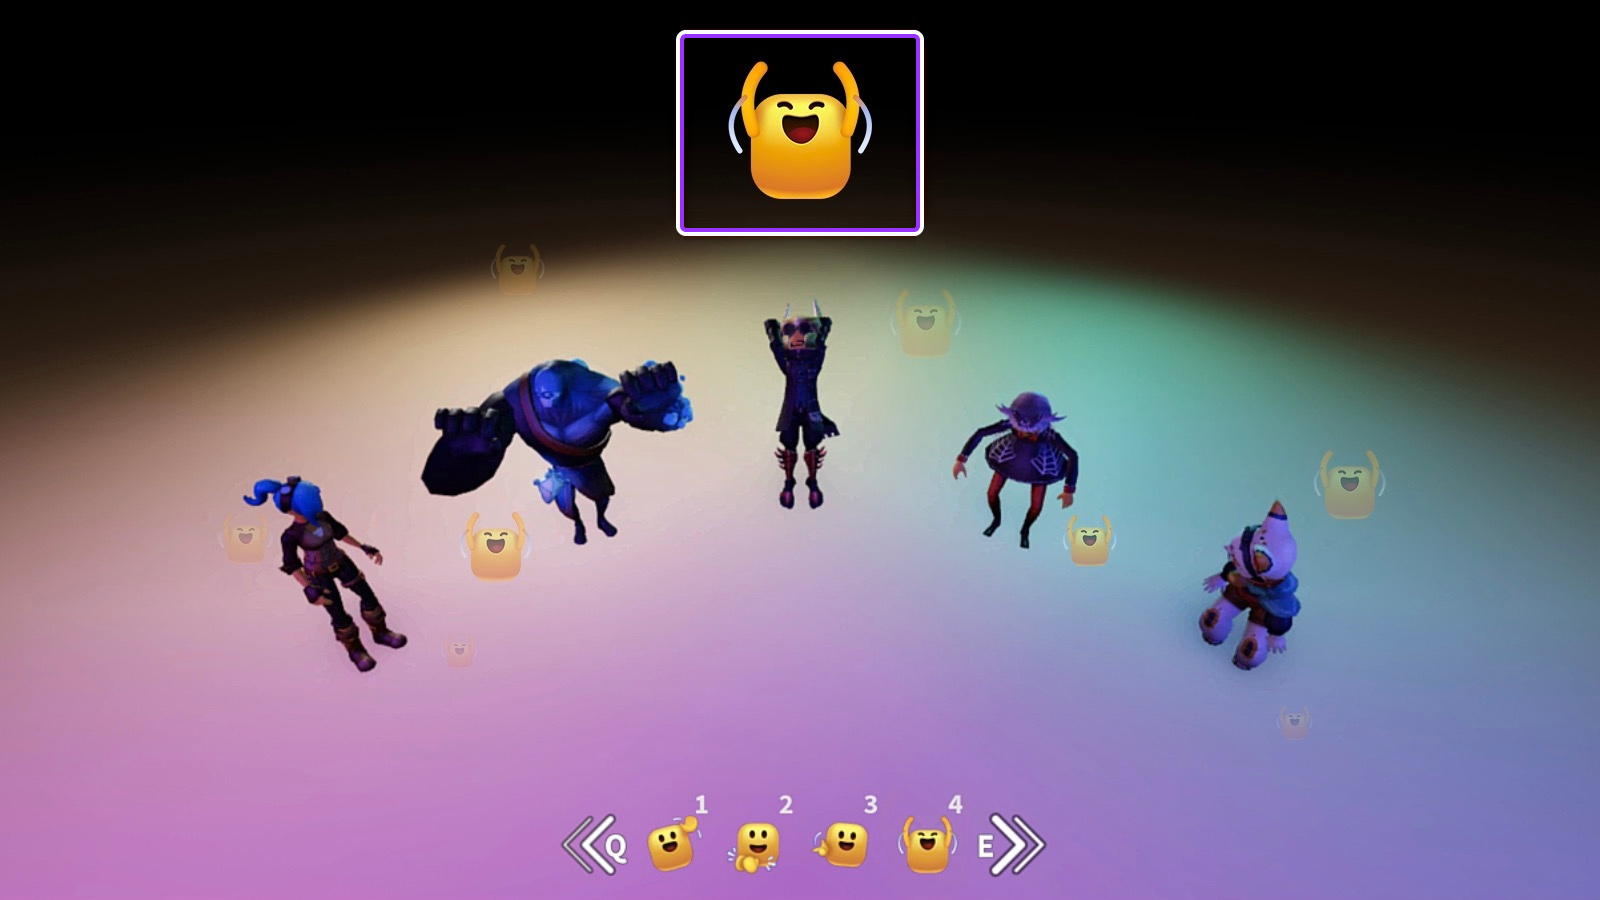
A mega emote is formed when multiple players in the same area perform the same emote at the same time. As more and more players join in, the mega emote grows larger. As players stop performing the emote, the mega emote grows smaller until eventually it disappears.
Tempo
An emote's tempo is the speed at which it plays when its button is tapped once. The default speed of an emote is determined by its defaultTempo. An emote's speed can be increased or decreased by tapping its button faster or slower.
API reference
Types
Emote
Each emote is represented by a dictionary with the following key-value pairs:
| Key | Type | Description |
|---|---|---|
| `name` | string | Emote name, for example `"Shrug"`. |
| `animation` | string | Asset ID for the emote's animation. |
| `image` | string | Asset ID for the emote's image in the GUI. |
| `defaultTempo` | number | Default speed factor at which to play the emote animation. For example, a tempo of 2 will play the animation at twice its normal speed. Must be greater than 0. |
| `isLocked` | bool | Whether the emote is "locked" from being activated. |
Enums
EmoteBar.GuiType
| Name | Summary |
|---|---|
| `EmoteBar` | Default form where emotes are displayed in a bar along the bottom of the screen, separated into individual "pages." |
| `EmoteWheel` | Variant where emotes are displayed in a ring when a player clicks or taps on their player character. |
local ReplicatedStorage = game:GetService("ReplicatedStorage")
local EmoteBar = require(ReplicatedStorage.EmoteBar)
EmoteBar.configureClient({
guiType = EmoteBar.GuiType.EmoteWheel,
})Functions
configureServer
configureServer(config: table)
Overrides default server-side configuration options through the following keys/values in the config table. This function can only be called from a Script and changes will automatically replicate to all clients.
| Key | Description | Default |
|---|---|---|
| `useDefaultEmotes` | Whether the provided default emotes are included or not. | true |
| `useMegaEmotes` | Enables or disables the [mega emotes](#mega-emotes) feature. | true |
| `emoteMinPlayers` | Minimum number of players performing the same emote to contribute to a mega emote. | 3 |
| `emoteMaxPlayers` | Maximum number of players performing the same emote to contribute to a mega emote. | 50 |
| `playParticles` | Enables or disables the emotes players are playing as floating particles above their heads. | true |
| `sendContributingEmotes` | Enables or disables sending a small emote icon to contribute to the mega emote. | true |
local ReplicatedStorage = game:GetService("ReplicatedStorage")
local EmoteBar = require(ReplicatedStorage.EmoteBar)
EmoteBar.configureServer({
emoteMinPlayers = 2,
playParticles = false,
})configureClient
configureClient(config: table)
Overrides default client-side configuration options through the following keys/values in the config table. This function can only be called from a LocalScript. Depending on the value of guiType, options in the noted tabs also apply.
General
| Key | Description | Default |
|---|---|---|
| `guiType` | Controls which form the GUI will take for displaying emotes ([EmoteBar.GuiType](https://create.roblox.com/docs/resources/modules/emote-bar#emotebarguitype)). | [EmoteBar](https://create.roblox.com/docs/resources/modules/emote-bar#emotebarguitype) |
| `useTempo` | Enables or disables the [tempo](#tempo) feature where users are able to control how fast or slow their emotes are played by repeatedly activating the same emote rhythmically. | true |
| `tempoActivationWindow` | Amount of time, in seconds, the user has between sequential activations of an emote for it to count as part of the tempo. | 3 |
| `lockedImage` | Image to display overtop locked emotes. | "rbxassetid://6905802778" |
Bar
If the value of guiType is EmoteBar (default), the following options apply:
| Key | Description | Default |
|---|---|---|
| `maxEmotesPerPage` | Maximum number of emotes that are displayed at a time. Smaller screens will automatically show fewer emotes. | 4 |
| `emoteBarPosLandscape` | Position of the emote bar in landscape mode ([`UDim2`](/docs/udim2)). | (0.5, 0, 1, -16) |
| `emoteBarPosPortrait` | Position of the emote bar in portrait mode ([`UDim2`](/docs/udim2)). | (0.5, 0, 1, -100) |
| `useEmoteHotkeys` | Whether emote hotkeys are used. If `true`, this binds 1, 2, 3, 4, etc. as hotkeys for the emote bar. Only numeric keys 1–9 are supported. | true |
| `usePageHotkeys` | Whether page hotkeys are used. If `true`, `nextPageKey` and `prevPageKey` are used to cycle between pages. | true |
| `prevPageKey` | Key used to cycle to the previous page of emotes ([`KeyCode`](/docs/enum-keycode)). | [`Q`](/docs/enum-keycode) |
| `nextPageKey` | Key used to cycle to the next page of emotes ([`KeyCode`](/docs/enum-keycode)). | [`E`](/docs/enum-keycode) |
| `leftArrowImage` | Image for the left arrow (previous page). | "rbxassetid://6998633654" |
| `rightArrowImage` | Image for the right arrow (next page). | "rbxassetid://6998635824" |
Wheel
If the value of guiType is EmoteWheel, the following options apply:
| Key | Description | Default |
|---|---|---|
| `closeImage` | Image for the close button on the emote wheel, placed overtop the `closeBackgroundImage` image. | "rbxassetid://7027440823" |
| `closeBackgroundImage` | Background image for the close button on the emote wheel. | "rbxassetid://7027440823" |
| `emoteHoverImage` | Image for hover-over indication of the selected emote in the wheel. | "rbxassetid://7344843157" |
local ReplicatedStorage = game:GetService("ReplicatedStorage")
local EmoteBar = require(ReplicatedStorage.EmoteBar)
EmoteBar.configureClient({
guiType = EmoteBar.GuiType.EmoteBar,
maxEmotesPerPage = 6,
nextPageKey = Enum.KeyCode.Z,
prevPageKey = Enum.KeyCode.C,
})local ReplicatedStorage = game:GetService("ReplicatedStorage")
local EmoteBar = require(ReplicatedStorage.EmoteBar)
EmoteBar.configureClient({
guiType = EmoteBar.GuiType.EmoteWheel,
})setEmotes
setEmotes(emotes: table)
Sets the custom emotes to use. These will be added to the defaults if useDefaultEmotes is true, or replace the defaults if useDefaultEmotes is false. This function can only be called from a Script and changes will automatically replicate to all clients.
See Emote for the structure of each emote passed to this function.
Note
The order of custom emotes in the array determines how each emote is ordered in the UI.
local ReplicatedStorage = game:GetService("ReplicatedStorage")

local EmoteBar = require(ReplicatedStorage.EmoteBar)

EmoteBar.configureServer({
    useDefaultEmotes = false,
})

EmoteBar.setEmotes({
    {
        name = "Hello",
        animation = "rbxassetid://3344650532",
        image = "rbxassetid://7719817462",
        defaultTempo = 1,
    },
    {
        name = "Applaud",
        animation = "rbxassetid://5915693819",
        image = "rbxassetid://7720292217",
        defaultTempo = 2,
    },
})setGuiVisibility
setGuiVisibility(visible: boolean)
Shows or hides the emotes GUI. This function can only be called from a LocalScript on a specific client.
local ReplicatedStorage = game:GetService("ReplicatedStorage")

local EmoteBar = require(ReplicatedStorage.EmoteBar)

EmoteBar.setGuiVisibility(false)
getEmote
getEmote(emoteName: string): table
Gets an Emote by name. Returns nil if the emote cannot be found. This function can only be called from a LocalScript on a specific client.
Note
Emotes registered on the server with setEmotes can be retrieved client-side using this function. This can also be used to retrieve any of the default emotes by name: "Hello", "Applaud", "Point", "Stadium", "Tilt", "Shrug", or "Salute".
local ReplicatedStorage = game:GetService("ReplicatedStorage")

local EmoteBar = require(ReplicatedStorage.EmoteBar)

local shrug = EmoteBar.getEmote("Shrug")
playEmote
playEmote(emote: Emote)
Plays the given Emote and fires the emotePlayed event on the server, if connected. This function can only be called from a LocalScript on a specific client.
local ReplicatedStorage = game:GetService("ReplicatedStorage")

local EmoteBar = require(ReplicatedStorage.EmoteBar)

local shrug = EmoteBar.getEmote("Shrug")
EmoteBar.playEmote(shrug)
lockEmote
lockEmote(emoteName: string)
Locks the Emote with the given name. This function can only be called from a LocalScript on the client.
local ReplicatedStorage = game:GetService("ReplicatedStorage")

local EmoteBar = require(ReplicatedStorage.EmoteBar)

EmoteBar.lockEmote("Applaud")
unlockEmote
unlockEmote(emoteName: string)
Unlocks the Emote with the given name. This function can only be called from a LocalScript on the client.
local ReplicatedStorage = game:GetService("ReplicatedStorage")

local EmoteBar = require(ReplicatedStorage.EmoteBar)

EmoteBar.unlockEmote("Applaud")
Events
emotePlayed
Fires when any client plays an emote. This event can only be connected in a LocalScript.
| Parameters | |
|---|---|
| player: [`Player`](/docs/player) | Player who acted out the emote. |
| emote: [Emote](#emote) | Emote which was played. |
local ReplicatedStorage = game:GetService("ReplicatedStorage")

local EmoteBar = require(ReplicatedStorage.EmoteBar)

EmoteBar.emotePlayed:Connect(function(player, emote)
	print(player.Name, "played", emote.name)
end)
lockedEmoteActivated
Fires when a client clicks a locked emote. This event can only be connected in a LocalScript.
| Parameters | |
|---|---|
| emote: [Emote](#emote) | Locked emote which was activated. |
local ReplicatedStorage = game:GetService("ReplicatedStorage")
local Players = game:GetService("Players")

local EmoteBar = require(ReplicatedStorage.EmoteBar)

EmoteBar.lockedEmoteActivated:Connect(function(emote)
	print(Players.LocalPlayer, "clicked", emote.name)
end)