
Source: Roblox Creator Hub · CC BY 4.0 · View source · Code samples: MIT Imported 2026-10-03. Formatting adapted for this site.
Apply polished assets
Applying polished assets is the last step in building your final environment, in which you swap out your greybox placeholder assets for high-quality polished assets in order to meet your game's aesthetic goals and design requirements. This exciting section of the curriculum is where you see your world come to life into a cohesive environment that is complete and ready for publication.
Using the Island Jump - Final file as a reference, this section of the tutorial teaches you how to use the Creator Store to find and add a sample asset library into your project, continue your organization structure to sort your new assets into meaningful categories, and apply the asset library to the 3D space.
Note
This chapter involves a lot of precise positioning and property configuration. Each section includes a Build with Assistant option that places assets using the exact CFrame.Position and Scale values from the tutorial, as well as an Apply your own option if you'd prefer to create your own layout.
Assistant is particularly effective at this kind of repetitive, deterministic setup, making it a useful way to speed up the building process.
Get asset library
The Creator Store is a tab of the Toolbox that you can use to find all assets that are made by Roblox and the Roblox community for use within your projects, including model, image, mesh, audio, plugin, video, and font assets. You can use the Creator Store to add an individual asset or asset library directly into an open game.
Asset libraries are collections of assets you can place into a central location of your game for easy access and reuse. The asset library you will use for your project from the Creator Store includes six 3D assets, two custom MaterialVariant materials, and the final particle effects from Create basic visual effects. The six meshes are as follows:
<img src="https://prod.docsiteassets.roblox.com/assets/tutorials/core-building-and-scripting/Platform-A-Model.jpg" alt="A mesh that's a grassy, circular platform with concrete surrounding its edges." />PlatformA
<img src="https://prod.docsiteassets.roblox.com/assets/tutorials/core-building-and-scripting/Platform-B-Model.jpg" alt="A mesh that's a grassy, circular platform with rock underneath."/>PlatformB
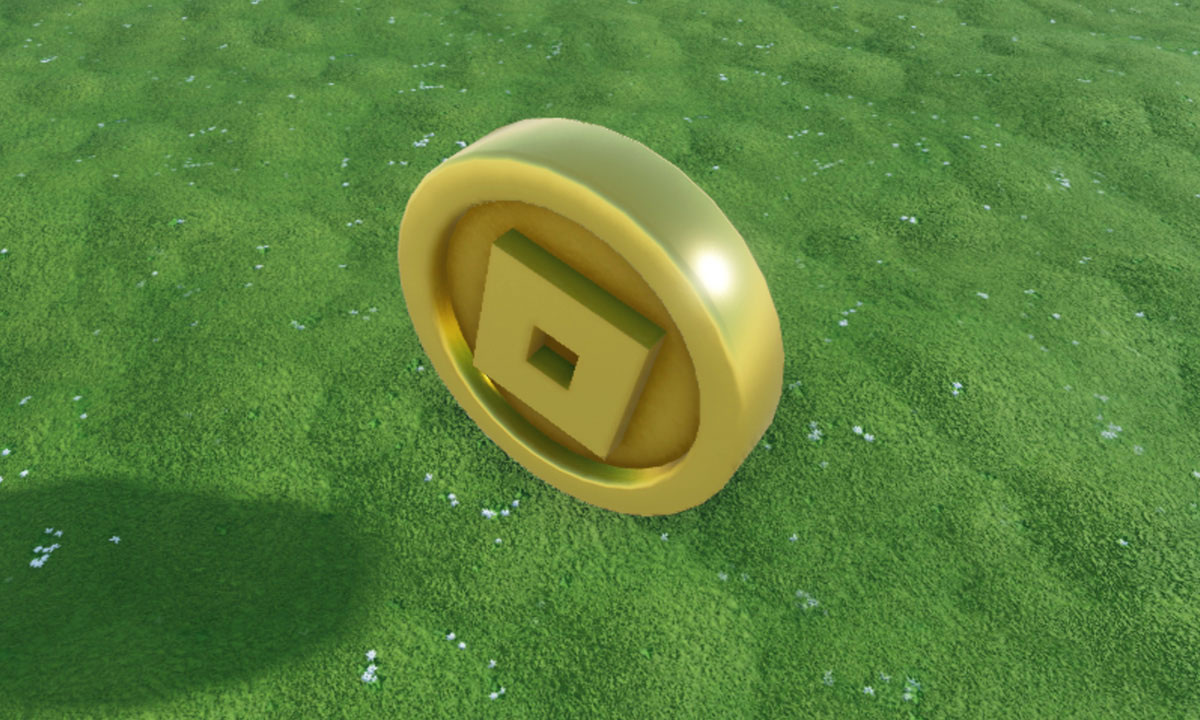
<img src="https://prod.docsiteassets.roblox.com/assets/tutorials/core-building-and-scripting/Coin-Mesh.jpg" alt="A mesh that's a shiny golden coin with a Roblox logo in the middle." />Coin
<img src="https://prod.docsiteassets.roblox.com/assets/tutorials/core-building-and-scripting/Sea-Stack-Mesh.jpg" alt="A mesh that's a large rock sea stack." />SeaStackMesh
<img src="https://prod.docsiteassets.roblox.com/assets/tutorials/core-building-and-scripting/Sea-Stack-Cave-Mesh.jpg" alt="A mesh that's a large rock sea stack with a hollow tunnel in the middle." />SeaStackCaveMesh
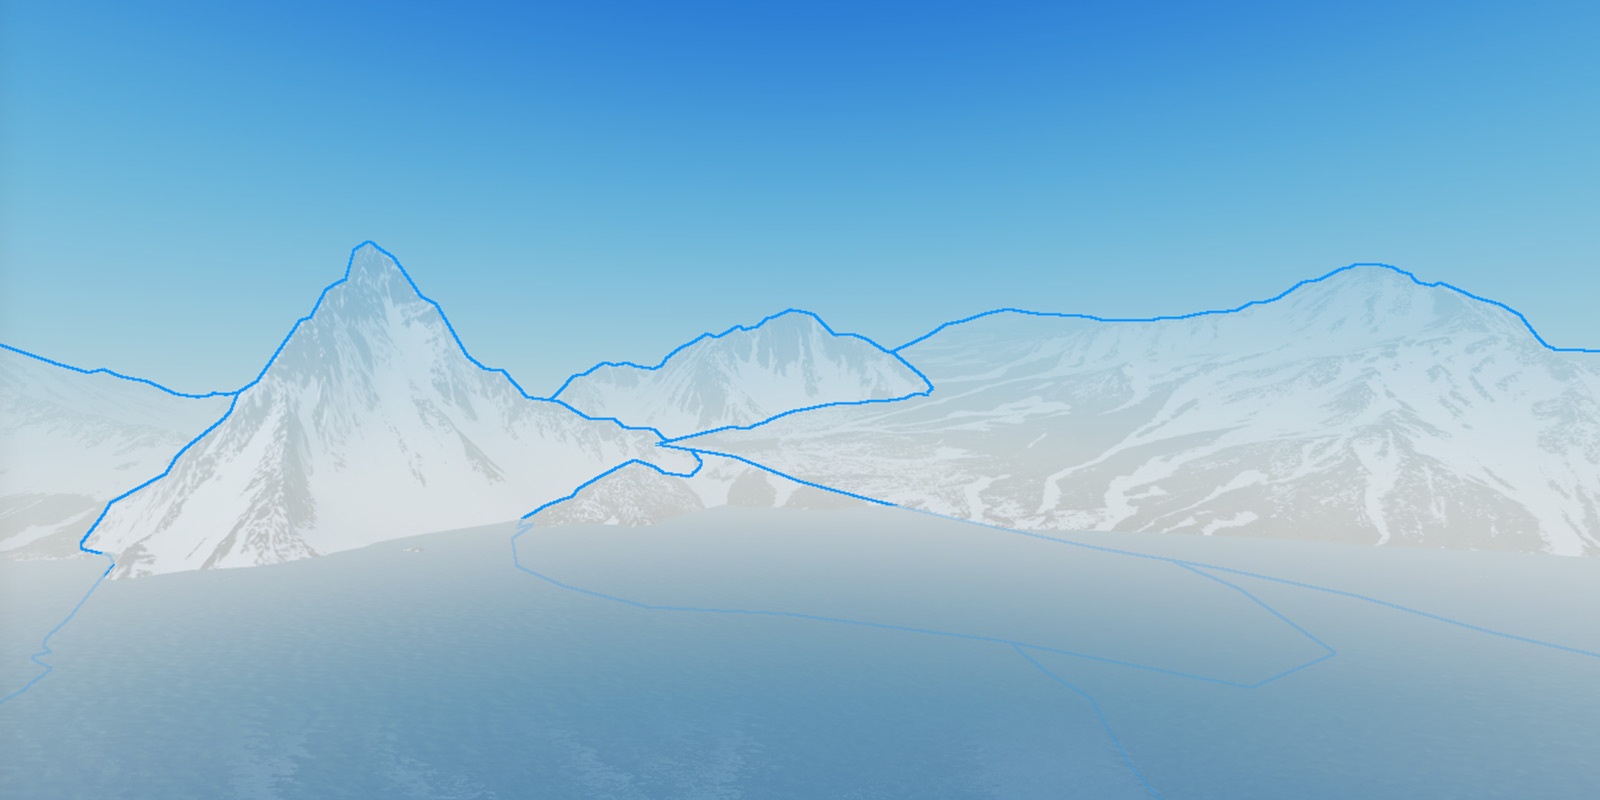
<img src="https://prod.docsiteassets.roblox.com/assets/tutorials/core-building-and-scripting/Mountain-Mesh.jpg" alt="A mesh that's a large snowy mountain." />MountainMesh
These assets are either single MeshPart objects or Model objects containing multiple meshes. They use custom materials and physically-based rendering (PBR) textures for realistic shading. For more information, see Materials - Custom Materials and PBR Textures.
To get the asset library from your inventory into your game:
Open the asset library's details page on the Creator Store and click Get Model in the top-right corner. The library is now in your inventory, and you can reuse these assets in any project on the platform.
Back in Studio, click Toolbox in the Home toolbar tab, switch to the Inventory tab, and click the Core Building and Scripting tile. The library appears in the viewport.

A few meshes might look gray instead of textured becasue their materials reference
MaterialVariantobjects that aren't installed yet. To fix this, drag Moss_Lumpy_A and Moss_Strata_Noisy_A from the asset library into the MaterialService container in the Explorer. The textures snap into place.
Continue organization structure
Before placing assets, extend the folder structure you started in Greybox a playable area:
- In the Explorer, add two new folders inside World and name them Platforms and Mountains.
- Inside Platforms, add a
Modelfor each sea stack level and name them to match your greybox levels. For example, the sample game has 18 individual model containers for every platform in the environment.

Apply asset library
Now place the polished assets over your greybox. Each section gives you three paths: Build with Assistant (which lets Assistant place every asset at the sample's exact coordinates), Apply your own (where you place assets to fit your own custom layout), and Recreate the sample (where you place them by hand at the exact coordinates of the sample).
The screenshots make the placeholder assets semi-transparent so you can see your progress between steps.
Graybox Version
<img src="https://prod.docsiteassets.roblox.com/assets/tutorials/core-building-and-scripting/Pre-Polished-Assets.jpg" alt="A version of the sample Island Jump game's placeholder greybox geometry." width="800" height="450" />Polished Assets
<img src="https://prod.docsiteassets.roblox.com/assets/tutorials/core-building-and-scripting/Final-Polished-Assets.jpg" alt="A version of the sample Island Jump game with polished geometry." width="800" height="450" />Platforms
The library includes two platform Model objects (each made of two MeshPart children):
- PlatformA — Includes a metallic circular base, used for the first and final platforms.
- PlatformB — Includes basic terrain cap, used for the in-between platforms.

Build with Assistant
For each row below, copy the matching mesh from the asset library named "Core Building and Scripting" into Workspace > World > Platforms > <Parent Model> and set its Origin.Position and Scale.

PlatformA assets:
- Level_1: Origin.Position -30, 3, 9; Scale 2.2
- Level_2: Origin.Position -24, 11, 24; Scale 1.4
- Level_3a: Origin.Position 34, 31, 9.5; Scale 0.7
- Level_3b: Origin.Position 79, 31, 2; Scale 0.6
- Level_7: Origin.Position 402, 312, 79; Scale 1.1

PlatformB assets:
- Level_3c: Origin.Position 89, 31, 48; Scale 0.8
- Level_4a: Origin.Position 104, 65.5, 46.5; Scale 0.6
- Level_4b: Origin.Position 127, 66, 67.5; Scale 0.6
- Level_4b: Origin.Position 133.5, 164.5, 70.5; Scale 0.7
- Level_4c: Origin.Position 152, 65.5, 91; Scale 1
- Level_4d: Origin.Position 200, 66, 107; Scale 0.5
- Level_4e: Origin.Position 238.5, 66, 81; Scale 0.8
- Level_5a: Origin.Position 262, 120, 57.5; Scale 0.7
- Level_5b: Origin.Position 245, 122, 15; Scale 0.4
- Level_5c: Origin.Position 271, 122.5, -5.5; Scale 0.4
- Level_5d: Origin.Position 318, 121, -22; Scale 0.9
- Level_6a: Origin.Position 363, 201, -52.5; Scale 1.2
- Level_6b: Origin.Position 381, 201, 11; Scale 0.4
- Level_6c: Origin.Position 389, 201, 47; Scale 0.6
Apply your own platforms
To build out your own arrangement of platforms, grab one polished asset at a time from the asset library and drop it onto each sea stack. The library includes two variants (PlatformA and PlatformB) so you can vary the look as you go.
In the Explorer, navigate to the asset library, right-click PlatformA, and choose Copy.
Paste PlatformA into the Level_1 model inside your Platforms folder.
Use the Move and Scale tools in the toolbar to size and position the platform on top of your first sea stack.

Repeat for the rest of your sea stacks. Use PlatformA for the first and final stacks (where players start and end), and use PlatformB for the platforms in between to add visual variety.
Recreate the sample
In the Explorer window, navigate to the asset library and copy PlatformA.
- Right-click PlatformA. A contextual menu displays.
- From the contextual menu, select Copy.
In the Platforms folder, paste PlatformA into the Level_1 model.
In the Properties window,
- Set Origin.Position to
-30, 3, 9. - Set Scale to
2.2.
- Set Origin.Position to
Repeat this process, adding and configuring the following PlatformA assets into their respective sea stack platform models:
Parent Model Origin.Position Scale Level_2 `-24, 11, 24` `1.4` Level_3a `34, 31, 9.5` `0.7` Level_3b `79, 31, 2` `0.6` Level_7 `402, 312, 79` `1.1` 
Add and configure the following PlatformB assets into their respective sea stack platform models:
Parent Model Origin.Position Scale Level_3c `89, 31, 48` `0.8` Level_4a `104, 65.5, 46.5` `0.6` Level_4b `127, 66, 67.5` `0.6` Level_4b `133.5, 164.5, 70.5` `0.7` Level_4c `152, 65.5, 91` `1` Level_4d `200, 66, 107` `0.5` Level_4e `238.5, 66, 81` `0.8` Level_5a `262, 120, 57.5` `0.7` Level_5b `245, 122, 15` `0.4` Level_5c `271, 122.5, -5.5` `0.4` Level_5d `318, 121, -22` `0.9` Level_6a `363, 201, -52.5` `1.2` Level_6b `381, 201, 11` `0.4` Level_6c `389, 201, 47` `0.6`
Sea stacks
The sample asset library includes two types of sea stack rock formations you can stack in creative ways to form the pillars of your sea stack platforms:
- SeaStackMesh – Includes a solid rock formation.
- SeaStackCaveMesh – Includes a tunnel and solid top.
Both platform types are MeshPart objects.
<img width="100%" img src="https://prod.docsiteassets.roblox.com/assets/tutorials/core-building-and-scripting/Sea-Stacks.jpg" alt="A comparison of a single sea stack next to multiple sea stacks that are stacked on top of each other." />


<img width="100%" img src="https://prod.docsiteassets.roblox.com/assets/tutorials/core-building-and-scripting/Completed-Sea-Stack.jpg" alt="A demonstration of a SeaStackCaveMesh stacked on top of a PlatformB on top of a SeaStackMesh." />
Build with Assistant
For each row below, copy the matching mesh from the asset library named "Core Building and Scripting" into Workspace > World > Platforms > <Parent Model> and set its Size, CFrame.Position, and CFrame.Orientation. All meshes are SeaStackMesh unless otherwise noted.

Level_3a:
- Size 31, 31, 34; CFrame.Position 31, 14, 15.5; CFrame.Orientation 0, 72, 0
- Size 32, 37, 34; CFrame.Position 39, 11, 6; CFrame.Orientation 0, 162, 0
- Size 32, 36, 34; CFrame.Position 31, 13, 7.5; CFrame.Orientation 0, 68, 0

Level_3b:
- Size 35, 47, 36; CFrame.Position 80, 7, 4; CFrame.Orientation 0, -18, 0

Level_3c:
- Size 52, 69, 53; CFrame.Position 90, -4, 48; CFrame.Orientation 0, -18, 0

Level_4a:
- Size 43, 49, 43; CFrame.Position 103, 5, 48; CFrame.Orientation 0, -119, 0
- Size 37, 49, 38; CFrame.Position 104, 41, 47; CFrame.Orientation 0, -18, 0

Level_4b:
- SeaStackCaveMesh; Size 54, 67, 53; CFrame.Position 131, 88, 71; CFrame.Orientation 0, -111, 0
- Size 66, 85, 65; CFrame.Position 133, 23, 71; CFrame.Orientation 0, 87, 0
- Size 46, 55, 47; CFrame.Position 133, 136, 71; CFrame.Orientation 0, -79, 0

Level_4c:
- Size 63, 81, 62; CFrame.Position 151, 25, 91; CFrame.Orientation 0, -50, 0

Level_4d:
- Size 35, 39, 35; CFrame.Position 198, -4, 108; CFrame.Orientation 0, -44, 0
- Size 33, 36, 32; CFrame.Position 199, 21, 108; CFrame.Orientation 0, -119, 0
- Size 27, 36, 28; CFrame.Position 199, 48, 108; CFrame.Orientation 0, -18, 0

Level_4e:
- Size 57, 65, 57; CFrame.Position 239, -14, 82; CFrame.Orientation 0, -63, 0
- Size 48, 65, 50; CFrame.Position 239, 34, 81; CFrame.Orientation 0, 39, 0

Level_5a:
- Size 56, 62, 54; CFrame.Position 264, 11, 55; CFrame.Orientation 0, 150, 0
- Size 50, 57, 50; CFrame.Position 263, 50, 57; CFrame.Orientation 0, 75, 0
- Size 43, 57, 44; CFrame.Position 262, 92, 57; CFrame.Orientation 0, 176, 0

Level_5b:
- Size 47, 36, 40; CFrame.Position 245, -16, 15; CFrame.Orientation 0, 0, 0
- Size 38, 38, 41; CFrame.Position 245, 11, 14; CFrame.Orientation 0, 100, 0
- Size 36, 38, 34; CFrame.Position 243, 34, 15; CFrame.Orientation 0, -164, 0
- Size 31, 34, 30; CFrame.Position 244, 62, 16; CFrame.Orientation 0, -45, 0
- Size 28, 32, 28; CFrame.Position 244, 83, 15; CFrame.Orientation 0, -120, 0
- Size 24, 32, 24; CFrame.Position 244, 106, 15; CFrame.Orientation 0, -18, 0

Level_5c:
- Size 45, 34, 38; CFrame.Position 270, -8, -6; CFrame.Orientation 0, 180, 0
- Size 36, 35, 38; CFrame.Position 270, 17, -5; CFrame.Orientation 0, -80, 0
- Size 34, 35, 32; CFrame.Position 272, 40, -5; CFrame.Orientation 0, 16, 0
- Size 29, 32, 29; CFrame.Position 271, 65, -7; CFrame.Orientation 0, 136, 0
- Size 26, 30, 26; CFrame.Position 271, 86, -6; CFrame.Orientation 0, 61, 0
- Size 22, 30, 23; CFrame.Position 270, 108, -6; CFrame.Orientation 0, 162, 0

Level_5d:
- Size 65, 71, 63; CFrame.Position 315, -5, -27; CFrame.Orientation 0, -161, 0
- Size 58, 66, 58; CFrame.Position 315, 39, -25; CFrame.Orientation 0, 124, 0
- Size 50, 66, 51; CFrame.Position 315, 89, -24; CFrame.Orientation 0, -134, 0

Level_6a:
- Size 94, 104, 92; CFrame.Position 358, 32, -56; CFrame.Orientation 0, -123, 0
- Size 85, 96, 84; CFrame.Position 360, 97, -54; CFrame.Orientation 0, 162, 0
- Size 72, 71, 74; CFrame.Position 361, 165, -52; CFrame.Orientation 0, -79, 0

Level_6b:
- Size 44, 65, 47; CFrame.Position 380, 17, 9; CFrame.Orientation 0, -143, 0
- Size 46, 44, 39; CFrame.Position 380, 61, 11; CFrame.Orientation 0, -78, 0
- Size 37, 37, 40; CFrame.Position 381, 92, 11; CFrame.Orientation 0, 22, 0
- Size 35, 37, 33; CFrame.Position 381, 115, 10; CFrame.Orientation 0, 118, 0
- Size 30, 33, 30; CFrame.Position 379, 141, 10; CFrame.Orientation 0, -123, 0
- Size 27, 31, 27; CFrame.Position 380, 162, 10; CFrame.Orientation 0, 162, 0
- Size 23, 31, 24; CFrame.Position 380, 185, 11; CFrame.Orientation 0, -96, 0

Level_6c:
- Size 68, 52, 57; CFrame.Position 387, 3, 48; CFrame.Orientation 0, -4, 0
- Size 54, 54, 58; CFrame.Position 388, 41, 47; CFrame.Orientation 0, 96, 0
- Size 52, 54, 48; CFrame.Position 385, 75, 47; CFrame.Orientation 0, -168, 0
- Size 44, 49, 43; CFrame.Position 385, 114, 49; CFrame.Orientation 0, -49, 0
- Size 40, 45, 40; CFrame.Position 386, 145, 48; CFrame.Orientation 0, -124, 0
- Size 34, 45, 35; CFrame.Position 387, 178, 48; CFrame.Orientation 0, -22, 0

Level_7a:
- Size 96, 98, 102; CFrame.Position 406, 19, 82; CFrame.Orientation 0, -41, 0
- Size 92, 98, 84; CFrame.Position 407, 81, 82; CFrame.Orientation 0, -19, 0
- Size 81, 90, 79; CFrame.Position 407, 152, 80; CFrame.Orientation 0, 90, 0
- Size 73, 83, 73; CFrame.Position 404, 208, 80; CFrame.Orientation 0, 15, 0
- Size 62, 83, 64; CFrame.Position 403, 270, 79; CFrame.Orientation 0, 116, 0

After placing all sea stacks, delete the placeholder greybox cylinders inside each level model.
Apply your own sea stacks
Sea stacks are the towers underneath your platforms. The asset library includes a standard SeaStackMesh, plus a SeaStackCaveMesh with a tunnel cut through it. Use the cave variant wherever you greyboxed a hollow tunnel.
In the Explorer, navigate to the asset library, right-click SeaStackMesh, and choose Copy.
Paste it into one of your level models inside the Platforms folder.
Use the Move, Scale, and Rotate tools to match the height and position of your placeholder cylinder.
If your sea stack is taller than a single mesh covers, paste additional copies and stack them on top of each other to reach the full height.
For any level that includes a tunnel, copy and paste SeaStackCaveMesh instead and align it with the opening you carved out earlier.

Repeat for every level until each placeholder cylinder is covered by a polished mesh.
Once every sea stack is in place, delete the placeholder greybox cylinders inside each level model.
Recreate the sample
In the Explorer window, navigate to the asset library and copy SeaStackMesh.
In the Platforms folder, paste SeaStackMesh into the Level_3a model three times.
In the Properties window, configure the meshes with the following values:
Size CFrame.Position CFrame.Orientation `31, 31, 34` `31, 14, 15.5` `0, 72, 0` `32, 37, 34` `39, 11, 6` `0, 162, 0` `32, 36, 34` `31, 13, 7.5` `0, 68, 0` Repeat this process, adding and configuring the following SeaStackMesh asset into the Level_3b model:
Size CFrame.Position CFrame.Orientation `35, 47, 36` `80, 7, 4` `0, -18, 0` 
Add and configure the following SeaStackMesh asset into the Level_3c model:
Size CFrame.Position CFrame.Orientation `52, 69, 53` `90, -4, 48` `0, -18, 0` 
Add and configure the following SeaStackMesh assets into the Level_4a model:
Size CFrame.Position CFrame.Orientation `43, 49, 43` `103, 5, 48` `0, -119, 0` `37, 49, 38` `104, 41, 47` `0, -18, 0` 
Add and configure the following assets into the Level_4b model:
Sea stack type Size CFrame.Position CFrame.Orientation SeaStackCaveMesh `54, 67, 53` `131, 88, 71` `0, -111, 0` SeaStackMesh `66, 85, 65` `133, 23, 71` `0, 87, 0` SeaStackMesh `46, 55, 47` `133, 136, 71` `0, -79, 0` 
Add and configure the following SeaStackMesh asset into the Level_4c model:
Size CFrame.Position CFrame.Orientation `63, 81, 62` `151, 25, 91` `0, -50, 0` 
Add and configure the following SeaStackMesh assets into the Level_4d model:
Size CFrame.Position CFrame.Orientation `35, 39, 35` `198, -4, 108` `0, -44, 0` `33, 36, 32` `199, 21, 108` `0, -119, 0` `27, 36, 28` `199, 48, 108` `0, -18, 0` 
Add and configure the following SeaStackMesh assets into the Level_4e model:
Size CFrame.Position CFrame.Orientation `57, 65, 57` `239, -14, 82` `0, -63, 0` `48, 65, 50` `239, 34, 81` `0, 39, 0` 
Add and configure the following SeaStackMesh assets into the Level_5a model:
Size CFrame.Position CFrame.Orientation `56, 62, 54` `264, 11, 55` `0, 150, 0` `50, 57, 50` `263, 50, 57` `0, 75, 0` `43, 57, 44` `262, 92, 57` `0, 176, 0` 
Add and configure the following SeaStackMesh assets into the Level_5b model:
Size CFrame.Position CFrame.Orientation `47, 36, 40` `245, -16, 15` `0, 0, 0` `38, 38, 41` `245, 11, 14` `0, 100, 0` `36, 38, 34` `243, 34, 15` `0, -164, 0` `31, 34, 30` `244, 62, 16` `0, -45, 0` `28, 32, 28` `244, 83, 15` `0, -120, 0` `24, 32, 24` `244, 106, 15` `0, -18, 0` 
Add and configure the following SeaStackMesh assets into the Level_5c model:
Size CFrame.Position CFrame.Orientation `45, 34, 38` `270, -8, -6` `0, 180, 0` `36, 35, 38` `270, 17, -5` `0, -80, 0` `34, 35, 32` `272, 40, -5` `0, 16, 0` `29, 32, 29` `271, 65, -7` `0, 136, 0` `26, 30, 26` `271, 86, -6` `0, 61, 0` `22, 30, 23` `270, 108, -6` `0, 162, 0` 
Add and configure the following SeaStackMesh assets into the Level_5d model:
Size CFrame.Position CFrame.Orientation `65, 71, 63` `315, -5, -27` `0, -161, 0` `58, 66, 58` `315, 39, -25` `0, 124, 0` `50, 66, 51` `315, 89, -24` `0, -134, 0` 
Add and configure the following SeaStackMesh assets into the Level_6a model:
Size CFrame.Position CFrame.Orientation `94, 104, 92` `358, 32, -56` `0, -123, 0` `85, 96, 84` `360, 97, -54` `0, 162, 0` `72, 71, 74` `361, 165, -52` `0, -79, 0` 
Add and configure the following SeaStackMesh assets into the Level_6b model:
Size CFrame.Position CFrame.Orientation `44, 65, 47` `380, 17, 9` `0, -143, 0` `46, 44, 39` `380, 61, 11` `0, -78, 0` `37, 37, 40` `381, 92, 11` `0, 22, 0` `35, 37, 33` `381, 115, 10` `0, 118, 0` `30, 33, 30` `379, 141, 10` `0, -123, 0` `27, 31, 27` `380, 162, 10` `0, 162, 0` `23, 31, 24` `380, 185, 11` `0, -96, 0` 
Add and configure the following SeaStackMesh assets into the Level_6c model:
Size CFrame.Position CFrame.Orientation `68, 52, 57` `387, 3, 48` `0, -4, 0` `54, 54, 58` `388, 41, 47` `0, 96, 0` `52, 54, 48` `385, 75, 47` `0, -168, 0` `44, 49, 43` `385, 114, 49` `0, -49, 0` `40, 45, 40` `386, 145, 48` `0, -124, 0` `34, 45, 35` `387, 178, 48` `0, -22, 0` 
Add and configure the following SeaStackMesh assets into the Level_7a model:
Size CFrame.Position CFrame.Orientation `96, 98, 102` `406, 19, 82` `0, -41, 0` `92, 98, 84` `407, 81, 82` `0, -19, 0` `81, 90, 79` `407, 152, 80` `0, 90, 0` `73, 83, 73` `404, 208, 80` `0, 15, 0` `62, 83, 64` `403, 270, 79` `0, 116, 0` Delete your placeholder greybox sea stack platforms.
Coins
The sample asset library includes a single Coin asset, which is a MeshPart with a child SurfaceAppearance that gives it a shiny metallic finish. Place one wherever you added a placeholder coin, then adjust its position and orientation as needed.
Build with Assistant
For each row below, copy the Coin mesh from the asset library named "Core Building and Scripting" into Workspace > World > Coins and set its CFrame.Position and CFrame.Orientation:

- CFrame.Position -121, 3, 6; CFrame.Orientation 0, -105, 0
- CFrame.Position -107, 3, 10; CFrame.Orientation 0, -105, 0
- CFrame.Position -104, 3, 35; CFrame.Orientation 0, 120, 0
- CFrame.Position -86, 3, 61; CFrame.Orientation 0, 30, 0
- CFrame.Position -101, 3, -12; CFrame.Orientation 0, -15, 0
- CFrame.Position -22, 6, -39; CFrame.Orientation 0, 120, 0
- CFrame.Position -48, 6, -26; CFrame.Orientation 0, 75, 0
- CFrame.Position -65, 6, -6; CFrame.Orientation 0, 75, 0
- CFrame.Position -74, 6, 19; CFrame.Orientation 0, 75, 0
- CFrame.Position -67, 6, 46; CFrame.Orientation 0, 75, 0
- CFrame.Position -38, 14, 28; CFrame.Orientation 0, 75, 0
- CFrame.Position -8, 14, 8; CFrame.Orientation 0, 75, 0
- CFrame.Position -3, 14, 34; CFrame.Orientation 0, 75, 0
- CFrame.Position 35, 33, 9; CFrame.Orientation 0, -105, 0
- CFrame.Position 59, 39, 6; CFrame.Orientation 0, 90, 0
- CFrame.Position 78, 33, 4; CFrame.Orientation 0, -75, 0
- CFrame.Position 83, 39, 22; CFrame.Orientation 0, -165, 0
- CFrame.Position 113, 70, 56; CFrame.Orientation 0, -135, 0
- CFrame.Position 134, 70, 76; CFrame.Orientation 0, -135, 0
- CFrame.Position 175, 70, 103; CFrame.Orientation 0, 75, 0
- CFrame.Position 197, 70, 107; CFrame.Orientation 0, 105, 0
- CFrame.Position 214, 81, 95; CFrame.Orientation 0, 120, 0
- CFrame.Position 235, 99, 78; CFrame.Orientation 0, 135, 0
- CFrame.Position 258, 125, 54; CFrame.Orientation 0, 135, 0
- CFrame.Position 251, 132, 11; CFrame.Orientation 0, 135, 0
- CFrame.Position 260, 140, 4; CFrame.Orientation 0, 135, 0
- CFrame.Position 270, 132, -5; CFrame.Orientation 0, 135, 0
- CFrame.Position 312, 162, -19; CFrame.Orientation 0, 105, 0
- CFrame.Position 360, 206, -40; CFrame.Orientation 0, 69, 0
- CFrame.Position 377, 260, -4; CFrame.Orientation 0, -145, 0
- CFrame.Position 380, 206, 13; CFrame.Orientation 0, 12, 0
- CFrame.Position 386, 260, 27; CFrame.Orientation 0, -145, 0
- CFrame.Position 391, 206, 45; CFrame.Orientation 0, 12, 0

After placing all coins, delete the placeholder coins.
Apply your own coins
Swap each placeholder coin for the polished version. Because your script already references coins by name, you only need to make sure each replacement keeps the name Coin and lives inside the Coins folder.
In the Explorer, navigate to the asset library, right-click Coin, and choose Copy.
Paste Coin into the Coins folder inside World.
Use the Move and Rotate tools to match the position and angle of one of your placeholder coins.
Repeat for each placeholder coin until every spot you want collectable has a polished coin in place.
Once all coins are placed, delete the placeholder coins so only the polished versions remain in the Coins folder.
Recreate the sample
In the Explorer window, navigate to the asset library and copy Coin.
In the Platforms folder, paste Coin into the Coins folder.
In the Properties window:
- Set CFrame.Position to
-121, 3, 6. - Set CFrame.Orientation to
0, -105, 0.
- Set CFrame.Position to
Repeat this process, adding and configuring the following coin assets wherever you set your initial coin placeholder objects:
CFrame.Position CFrame.Orientation `-121, 3, 6` `0, -105, 0` `-107, 3, 10` `0, -105, 0` `-104, 3, 35` `0, 120, 0` `-86, 3, 61` `0, 30, 0` `-101, 3, -12` `0, -15, 0` `-22, 6, -39` `0, 120, 0` `-48, 6, -26` `0, 75, 0` `-65, 6, -6` `0, 75, 0` `-74, 6, 19` `0, 75, 0` `-67, 6, 46` `0, 75, 0` `-38, 14, 28` `0, 75, 0` `-8, 14, 8` `0, 75, 0` `-3, 14, 34` `0, 75, 0` `35, 33, 9` `0, -105, 0` `59, 39, 6` `0, 90, 0` `78, 33, 4` `0, -75, 0` `83, 39, 22` `0, -165, 0` `113, 70, 56` `0, -135, 0` `134, 70, 76` `0, -135, 0` `175, 70, 103` `0, 75, 0` `197, 70, 107` `0, 105, 0` `214, 81, 95` `0, 120, 0` `235, 99, 78` `0, 135, 0` `258, 125, 54` `0, 135, 0` `251, 132, 11` `0, 135, 0` `260, 140, 4` `0, 135, 0` `270, 132, -5` `0, 135, 0` `312, 162, -19` `0, 105, 0` `360, 206, -40` `0, 69, 0` `377, 260, -4` `0, -145, 0` `380, 206, 13` `0, 12, 0` `386, 260, 27` `0, -145, 0` `391, 206, 45` `0, 12, 0` Delete your placeholder coins.
Mountains
The asset library's single MountainMesh decorates the background, hides the edge of your water terrain, and encloses your playable area. Rotating and scaling each instance breaks up the repetition so players don't notice you're using the same mesh over and over.
Build with Assistant
For each row below, copy the MountainMesh from the asset library named "Core Building and Scripting" into Workspace > World > Mountains and set its Size, CFrame.Position, and CFrame.Orientation:

- Size 2048, 334, 2048; CFrame.Position -1243, 115, -1402; CFrame.Orientation 0, 46, 0
- Size 2048, 212, 2048; CFrame.Position -326, 230, -1614; CFrame.Orientation -15, -155, 0
- Size 2048, 416, 1871; CFrame.Position 434, 160, -1543; CFrame.Orientation 0, -2, 0
- Size 2048, 400, 2048; CFrame.Position 1200, 147, -1534; CFrame.Orientation -15, -155, 0
- Size 2048, 540, 1488; CFrame.Position 1726, 220, -1139; CFrame.Orientation 0, -95, 0
- Size 2044, 442, 2044; CFrame.Position 2344, 174, -413; CFrame.Orientation 0, 5, 0
- Size 2048, 458, 2048; CFrame.Position 2267, 157, 1084; CFrame.Orientation 0, -81, 0
- Size 2048, 678, 2048; CFrame.Position 1662, 221, 1804; CFrame.Orientation 0, 9, 0
- Size 2043, 352, 1467; CFrame.Position 1025, 147, 2462; CFrame.Orientation 0, 54, 0
- Size 1980, 531, 1742; CFrame.Position 361, 180, 2119; CFrame.Orientation 0, 21, 0
- Size 2048, 415, 2048; CFrame.Position -580, 160, 1961; CFrame.Orientation 0, -122, 0
- Size 2048, 415, 2048; CFrame.Position -900, 160, 1652; CFrame.Orientation 0, 24, 0
- Size 1321, 403, 1321; CFrame.Position -1303, 133, 770; CFrame.Orientation 0, 55, 0
- Size 2048, 335, 2048; CFrame.Position -1653, 114, 161; CFrame.Orientation 0, -20, 0
- Size 2048, 249, 2048; CFrame.Position -1928, 79, -674; CFrame.Orientation 0, 24, 0
- Size 2048, 450, 2048; CFrame.Position -1426, 73, -895; CFrame.Orientation 0, -20, 0
Apply your own mountains
Mountains sit far outside the playable area to fill in the horizon, so exact placement matters less than visual coverage. You only need to make sure no gaps in the mountain range expose the empty edge of your water terrain.
In the Explorer, navigate to the asset library, right-click MountainMesh, and choose Copy.
Paste MountainMesh into the Mountains folder inside World.
Use the Move, Scale, and Rotate tools to position it along the edge of your water terrain.
Repeat the paste-and-position process several times, varying Scale and Orientation on each copy so the mountains feel naturally arranged rather than uniform.
Continue until the horizon is fully covered from every angle a player can look out from your platforms.
Recreate the sample
In the Explorer window, navigate to the asset library and copy MountainMesh.
In the Platforms folder, paste MountainMesh into the Mountains folder.
In the Properties window:
- Set Size to
2048, 334, 2048. - Set CFrame.Position to
-1243, 115, -1402. - Set CFrame.Orientation to
0, 46, 0.
- Set Size to
Repeat this process, adding and configuring the following mountain assets along the border of your water terrain:
Size CFrame.Position CFrame.Orientation `2048, 212, 2048` `-326, 230, -1614` `-15, -155, 0` `2048, 416, 1871` `434, 160, -1543` `0, -2, 0` `2048, 400, 2048` `1200, 147, -1534` `-15, -155, 0` `2048, 540, 1488` `1726, 220, -1139` `0, -95, 0` `2044, 442, 2044` `2344, 174, -413` `0, 5, 0` `2048, 458, 2048` `2267, 157, 1084` `0, -81, 0` `2048, 678, 2048` `1662, 221, 1804` `0, 9, 0` `2043, 352, 1467` `1025, 147, 2462` `0, 54, 0` `1980, 531, 1742` `361, 180, 2119` `0, 21, 0` `2048, 415, 2048` `-580, 160, 1961` `0, -122, 0` `2048, 415, 2048` `-900, 160, 1652` `0, 24, 0` `1321, 403, 1321` `-1303, 133, 770` `0, 55, 0` `2048, 335, 2048` `-1653, 114, 161` `0, -20, 0` `2048, 249, 2048` `-1928, 79, -674` `0, 24, 0` `2048, 450, 2048` `-1426, 73, -895` `0, -20, 0`
Playtest
Polished assets can change the shape of a sea stack just enough to affect a jump that worked in the greybox version of the level. Take one final pass through the game to identify and fix any issues before publishing.
Select Test from the dropdown and click Play. Climb to the flare at the top of the stacks; if a jump suddenly feels off, nudge the offending mesh and try again. Click Stop when you're done.
Congratulations on completing the Core Curriculum! From here you can extend your project with new gameplay features or levels, browse Studio's full feature set, or move on to another curriculum like Environmental art. Happy creating!