Source: Roblox Creator Hub · CC BY 4.0 · View source · Code samples: MIT Imported 2026-10-03. Formatting adapted for this site.
Animations and feedback
Established developer? Just getting started? Create and code a victory animation to celebrate player achievements in this Build It, Play It Challenge! When finished, add this animation into any game, making your work more engaging and attractive to players. These types of animations are perfect for giving feedback when a player wins a match, reaches a checkpoint, or levels up.
Below is an example of the animation you can expect to produce by the end of this series.
Animations and feedback
Before learning to create an animation, take a moment to think about how animations and feedback are connected. Imagine an adventure game where you fight monsters. After hitting a monster, nothing happens - it doesn't react and there's no sound effect. You might think that the game is broken, but after a few more hits, the monster just disappears.
This scenario is frustrating since the monster fails to give the user any feedback. Like real life, whenever players take action in-game, they expect a reaction. Designing informative and visually appealing feedback is critical for designing successful games that engage players.
One way of giving feedback is with animations. Whenever a player performs an action, like hitting an enemy, animations can show a reaction, like the opponent being struck. The reaction tells the player their action did something, making them feel a part of the world and reducing the chance of confusion.
Project setup
The first step in making a victory animation is to create an animation using the Animation Editor. Later, you'll hook it up with code to celebrate a player's in-game accomplishment. That code will work in any game you've created.
Set up for animation
Roblox Studio features a powerful, built-in Animation Editor that allows you to design and publish custom animations.
Start or open a project in Roblox Studio.
To animate, you'll need to freely manipulate parts. From the toolbar, make sure Move and Rotate snapping are turned off.

To open the Animation Editor, select Animation from the Avatar tab.
To create player animations, a character rig is needed. In the Avatar tab, click on Character. In the popup, select any rig.
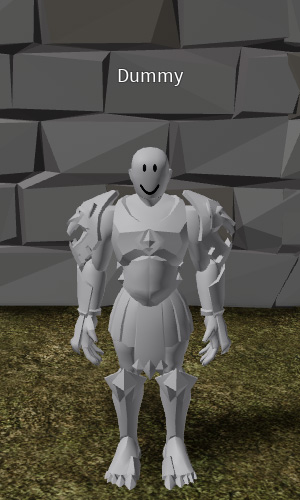
Create a new animation
Individual animations, such as walking or jumping, need to be created and saved.
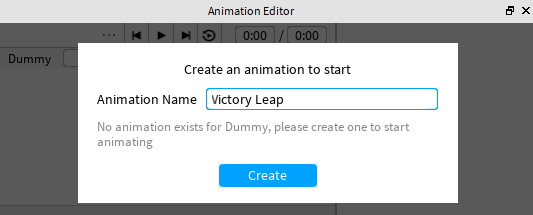
In the Animation Editor, type in a new animation name and click Create.
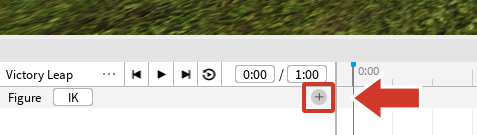
To animate, parts of the rig need to be added to the Animation Editor. Click the (+) icon and pick Add All.
Note
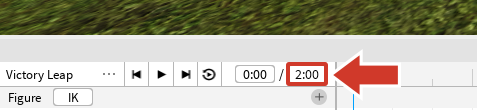
By default, the length of all new animations is set to one second (shown as 1:00). To get a different length, change the second box in the position indicator.