
Source: Roblox Creator Hub · CC BY 4.0 · View source · Code samples: MIT Imported 2026-10-03. Formatting adapted for this site.
Shop
Shop provides players with a personalized shopping experience for your game. Roblox combines platform-wide signals with signals from your game to surface the most relevant items for each player, and automatically handles ranking and optimization.
Shop displays all passes and eligible developer products available in your game, making it easier for players to discover items they want to purchase. Players can also browse Top Picks, personalized categories, and search results.
In addition to individual items, Shop can surface Robux packages that include one or more of your items. When a player purchases one of these packages, they receive additional Robux to spend across Roblox, including in your game.
Manage your Shop
You can manage your Shop from Creator Hub, where you can review item categories and visibility, preview your Shop in Roblox Studio, and save changes.
To access the Shop page:
- Go to Creator Hub and select a game.
- Go to Monetization > Shop.
The Shop page has two tabs:
- Overview: A summary of your Shop, including key metrics and recent activity.
- Item catalog: The full list of passes and developer products in your Shop, where you manage visibility and categories.
Changes to your Shop are not visible to players until you save them. To publish your changes, click Save in the upper-right corner of the Item catalog tab.

List or unlist items
Note
Passes are always listed and can't be unlisted.
Listing controls whether a developer product appears in the in-game Shop or other eligible Roblox surfaces.
- Listed: The developer product appears in Shop and might appear on other Roblox surfaces, such as the game details page.
- Unlisted: The developer product doesn't appear in Shop or on other Roblox surfaces, but can still be purchased through your own in-game purchase flows.
To change the listing status of a developer product:
- In the Item catalog tab, select the item.
- Do one of the following:
- To list the item, click List items or click ⋮ > Show in Shop.
- To unlist the item, click Unlist items or click ⋮ > Hide from Shop.
Listing developer products also lets Roblox surface your items outside of your game, which can create more opportunities for purchases. To be eligible for external surfacing, make sure that ProcessReceipt is properly implemented for your items. We strongly recommend implementing ProcessReceipt so players receive their purchases immediately, including purchases made through Shop and on other Roblox surfaces. For more information, see Handle a developer product purchase.
Update categories
Each item belongs to a category that determines where it appears in Shop. Roblox automatically suggests categories for your items, but you can customize them to match your game. You can create new categories, rename existing ones, and move items between them.
To create a new category:
- Click the Category dropdown.
- Click Add category.
- Enter a category name and click Save.
To rename an existing category:
- Click the Category dropdown.
- Click the edit icon next to the category you want to rename.
- Enter the new name and click Save.
To move items between categories, do one of the following:
- To move a single item, click the Category dropdown next to the item and choose a new category.
- To move multiple items, select the items, click the Edit category, choose a new category, and then click Save.
Shop access
Players can access Shop through the in-game menu or through the global Shop button in your game.
In-game menu
By default, Shop appears in the in-game menu.
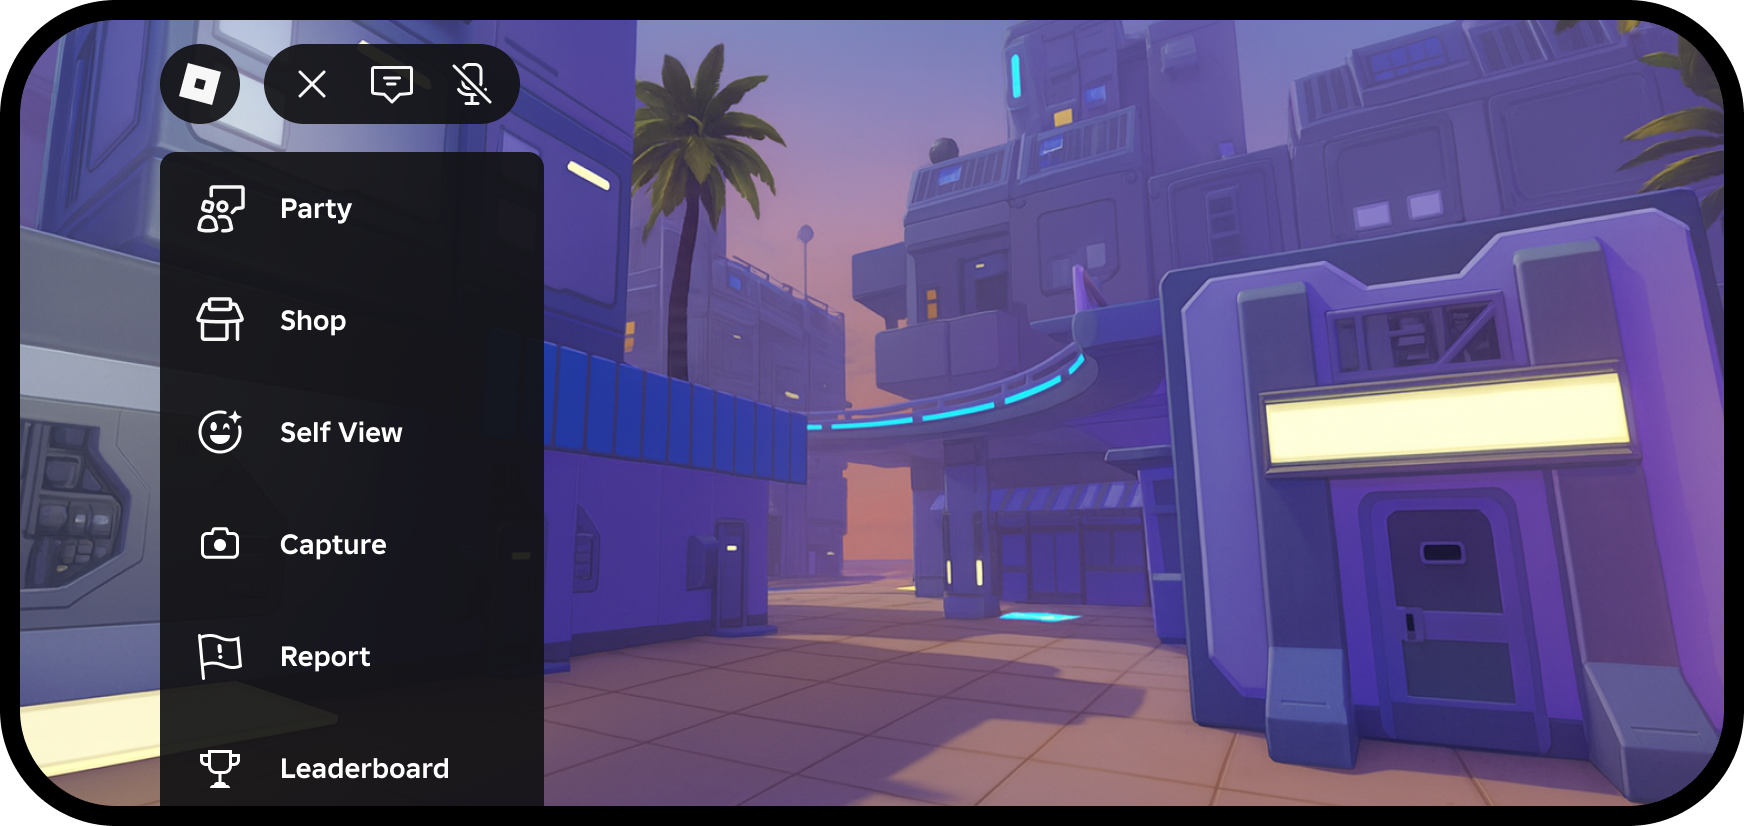
You can hide it by adding the following code snippet to a client script:
local StarterGui = game:GetService("StarterGui")
StarterGui:SetCoreGuiEnabled(Enum.CoreGuiType.ExperienceShop, false)
Global Shop button
The global Shop button provides a persistent way for players to open Shop in your game. It appears in the upper-left corner of the screen, next to the top bar.

The button is disabled by default. We recommend enabling it so players always have a visible way to access Shop.
To enable the global Shop button:
- Go to Monetization > Shop.
- In the Overview tab, toggle the Shop button.
Purchases and earnings
Purchases made through Shop use your existing purchase handling, and standard earnings apply. Shop is a discovery surface and doesn't change the economics of any pass or developer product.